HP Scanjet 1000 User Guide - Page 16
Connect one end of an audio cable not included to the audio-in jack on the monitor and the other end
 |
View all HP Scanjet 1000 manuals
Add to My Manuals
Save this manual to your list of manuals |
Page 16 highlights
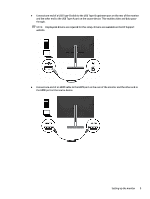
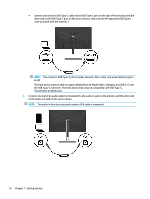
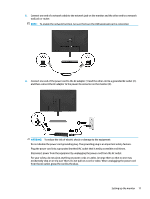
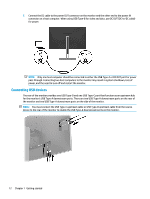
● Connect one end of a USB Type-C cable to the USB Type-C port on the rear of the monitor and the other end to the USB Type-C port on the source device. (Use only the HP-approved USB Type-C cable provided with the monitor.) NOTE: The monitor's USB Type-C port provides network, data, video, and power delivery (up to 65 W). The host device must be able to support DisplayPort Alt Mode (video, charging, and USB 3.1) over the USB Type-C connector. The host device must also be compatible with USB Type-C, Thunderbolt-enabled ports. 4. Connect one end of an audio cable (not included) to the audio-in jack on the monitor and the other end to the audio-out jack on the source device. NOTE: The audio-in function only works when a VGA cable is connected. 10 Chapter 1 Getting started
-
 1
1 -
2
-
3
-
4
-
5
-
6
-
7
-
8
-
9
-
10
-
 11
11 -
 12
12 -
 13
13 -
 14
14 -
 15
15 -
 16
16 -
 17
17 -
 18
18 -
 19
19 -
 20
20 -
 21
21 -
22
-
23
-
24
-
25
-
26
-
27
-
28
-
29
-
30
-
31
-
32
-
33
-
34
-
35
-
36
-
37
-
38
-
39
-
40
-
41
-
42
-
43
-
44
-
45
-
46
-
47
 |
 |
