HP Scanjet 1000 User Guide - Page 23
Connecting an HP notebook computer and installing drivers to enable USB Type-A docking
 |
View all HP Scanjet 1000 manuals
Add to My Manuals
Save this manual to your list of manuals |
Page 23 highlights
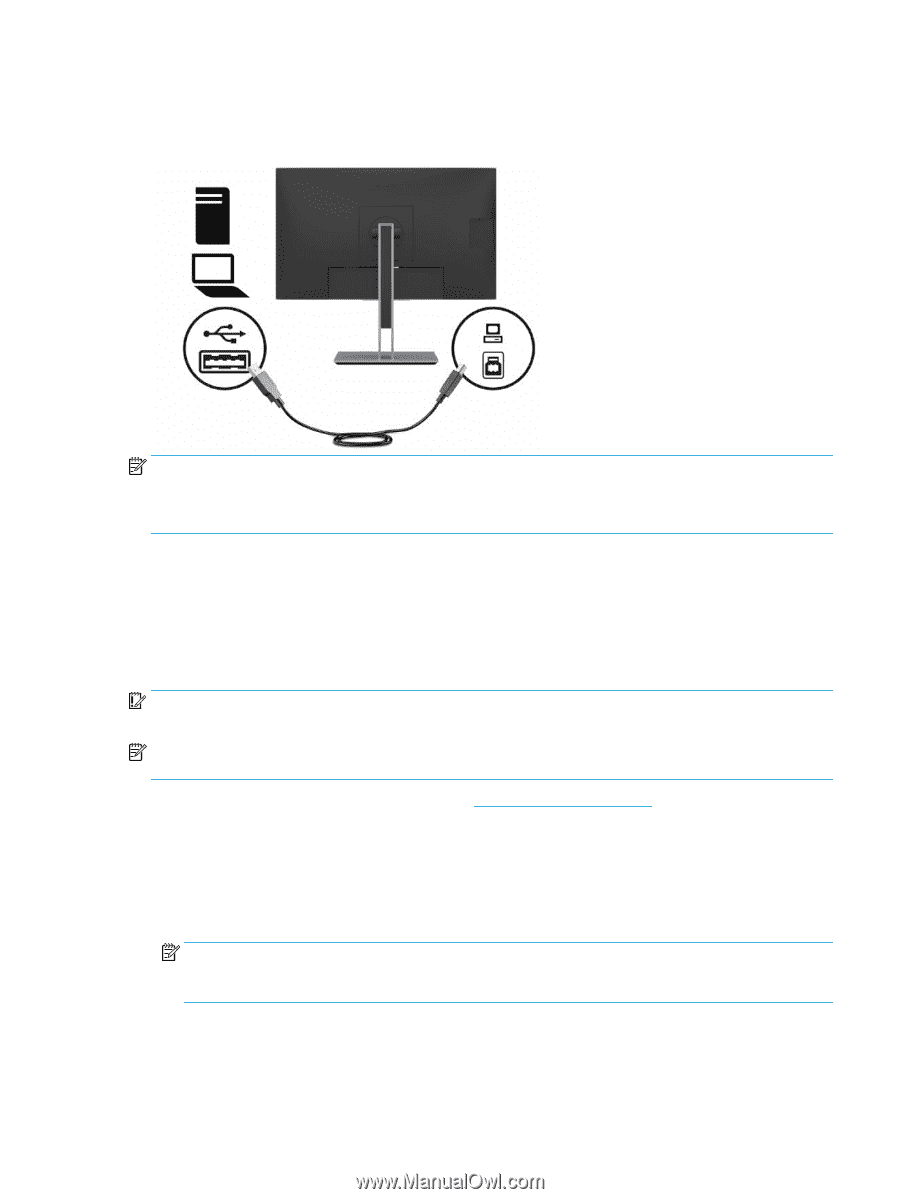
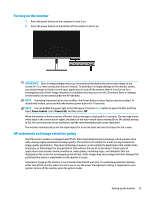
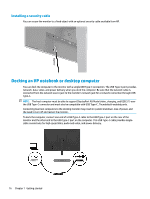
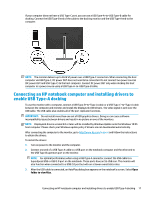
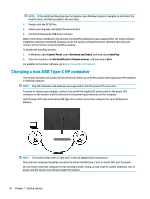
If your computer does not have a USB Type-C port, you can use a USB Type-A-to-USB Type-B cable for docking. Connect the USB Type-B end of the cable to the docking monitor and the USB Type-A end to the computer. NOTE: The monitor delivers up to 65 W of power over a USB Type-C connection. When connecting the host computer via USB Type-C, DC power OUT does not need to be connected. Do not connect two power sources (DC power OUT and USB Type-C) to the host computer. Connect DC power OUT only when docking the host computer to a power source using a USB Type-A-to-USB Type-B cable. Connecting an HP notebook computer and installing drivers to enable USB Type-A docking To use the monitor with a computer, connect a USB Type-B-to-Type-A cable or a USB Type-C-to-Type-A cable between the computer and monitor and install the DisplayLink USB drivers. The video signal is sent over the USB cable. The USB cable also enables all of the port replicator functions. IMPORTANT: Do not install more than one set of USB graphics drivers. Doing so can cause software incompatibility issues between drivers and result in no picture on one of the monitors. NOTE: DisplayLink drivers version 8.0 or later will be installed by Windows Update onto the Windows 10 OS host computer. Please check your Windows update policy if drivers are not downloaded automatically. After connecting the computer to the monitor, go to http://www.hp.com/support and follow the instructions to obtain the drivers. To install the drivers: 1. Turn on power to the monitor and the computer. 2. Connect one end of a USB Type-A cable to a USB port on the notebook computer and the other end to the USB Type-B upstream port on the monitor. NOTE: For optimal performance when using a USB Type-A connector, connect the USB cable to a SuperSpeed USB or USB 3.0 port on the notebook. These ports have an SS-USB icon. The monitor will also function when connected to a USB 2.0 port but will run at lower overall data rates. 3. After the USB cable is connected, an AutoPlay dialog box appears on the notebook's screen. Select Open folder to view files. Connecting an HP notebook computer and installing drivers to enable USB Type-A docking 17
-
 1
1 -
2
-
3
-
4
-
5
-
6
-
7
-
8
-
9
-
10
-
11
-
12
-
13
-
14
-
15
-
16
-
17
-
 18
18 -
 19
19 -
 20
20 -
 21
21 -
 22
22 -
 23
23 -
 24
24 -
 25
25 -
 26
26 -
 27
27 -
 28
28 -
29
-
30
-
31
-
32
-
33
-
34
-
35
-
36
-
37
-
38
-
39
-
40
-
41
-
42
-
43
-
44
-
45
-
46
-
47
 |
 |