HP Scanjet 1000 User Guide - Page 24
Charging a non-USB Type-C HP computer, Control Panel, Hardware and Sound, AutoPlay
 |
View all HP Scanjet 1000 manuals
Add to My Manuals
Save this manual to your list of manuals |
Page 24 highlights
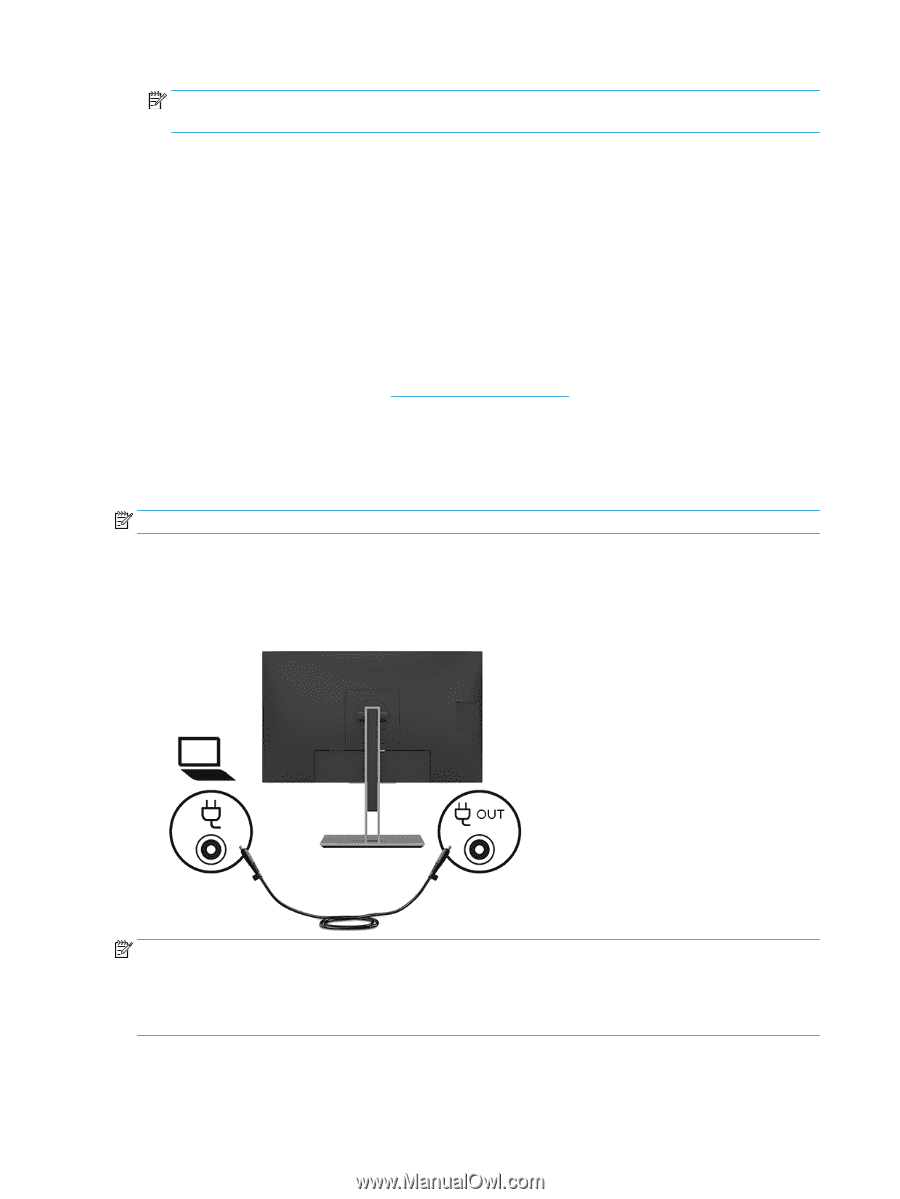
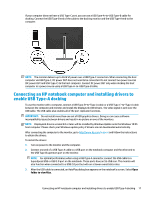
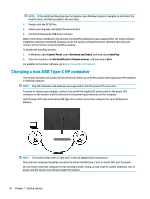
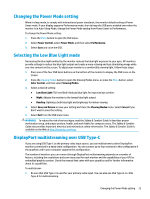
NOTE: If the AutoPlay dialog box does not appear, open Windows Explorer, navigate to and select the monitor drive, and then proceed to the next step. 4. Double-click the SETUP file. 5. Select your language, and select the arrow button. 6. Install the DisplayLink USB driver software. When connecting a notebook to the monitor, the AutoPlay dialog box may reappear after the initial software installation has been completed. Because you do not need to reinstall the driver software each time you connect to the monitor, close the AutoPlay window. To disable the AutoPlay window: 1. In Windows, open Control Panel, select Hardware and Sound, and then select AutoPlay. 2. Clear the check box for Use AutoPlay for all/some devices, and then select Save. For updates to the driver software, go to http://www.hp.com/support. Charging a non-USB Type-C HP computer The monitor includes a DC power OUT port that can deliver up to 90 W to power and charge your HP notebook or desktop computer. NOTE: Only HP notebooks and desktops are supported for the DC power OUT connection. To power or charge your computer, connect one end of the supplied DC power cable to the power OUT connector on the monitor and the other end to the power input connector on the computer. Use DC power OUT only when using USB Type-A to connect to the host computer for up to 90 W power delivery. NOTE: The monitor ships with 4.5 mm and 7.4 mm AC adapter barrel connectors. Only one host computer should be connected to either the USB Type-C port or the DC OUT port for power. Do not connect two host computers to the docking monitor. Doing so may result in system shutdown, loss of power, and the need to turn off and restart the monitor. 18 Chapter 1 Getting started
-
 1
1 -
2
-
3
-
4
-
5
-
6
-
7
-
8
-
9
-
10
-
11
-
12
-
13
-
14
-
15
-
16
-
17
-
18
-
 19
19 -
 20
20 -
 21
21 -
 22
22 -
 23
23 -
 24
24 -
 25
25 -
 26
26 -
 27
27 -
 28
28 -
 29
29 -
30
-
31
-
32
-
33
-
34
-
35
-
36
-
37
-
38
-
39
-
40
-
41
-
42
-
43
-
44
-
45
-
46
-
47
 |
 |