HP Visualize b180L installing the hp Visualize workstation b132L/b160L to b180 - Page 14
Transfer Memory Modules From the Old Main Tray Assembly to the New Main Tray, Assembly
 |
View all HP Visualize b180L manuals
Add to My Manuals
Save this manual to your list of manuals |
Page 14 highlights
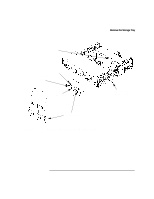
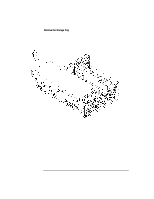
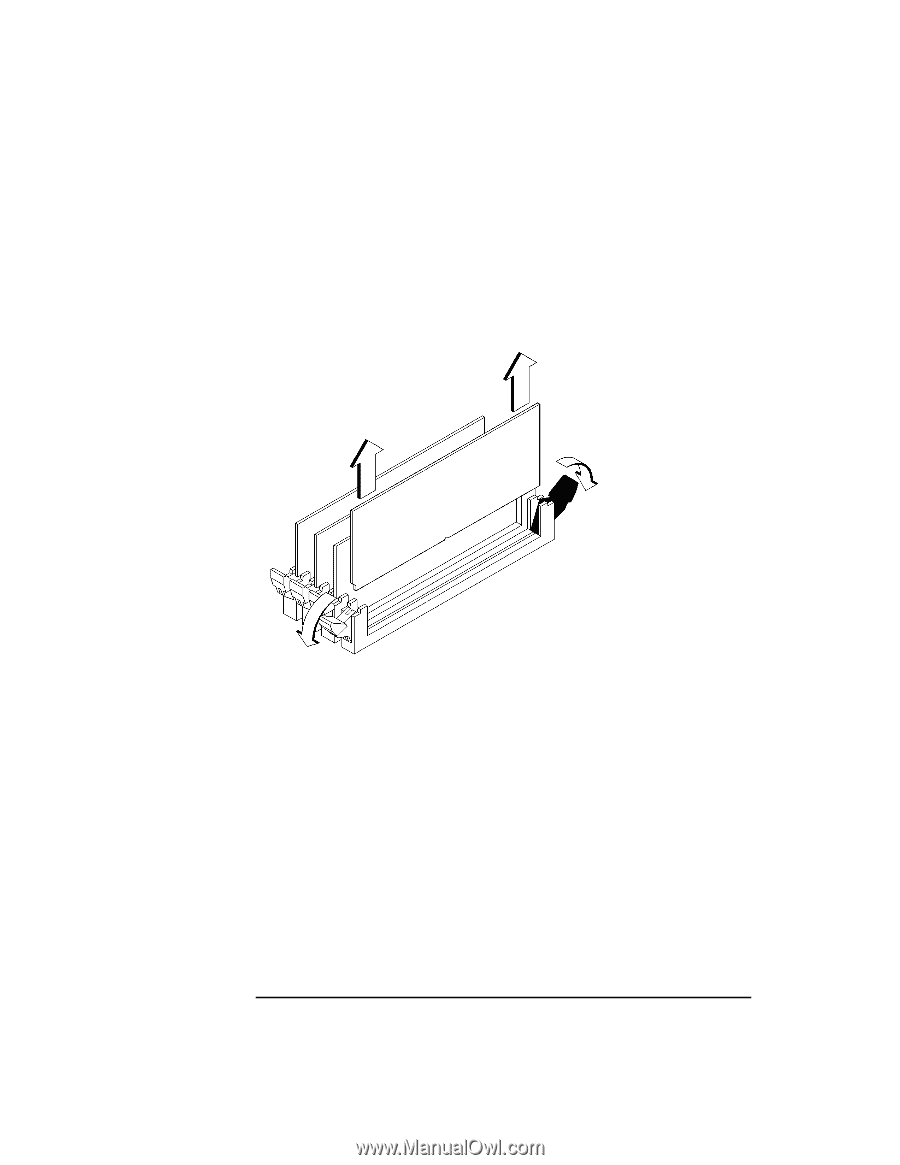
Transfer Memory Modules From the Old Main Tray Assembly to the New Main Tray Assembly 3 Ensure the ejector tabs are closed on each side of the memory connectors, on the new main tray assembly, to reduce the force required to seat the memory module 4 To remove a memory module, push the ejector tabs on each side of the module. Lift the memory module up and out of the connector. Figure 6 shows how to remove a memory module. Figure 6 Removing a Memory Module 5 Install it in the corresponding connector on the new main tray assembly by lining up the memory module with the guides making sure that the notched end of the memory module is toward the white ejector tab, as shown in Figure 7. 12
-
 1
1 -
2
-
3
-
4
-
5
-
6
-
7
-
8
-
 9
9 -
 10
10 -
 11
11 -
 12
12 -
 13
13 -
 14
14 -
 15
15 -
 16
16 -
 17
17 -
 18
18 -
 19
19 -
20
-
21
-
22
-
23
-
24
-
25
-
26
-
27
-
28
 |
 |
12
Transfer Memory Modules From the Old Main Tray Assembly to the New Main Tray
Assembly
3
Ensure the ejector tabs are closed on each side of the memory connectors, on the
new main tray assembly, to reduce the force required to seat the memory module
4
To remove a memory module, push the ejector tabs on each side of the module.
Lift the memory module up and out of the connector. Figure 6 shows how to re-
move a memory module.
Figure 6
Removing a Memory Module
5
Install it in the corresponding connector on the new main tray assembly by lining
up the memory module with the guides making sure that the notched end of the
memory module is toward the white ejector tab, as shown in Figure 7.