HP Visualize b180L installing the hp Visualize workstation b132L/b160L to b180 - Page 4
Upgrade Instructions Overview
 |
View all HP Visualize b180L manuals
Add to My Manuals
Save this manual to your list of manuals |
Page 4 highlights
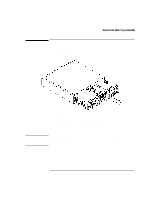
NOTE: Upgrade Instructions Overview Upgrade Instructions Overview The general steps for performing the upgrade are outlined as follows and should be performed in the sequence listed. Refer to the individual sections of this guide for the actual step-by-step procedures for upgrading the Model B132/B160 to a Model B180. 1 Prepare your workstation • Update or arrange to have your operating system software updated to HP-UX 10.20 with ACE. This can be a complex task and takes some time and planning. If you are at HP-UX 10.20, you can check the HP-UX revision level by running swlist as superuser. You must back up your system before updating your operating system. • Determine and WRITE DOWN the graphics configuration of your system. • Determine and WRITE DOWN the LAN ID of your system. You will need to re-enter it into the new system board • Run the bclass_upgrade program. • Power off the workstation and any peripherals. • Unplug the power cords and disconnect any peripheral cables • Remove the floor stand 2 Remove the main tray assembly 3 Remove the storage tray assembly 4 Transfer memory modules from the old main tray to the new main tray assembly 5 Install additional memory modules on to the new main tray if needed 6 Transfer the optional EGRAM module from the old main tray to the new main tray 7 Transfer the optional FWSCSI module from the old main tray to the new main tray 8 Transfer the power supply from the old tray into the new tray. 9 Install the storage tray on the new main tray assembly 10 Place the new main tray assembly into the workstation chassis 11 Reinstall the floor stand 12 Connect power cords and cables, restart the workstation, and enter the LAN ID when prompted 2
-
 1
1 -
 2
2 -
 3
3 -
 4
4 -
 5
5 -
 6
6 -
 7
7 -
 8
8 -
 9
9 -
 10
10 -
11
-
12
-
13
-
14
-
15
-
16
-
17
-
18
-
19
-
20
-
21
-
22
-
23
-
24
-
25
-
26
-
27
-
28
 |
 |