HP Visualize b180L installing the hp Visualize workstation b132L/b160L to b180 - Page 7
For example, Graphics0
 |
View all HP Visualize b180L manuals
Add to My Manuals
Save this manual to your list of manuals |
Page 7 highlights
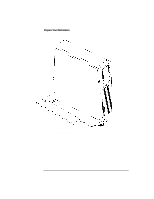
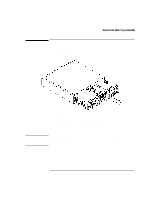
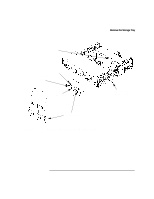
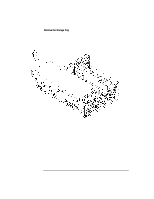
WARNING: CAUTION CAUTION Prepare Your Workstation For example, "Graphics(0)" 10 Enter the following command to display the monitor type setting: co mo The monitor type for the default console device is displayed. Write down the graphics number and monitor type. For example, Monitor type: "Graphics(0)" type 12 11 Power off your workstation by pressing the power button on the front panel. 12 When the workstation has completed shutting down and powering off, power off the monitor, and any peripheral devices connected to the workstation. To avoid electrical shock, make sure you unplug the power cable from the wall outlet and the system unit before proceeding any further. The internal components of your workstation are susceptible to mechanical and electrostatic shock. To prevent such damage from occurring, observe the following precautions during the installation procedure • Stand on a static-free mat • Wear a static-grounding wrist strap to ensure that any accumulated electrostatic charge discharges from your body to ground. Attach the static-grounding wrist strap by following the instructions on the package that contains the strap. Be sure to attach one end of the strap to the system chassis 13 Unplug the power cord of the system unit, the monitor, and any peripheral devices from ac wall outlets. 14 Unplug the power cord from the back of the system unit. 15 Remove the floor stand from the system unit, as shown in Figure 1, if applicable. 16 Remove the monitor from on top of the system unit and set it aside, if applicable. Removal of the monitor from on top of the system unit is to prevent possible damage to the system unit or the monitor while performing this upgrade. 17 Lay the system unit on a flat surface, such as a table top. 18 Attach a static-grounding wrist strap to bare metal on the back of the system unit. 5
-
 1
1 -
 2
2 -
 3
3 -
 4
4 -
 5
5 -
 6
6 -
 7
7 -
 8
8 -
 9
9 -
 10
10 -
 11
11 -
 12
12 -
13
-
14
-
15
-
16
-
17
-
18
-
19
-
20
-
21
-
22
-
23
-
24
-
25
-
26
-
27
-
28
 |
 |