HP Workstation x2000 3Dlabs Wildcat III 6110 user's guide - Page 30
Enabling stereo display, Enabling Multiview features
 |
View all HP Workstation x2000 manuals
Add to My Manuals
Save this manual to your list of manuals |
Page 30 highlights
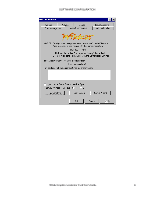
SOFTWARE CONFIGURATION Enabling stereo display If you connect a device to the stereo port on the Wildcat III 6210 or Wildcat III 6110, you must change the display mode to view in stereo. See Chapter 2, "Setup," for an illustration of the stereo output port. 1. Make sure your stereo display device is properly connected to the stereo output port on the Wildcat III 6210 or Wildcat III 6110. See Chapter 2, "Connecting a Stereo Display Device" for more information. 2. On the Wildcat III Monitor tab under Display Properties, click Configure Monitor. The Configure Monitor dialog box displays. 3. Select one of the Stereoscopic Display modes from the Display Mode pulldown, then click OK to return to the Display Properties dialog box. If you are prompted with the following message: "The selected monitor cannot display the current desktop area. Select a new resolution before applying these changes," click OK then select a resolution from the list of available resolutions. 4. Click OK if the display is correct and you wish to keep the new settings. The Display Properties dialog box is dismissed. 5. Click OK to accept the new display mode and dismiss the Display Properties dialog box. NOTE: You must disable stereo mode when you no longer wish to view in stereo. Follow the steps above, and select Monoscopic Display under Display Mode to disable stereo mode. Enabling Multiview and Genlock on the Wildcat III 6210 The Wildcat III 6210 comes with Multiview support for frame locking and rate locking of multiple workstations. Genlock support allows video timing to be synchronized to an external timing source. NOTE: Your application must support Multiview for Multiview to work. Refer to the Wildcat support area on http://www.3dlabs.com/support/troubleshooting/wc-01.htm for information on ordering the correct cables. IMPORTANT: Multiview on a Wildcat III 6210 is not compatible with Multiview on any previous Wildcat product. Only connect Wildcat III 6210 cards together in a Multiview configuration. Enabling Multiview features 1. Insert one end of a shielded DB-9 cable into the Multiview Out port of the first workstation. This workstation becomes the "Master." 2. Insert the other end of the cable into the Multiview In port of the second workstation. This workstation becomes a "Slave." 3. If connecting more than two workstations, continue linking workstations to one another by connecting the Multiview Out port of one workstation to the Multiview In port of the next. The last workstation should terminate the links and only have a cable plugged into the Multiview In port. 24 3Dlabs Graphics Accelerator Card User's Guide
-
 1
1 -
2
-
3
-
4
-
5
-
6
-
7
-
8
-
9
-
10
-
11
-
12
-
13
-
14
-
15
-
16
-
17
-
18
-
19
-
20
-
21
-
22
-
23
-
24
-
 25
25 -
 26
26 -
 27
27 -
 28
28 -
 29
29 -
 30
30 -
 31
31 -
 32
32 -
 33
33 -
 34
34 -
 35
35 -
36
-
37
-
38
-
39
-
40
-
41
-
42
-
43
-
44
-
45
-
46
-
47
-
48
-
49
-
50
-
51
-
52
-
53
-
54
-
55
-
56
-
57
-
58
-
59
 |
 |
