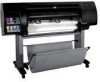
HP Z6100 HP Designjet Z6100 Printer Series - User's Guide - Page 30
Share the printer - forum
 |
UPC - 882780989535
View all HP Z6100 manuals
Add to My Manuals
Save this manual to your list of manuals |
Page 30 highlights
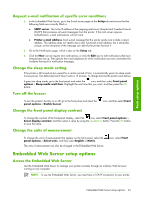
Connectivity 3. Click the CD/DVD icon on your desktop. 4. Click the Mac OS X HP Designjet Installer icon. 5. Follow the onscreen instructions. HP recommends that you use the Easy Install option. The printer software is installed, including the printer driver, HP Printer Utility, and HP Color Center. 6. When the software has been installed, the HP Printer Setup Assistant starts automatically to help you set up a connection to your printer. 7. Make sure that the printer is turned on and connected to the computer with a certified USB cable. NOTE: The use of non-certified USB cables can lead to connectivity problems. Only cables certified by the USB Implementor's Forum (http://www.usb.org/) should be used with this printer. 8. In the HP Printer Setup Assistant, click Continue. 9. In the list of printers that appears, select the entry that uses the connection type USB, and click Continue. 10. The following screen shows information about your printer's installation, and the name of the printer can be modified. Make any changes you want to make, and click Continue. 11. Your printer is now connected. On the Printer Queue Created screen, click Quit to exit, or click Create New Queue if you want to connect another printer. 12. When the HP Printer Setup Assistant has finished, you can remove the CD from the CD drive. If the printer driver is already installed, run the HP Printer Setup Assistant can be run at any time from the CD. Share the printer NOTE: Printer sharing between users is supported under Mac OS X V10.2 and later. If your computer is connected to a network, you can make your directly connected printer available to other computers on the same network. 1. Double-click the System Preferences icon on the Dock menu bar on your desktop. 2. Enable printer sharing by clicking Sharing > Services > Printer Sharing. 3. Your printer now automatically appears in the list of shared printers that is available on any other computer that is running Mac OS and connected to your local network. 18 Chapter 2 Connectivity and software instructions
-
 1
1 -
2
-
3
-
4
-
5
-
6
-
7
-
8
-
9
-
10
-
11
-
12
-
13
-
14
-
15
-
16
-
17
-
18
-
19
-
20
-
21
-
22
-
23
-
24
-
 25
25 -
 26
26 -
 27
27 -
 28
28 -
 29
29 -
 30
30 -
 31
31 -
 32
32 -
 33
33 -
 34
34 -
 35
35 -
36
-
37
-
38
-
39
-
40
-
41
-
42
-
43
-
44
-
45
-
46
-
47
-
48
-
49
-
50
-
51
-
52
-
53
-
54
-
55
-
56
-
57
-
58
-
59
-
60
-
61
-
62
-
63
-
64
-
65
-
66
-
67
-
68
-
69
-
70
-
71
-
72
-
73
-
74
-
75
-
76
-
77
-
78
-
79
-
80
-
81
-
82
-
83
-
84
-
85
-
86
-
87
-
88
-
89
-
90
-
91
-
92
-
93
-
94
-
95
-
96
-
97
-
98
-
99
-
100
-
101
-
102
-
103
-
104
-
105
-
106
-
107
-
108
-
109
-
110
-
111
-
112
-
113
-
114
-
115
-
116
-
117
-
118
-
119
-
120
-
121
-
122
-
123
-
124
-
125
-
126
-
127
-
128
-
129
-
130
-
131
-
132
-
133
-
134
-
135
-
136
-
137
-
138
-
139
-
140
-
141
-
142
-
143
-
144
-
145
-
146
-
147
-
148
-
149
-
150
-
151
-
152
-
153
-
154
-
155
-
156
-
157
-
158
-
159
-
160
-
161
-
162
-
163
-
164
-
165
-
166
-
167
-
168
-
169
-
170
-
171
-
172
-
173
-
174
-
175
-
176
-
177
-
178
-
179
-
180
-
181
-
182
-
183
-
184
-
185
-
186
-
187
-
188
-
189
-
190
-
191
-
192
-
193
-
194
-
195
-
196
-
197
-
198
-
199
-
200
-
201
-
202
-
203
-
204
-
205
-
206
-
207
-
208
-
209
-
210
-
211
-
212
-
213
-
214
-
215
-
216
-
217
-
218
-
219
-
220
-
221
-
222
-
223
-
224
-
225
-
226
-
227
-
228
-
229
-
230
-
231
-
232
 |
 |
