HP mt245 mt245 Mobile Thin Client Maintenance and Service Guide - Page 78
Unpacking the Image and Tools for Deployment, Deploying with PXE
 |
View all HP mt245 manuals
Add to My Manuals
Save this manual to your list of manuals |
Page 78 highlights
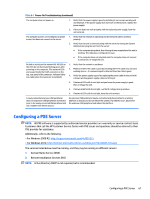
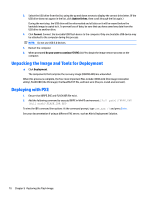
3. Select the USB drive from the list, using the up and down arrows to display the correct drive letter. (If the USB drive does not appear in the list, click Update Drives, then scroll through the list again.) During the next step, the USB drive will be reformatted and all data on it will be erased before the bootable image is copied to it. To prevent loss of data, be sure that you have saved any data from the USB drive to another drive. 4. Click Format. Connect the bootable USB flash device to the computer. Only one bootable USB device may be attached to the computer during this process. NOTE: Do not use USB 3.0 devices. 5. Restart the computer. 6. When prompted Do you want to continue? [Y/N] click Y to begin the image restore process on the computer. Unpacking the Image and Tools for Deployment ▲ Click Deployment. The components that comprise the recovery image (DSKIMG.BIN) are unbundled. When this process is complete, the four most important files include: IBRPE.EXE (the image restoration utility), FLASH.IBR (the OS image), the ReadMe.TXT file, and boot.wim (the pre-install environment). Deploying with PXE 1. Ensure that IBRPE.EXE and FLASH.IBR file exist. 2. Add the following command to execute IBRPE in WinPE environment: [full path]\IBRPE.EXE [full path]\FLASH.IBR HD0 To view the IBR command line options: At the command prompt, type IBR.EXE /? and press Enter. See your documentation if using a different PXE server, such as Altiris Deployment Solution. 70 Chapter 9 Restoring the Flash Image
-
 1
1 -
2
-
3
-
4
-
5
-
6
-
7
-
8
-
9
-
10
-
11
-
12
-
13
-
14
-
15
-
16
-
17
-
18
-
19
-
20
-
21
-
22
-
23
-
24
-
25
-
26
-
27
-
28
-
29
-
30
-
31
-
32
-
33
-
34
-
35
-
36
-
37
-
38
-
39
-
40
-
41
-
42
-
43
-
44
-
45
-
46
-
47
-
48
-
49
-
50
-
51
-
52
-
53
-
54
-
55
-
56
-
57
-
58
-
59
-
60
-
61
-
62
-
63
-
64
-
65
-
66
-
67
-
68
-
69
-
70
-
71
-
72
-
 73
73 -
 74
74 -
 75
75 -
 76
76 -
 77
77 -
 78
78 -
 79
79 -
 80
80 -
 81
81 -
 82
82 -
 83
83 -
84
-
85
-
86
-
87
-
88
-
89
-
90
-
91
-
92
-
93
-
94
-
95
-
96
-
97
-
98
 |
 |