IBM 72332MU Installation Guide - Page 34
Installing an additional microprocessor
 |
UPC - 883436084673
View all IBM 72332MU manuals
Add to My Manuals
Save this manual to your list of manuals |
Page 34 highlights
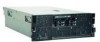
Installing an additional microprocessor The following notes describe information that you must consider when you install a microprocessor: v The voltage regulators that come with the optional microprocessor must be installed on the microprocessor board. v Install the microprocessors in the order shown in the following illustration. VRM 3 connector VRM 1 connector VRM 4 connector 3 4 1 2 VRM 2 connector Notes: 1. Microprocessor sockets 3 and 4 are mounted on the microprocessor board with the microprocessor-release levers on opposite sides. These sockets are oriented 180° from each other on the microprocessor board. Be sure to verify the orientation of the socket before you install the microprocessor in either of these sockets. The following illustration shows the orientation of the microprocessor sockets. Fan 4 Fan 1 V R M 3 CPU 3 Fan 5 Fan 2 CPU 4 Fan 6 Fan 3 V R M 4 Memory V Cards R 1 2M 1 CPU 1 CPU 2 V Memory R Cards M3 4 2 22 IBM System x3850 M2 and System x3950 M2 Types 7141 and 7233: Installation Guide
-
 1
1 -
2
-
3
-
4
-
5
-
6
-
7
-
8
-
9
-
10
-
11
-
12
-
13
-
14
-
15
-
16
-
17
-
18
-
19
-
20
-
21
-
22
-
23
-
24
-
25
-
26
-
27
-
28
-
 29
29 -
 30
30 -
 31
31 -
 32
32 -
 33
33 -
 34
34 -
 35
35 -
 36
36 -
 37
37 -
 38
38 -
 39
39 -
40
-
41
-
42
-
43
-
44
-
45
-
46
-
47
-
48
-
49
-
50
-
51
-
52
-
53
-
54
-
55
-
56
-
57
-
58
-
59
-
60
-
61
-
62
-
63
-
64
-
65
-
66
-
67
-
68
-
69
-
70
-
71
-
72
-
73
-
74
-
75
-
76
-
77
-
78
-
79
-
80
-
81
-
82
-
83
-
84
-
85
-
86
-
87
-
88
-
89
-
90
-
91
-
92
-
93
-
94
-
95
-
96
-
97
-
98
-
99
-
100
-
101
-
102
 |
 |
