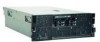
IBM 72332MU Installation Guide - Page 37
Installing a ServeRAID-MR10k SAS controller,
 |
UPC - 883436084673
View all IBM 72332MU manuals
Add to My Manuals
Save this manual to your list of manuals |
Page 37 highlights
Note: Make sure that the "Front" label on the VRM is facing the front of the server. 16. Replace the microprocessor air baffle between socket 1 and socket 2, if you removed it. 17. Rotate the media hood to the closed position and tighten the captive screws. If you have other devices to install or remove, do so now. Otherwise, go to "Completing the installation" on page 28. Installing a ServeRAID-MR10k SAS controller The following notes describe information that you must consider when you install a ServeRAID™-MR10k SAS controller: v A ServeRAID-MR10k SAS controller can be installed only in the dedicated slot on the I/O board. v The ServeRAID-MR10k SAS controller is not cabled to the server, and no rerouting of the SAS cables is required. The following illustration shows how to install a ServeRAID-MR10k SAS controller. Battery Cable guide Battery cable Cable guide Battery cable connector RAID controller 1. Read the safety information that begins on page v and "Installation guidelines" on page 9. 2. Turn off the server and peripheral devices, and disconnect the power cords and all external cables as necessary to replace the device. 3. Remove the server cover. Attention: When you handle static-sensitive devices, take precautions to avoid damage from static electricity. For details about handling these devices, see "Handling static-sensitive devices" on page 11. Chapter 2. Installing optional devices 25
-
 1
1 -
2
-
3
-
4
-
5
-
6
-
7
-
8
-
9
-
10
-
11
-
12
-
13
-
14
-
15
-
16
-
17
-
18
-
19
-
20
-
21
-
22
-
23
-
24
-
25
-
26
-
27
-
28
-
29
-
30
-
31
-
 32
32 -
 33
33 -
 34
34 -
 35
35 -
 36
36 -
 37
37 -
 38
38 -
 39
39 -
 40
40 -
 41
41 -
 42
42 -
43
-
44
-
45
-
46
-
47
-
48
-
49
-
50
-
51
-
52
-
53
-
54
-
55
-
56
-
57
-
58
-
59
-
60
-
61
-
62
-
63
-
64
-
65
-
66
-
67
-
68
-
69
-
70
-
71
-
72
-
73
-
74
-
75
-
76
-
77
-
78
-
79
-
80
-
81
-
82
-
83
-
84
-
85
-
86
-
87
-
88
-
89
-
90
-
91
-
92
-
93
-
94
-
95
-
96
-
97
-
98
-
99
-
100
-
101
-
102
 |
 |
