Invacare M61 Owners Manual - Page 47
Depth
 |
View all Invacare M61 manuals
Add to My Manuals
Save this manual to your list of manuals |
Page 47 highlights
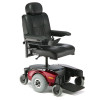
Bottom View of Footboard SECTION 8-FOOTBOARD ASSEMBLY Set Screw, Washer and Jam Nut Footboard Assembly FIGURE 8.2 Adjusting the Footboard Assembly - Angle Depth NOTE: For this procedure, refer to FIGURE 8.3. 1. Remove the quick release pin that secures the footboard assembly to the wheelchair frame. ƽ WARNING Make sure the detent balls of the quick-release pin are fully released and beyond the outer edge of the tube before operating the wheelchair. Otherwise, injury and/or damage may result. Keep detent balls clean. 2. Adjust footboard to one of three mounting positions. 3. Install the quick release pin. Make sure the detent balls of the quick‐release pin are fully released and beyond the outer edge of the tube (Detail "A"). Top Shroud Three Depth Adjustment Holes Footboard Assembly DETAIL "A" - BOTTOM VIEW OF FOOTBOARD Quick Release Pin Mounting Hole Quick Release Pin Detent Ball Outer Edge of Tube Detent Balls FIGURE 8.3 Adjusting the Footboard Assembly - Depth Part No 1125085 47 Pronto® M51™and M61™with SureStep®
-
 1
1 -
2
-
3
-
4
-
5
-
6
-
7
-
8
-
9
-
10
-
11
-
12
-
13
-
14
-
15
-
16
-
17
-
18
-
19
-
20
-
21
-
22
-
23
-
24
-
25
-
26
-
27
-
28
-
29
-
30
-
31
-
32
-
33
-
34
-
35
-
36
-
37
-
38
-
39
-
40
-
41
-
 42
42 -
 43
43 -
 44
44 -
 45
45 -
 46
46 -
 47
47 -
 48
48 -
 49
49 -
 50
50 -
 51
51 -
 52
52 -
53
-
54
-
55
-
56
-
57
-
58
-
59
-
60
-
61
-
62
-
63
-
64
-
65
-
66
-
67
-
68
-
69
-
70
-
71
-
72
-
73
-
74
-
75
-
76
-
77
-
78
-
79
-
80
 |
 |
