JVC V685U Instructions - Page 105
Setting value:Off, Area1, Area4], Black & White, Auto]
 |
View all JVC V685U manuals
Add to My Manuals
Save this manual to your list of manuals |
Page 105 highlights
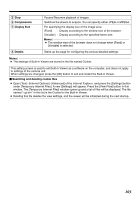
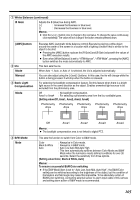
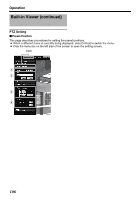
A White Balance (continued) B Gain Adjusts the B (blue) hue during AWC. [+] : Increases the blueness or blue level. [-] : Decreases the blueness or blue level. Memo: ● Click the [+] or [-] button once to change to the next value. To change the value continuously, click repeatedly. The value will not change if the button remains pressed down. [AWC]button B Iris Mode Manual C Back Light Compensation Mode Executes AWC (automatic white balance control).Execute by placing a white object around the center of the screen in a location with a lighting condition that is similar to the object to be shot. ● Pressing the [AWC] button replaces the [R Gain]] and [B Gain] valueswith the values of the AWC execution results. ● Even when [White Balance] is set to AATW-NarrowB, AATW-WideB, pressing the [AWC] button switches the mode automatically to AWC. This item sets the iris. When Auto -1, Auto, or Auto +1 is selected, the iris is adjusted automatically. You can also adjust using the [+] and [-] buttons. In this case, the iris will change while the button is being pressed. It will stop when the button is released. For selecting the backlight compensation feature. Set this feature when there is a bright light source in the same direction as the object. Enables unwanted light sources to be excluded from the photometry area. Off : No backlight compensation. Area1 to Area4 : For selecting a photometry area from the four available types. [Setting value:Off, Area1, Area2, Area3, Area4] Photometry Photometry Photometry Photometry Photometry Area Area Area Area Area D B/W Mode Mode Off Area1 Area2 Area3 Memo: ● The backlight compensation area is not linked to digital PTZ. Area4 This sets the function to switch from Color to B&W mode. Color : Always be in Color mode. Black & White : Always be in B&W mode. Auto : Auto Low,Auto Mid,Auto High : This item automatically switches between Color Mode and B&W Mode when the luminance meets defined conditions for over 30 seconds. Select the sensitivity from three options. [Setting value:Color, Black & White, Auto] Memo: To ensure a successful B&W/Color switching ● If the [B/W Mode] item is set to AAuto Low, Auto Mid, Auto HighB, the B&W/Color setting can be switched according to the brightness of the object, but the condition of illumination and field angle may make this impossible. To be absolutely certain of B&W/Color switching, connecting external sensor to alarm input cable of this camera and setting alarm action of B&W mode is recommended. 105
-
 1
1 -
2
-
3
-
4
-
5
-
6
-
7
-
8
-
9
-
10
-
11
-
12
-
13
-
14
-
15
-
16
-
17
-
18
-
19
-
20
-
21
-
22
-
23
-
24
-
25
-
26
-
27
-
28
-
29
-
30
-
31
-
32
-
33
-
34
-
35
-
36
-
37
-
38
-
39
-
40
-
41
-
42
-
43
-
44
-
45
-
46
-
47
-
48
-
49
-
50
-
51
-
52
-
53
-
54
-
55
-
56
-
57
-
58
-
59
-
60
-
61
-
62
-
63
-
64
-
65
-
66
-
67
-
68
-
69
-
70
-
71
-
72
-
73
-
74
-
75
-
76
-
77
-
78
-
79
-
80
-
81
-
82
-
83
-
84
-
85
-
86
-
87
-
88
-
89
-
90
-
91
-
92
-
93
-
94
-
95
-
96
-
97
-
98
-
99
-
 100
100 -
 101
101 -
 102
102 -
 103
103 -
 104
104 -
 105
105 -
 106
106 -
 107
107 -
 108
108 -
 109
109 -
 110
110 -
111
-
112
-
113
-
114
-
115
-
116
-
117
-
118
-
119
-
120
-
121
-
122
-
123
-
124
-
125
-
126
-
127
-
128
-
129
-
130
 |
 |
