JVC V685U Instructions - Page 11
Disclaimer, Transportation, The Automatic Tracking, Intelligent Tracking, - camera vn
 |
View all JVC V685U manuals
Add to My Manuals
Save this manual to your list of manuals |
Page 11 highlights
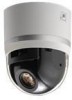
Disclaimer ⅷ The Automatic Tracking, Intelligent Tracking, and Motion Detection features are not features to prevent theft or fire. Our company shall not be liable for any inconveniences or failures that occur. ⅷ We shall not be responsible for any inconveniences or disturbances caused in the event of privacy invasion as a result of camera footages of this product. Transportation ⅷ Do not throw away the original box of the unit. Keep it and use it for transporting the unit in future. ⅷ As the camera unit is of an easily rotatable structure, secure the camera unit inside the dome cover such that it does not rotate before transporting. Otherwise, an error may occur during camera operation. AFace the heat release vents upward and secure the lens section with tape. BInsert cushioning material wrapped with air caps (approx. 50 mm x 200 mm) at two opposite sides of the camera. ⅷ When attaching the ceiling clamping bracket to the camera unit before transporting, pull out the tip of the fall prevention wire to prevent it from being caught between the camera and clamping bracket. Otherwise, it may be difficult to detach the bracket from the camera. (VN-V685U/VN-V686BU) ⅥVN-V685U/VN-V686BU Cushioning material A Secure with tape B Pull out the tip of the fall prevention wire ⅥVN-V686WPBU B Cushioning material A Secure with tape 11
-
 1
1 -
2
-
3
-
4
-
5
-
 6
6 -
 7
7 -
 8
8 -
 9
9 -
 10
10 -
 11
11 -
 12
12 -
 13
13 -
 14
14 -
 15
15 -
 16
16 -
17
-
18
-
19
-
20
-
21
-
22
-
23
-
24
-
25
-
26
-
27
-
28
-
29
-
30
-
31
-
32
-
33
-
34
-
35
-
36
-
37
-
38
-
39
-
40
-
41
-
42
-
43
-
44
-
45
-
46
-
47
-
48
-
49
-
50
-
51
-
52
-
53
-
54
-
55
-
56
-
57
-
58
-
59
-
60
-
61
-
62
-
63
-
64
-
65
-
66
-
67
-
68
-
69
-
70
-
71
-
72
-
73
-
74
-
75
-
76
-
77
-
78
-
79
-
80
-
81
-
82
-
83
-
84
-
85
-
86
-
87
-
88
-
89
-
90
-
91
-
92
-
93
-
94
-
95
-
96
-
97
-
98
-
99
-
100
-
101
-
102
-
103
-
104
-
105
-
106
-
107
-
108
-
109
-
110
-
111
-
112
-
113
-
114
-
115
-
116
-
117
-
118
-
119
-
120
-
121
-
122
-
123
-
124
-
125
-
126
-
127
-
128
-
129
-
130
 |
 |
