Konica Minolta bizhub 4750 bizhub 4750/4050 Print Functions User Guide - Page 81
Installing the printer driver, Configuring USB connection settings (Mac OS X 10.5 or later)
 |
View all Konica Minolta bizhub 4750 manuals
Add to My Manuals
Save this manual to your list of manuals |
Page 81 highlights
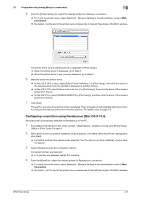
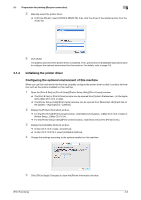
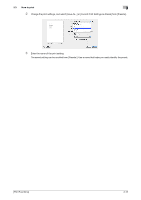
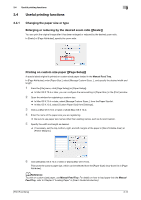
3.2 Preparation for printing (USB connection) 3 Installing the printer driver Install the printer driver using the installer. 0 Before installation, exit all application software programs that are running. 1 Mount the Drivers & Utilities CD-ROM disk into the CD-ROM drive of the computer. 2 Open the folder on the CD-ROM that contains the desired printer driver. % Select the folder according to the printer driver, operating system, and language to be used. 3 Copy the driver file onto the desktop according to the Mac OS X version. % Mac OS X 10.3: model name of this machine_103104.pkg % Mac OS X 10.4: model name of this machine_103104.pkg % Mac OS X 10.5: model name of this machine_105.pkg % Mac OS X 10.6: model name of this machine_106.pkg % Mac OS X 10.7: model name of this machine_106.pkg % Mac OS X 10.8: model name of this machine_106.pkg % In Mac OS X 10.5 or later, the driver folder varies depending on the paper size. Select the appropri- ate folder to suit your environment. To mainly use the metric-based paper size such as A4 size: "WW_A4" folder To mainly use the inch-based paper size such as letter size or 8 1/2 e 11: "WW_Letter" folder 4 Double-click the file copied onto the desktop. The printer driver installer starts. 5 Click [Continue] following the instructions on the pages that follow until the [Install] page appears. % When the name and password prompt appears during the procedure, enter the administrator name and password. 6 Click [Install]. The printer driver is installed on the computer. 7 Click [Close]. Installation of the printer driver is then completed. Then, add the printer to the computer. Configuring USB connection settings (Mac OS X 10.5 or later) Add the printer that is automatically detected by USB connection to the computer. 1 Connect a USB cable to the USB port of this machine. % For details on the cable connection port, refer to page 1-4. 2 Select [System Preferences...] in the Apple menu. 3 Click the [Print & Fax] or [Print & Scan] icon. 4 Click [+] on the [Print & Fax] or [Print & Scan] window. % In Mac OS X 10.4/10.5/10.6, go to Step 4. % In Mac OS X 10.7/10.8, if a target printer name is found in the list displayed by clicking [+], select it. When a printer driver is selected automatically, the printer addition is completed. If a target printer name is not found, select [Add Other Printer or Scanner...] or [Add Printer or Scanner...], and go to Step 4. 5 Click [Default]. Connected printers are detected. % If no printer is detected, check that this machine is turned on and the USB cable is connected, then restart the computer. [Print Functions] 3-9
-
 1
1 -
2
-
3
-
4
-
5
-
6
-
7
-
8
-
9
-
10
-
11
-
12
-
13
-
14
-
15
-
16
-
17
-
18
-
19
-
20
-
21
-
22
-
23
-
24
-
25
-
26
-
27
-
28
-
29
-
30
-
31
-
32
-
33
-
34
-
35
-
36
-
37
-
38
-
39
-
40
-
41
-
42
-
43
-
44
-
45
-
46
-
47
-
48
-
49
-
50
-
51
-
52
-
53
-
54
-
55
-
56
-
57
-
58
-
59
-
60
-
61
-
62
-
63
-
64
-
65
-
66
-
67
-
68
-
69
-
70
-
71
-
72
-
73
-
74
-
75
-
 76
76 -
 77
77 -
 78
78 -
 79
79 -
 80
80 -
 81
81 -
 82
82 -
 83
83 -
 84
84 -
 85
85 -
 86
86 -
87
-
88
-
89
-
90
-
91
-
92
-
93
-
94
-
95
-
96
-
97
-
98
-
99
-
100
-
101
-
102
-
103
-
104
-
105
-
106
-
107
-
108
-
109
-
110
-
111
-
112
-
113
-
114
 |
 |
