Kyocera KM-2030 Print System K Instruction Handbook (Functions) - Page 44
Device Settings Tab
 |
View all Kyocera KM-2030 manuals
Add to My Manuals
Save this manual to your list of manuals |
Page 44 highlights
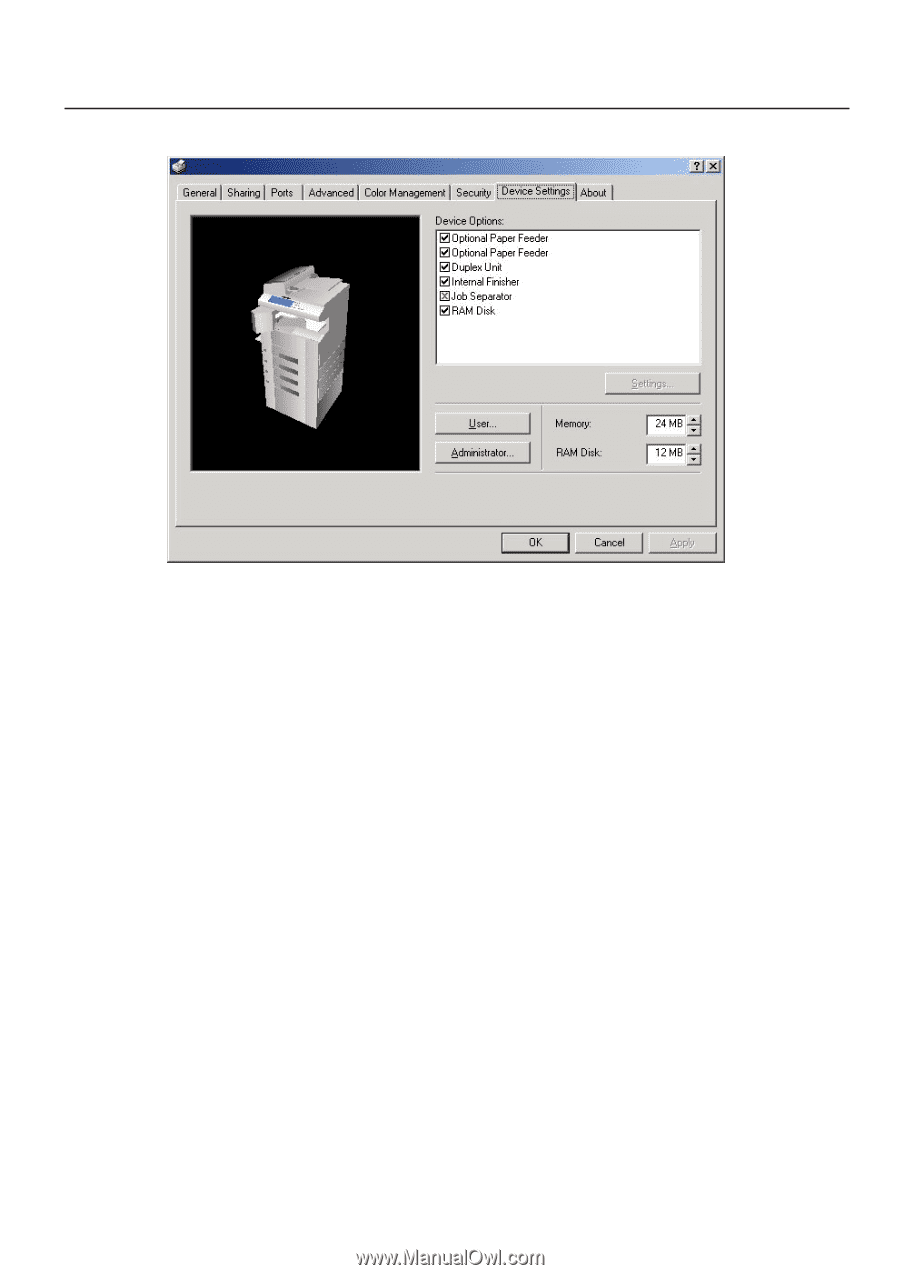
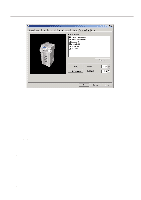
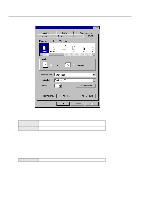
2. Windows XL Driver 2-6 Device Settings Tab To access the Device Settings screen, in step 4 on page 2-1 select [Properties] from the menu and then click on the Device Settings Tab. When you have added optional equipment, make the appropriate settings for that equipment here. Once the corresponding setting is complete, the corresponding function of the installed option will be added to the printer. Copy Management related setting are made here as well. s Device Options Select and installed options here. Once you have completed the setting for each option, the functions of that option will be available for use. q Optional Paper Feeder Perform this setting according to the installed Option Cassette. q Duplex Unit Perform this setting when the optional Duplex Unit (only available with 20 ppm copiers) is installed. q Internal Finisher Perform this setting when the optional Finisher (only available with 20 ppm copiers) is installed. q Job Separator Perform this setting when the optional Job Separator is installed. q RAM Disk Perform this setting when you want to create a RAM disk. Refer to "Chapter 1, 3-2 RAM Disk" on page 3-1 for more detailed information on creating a RAM disk. * In order to create a RAM disk, it is necessary to increase the memory capacity of your printer. After increasing memory, perform the setting here according to the "Memory" setting below. s Memory Specifies the amount of memory installed in the printer. If you make a mistake in the setting here, it is possible that printing will not be accomplished properly. s RAM Disk Specifies the amount of memory to be used for the RAM disk. This setting will only be available when you have selected "RAM Disk" in the "Device Options" list. s User... Click on this button when you want to register a user and/or department name. The [User Settings] dialog box will appear. It is also possible to select the "GDI compatible mode" from that dialog box. Refer to "2-6-1 User Settings" on page 2-8 for more detailed information. s Administrator... Click on this button when Copy Management is Turned ON in the printer. The [Administrator Settings] dialog box will appear. Refer to "26-2 Administrator Settings" on page 2-8 for more detailed information. 2-7
-
 1
1 -
2
-
3
-
4
-
5
-
6
-
7
-
8
-
9
-
10
-
11
-
12
-
13
-
14
-
15
-
16
-
17
-
18
-
19
-
20
-
21
-
22
-
23
-
24
-
25
-
26
-
27
-
28
-
29
-
30
-
31
-
32
-
33
-
34
-
35
-
36
-
37
-
38
-
 39
39 -
 40
40 -
 41
41 -
 42
42 -
 43
43 -
 44
44 -
 45
45 -
 46
46 -
 47
47 -
 48
48 -
 49
49 -
50
-
51
-
52
-
53
-
54
-
55
-
56
-
57
-
58
-
59
-
60
-
61
-
62
-
63
-
64
-
65
-
66
-
67
-
68
-
69
-
70
-
71
-
72
-
73
-
74
-
75
-
76
-
77
-
78
-
79
-
80
-
81
-
82
-
83
-
84
-
85
-
86
 |
 |