Kyocera KM-2550 Basic Guide
Kyocera KM-2550 Manual
 |
View all Kyocera KM-2550 manuals
Add to My Manuals
Save this manual to your list of manuals |
Kyocera KM-2550 manual content summary:
- Kyocera KM-2550 | Basic Guide - Page 1
KM-1650 KM-2050 KM-2550 Basic Operation Guide Please read the Operation Guide before using this machine. Keep it close to the machine fore easy reference. - Kyocera KM-2550 | Basic Guide - Page 2
- Kyocera KM-2550 | Basic Guide - Page 3
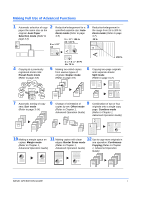
to page 3-8) 5 1/2 × 8 1/2": 64 % A5: 70 % 5 Making two-sided copies from various types of originals: Duplex mode (Refer to page 3-9) 200 % single copy page: Combine mode (Refer to Chapter 1, Advanced Operation Guide) 2 1 12 10 11 12 Making a margin space on Making copies with clean Use to - Kyocera KM-2550 | Basic Guide - Page 4
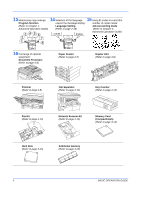
Guide) 16 Full range of optional equipment: Document Processor (Refer to page 4-3) Paper Feeder (Refer to page 4-7) Duplex Unit (Refer to page 4-8) Finisher (Refer to page 4-8) Job Separator (Refer to page 4-12) Key Counter (Refer to page 4-13) Fax Kit (Refer to page 4-14) Network Scanner - Kyocera KM-2550 | Basic Guide - Page 5
to using your machine. This chapter explains the following topics: • Legal Information iv • Energy Star Program v • Safety Conventions vi • Caution Labels viii • Installation Precautions ix • Power Supply/Grounding the Machine x • Precautions for Use xi • Laser Safety xiv • Disconnection of - Kyocera KM-2550 | Basic Guide - Page 6
user is following the instructions in this manual. No responsibility is assumed for defects in the printer's firmware (contents of its read-only memory). Copyright This Operation Guide is for 1650, 2050, and 2550. Throughout this guide of Apple computer, Inc. Microsoft, Windows, and Windows NT are - Kyocera KM-2550 | Basic Guide - Page 7
require that multifunction devices come equipped with Low Power Mode and Auto Sleep Mode. After a specified Service Representative can provide information about adding two-sided copying capabilities to this device. For further information refer to Duplex Unit, on page 4-8. BASIC OPERATION GUIDE - Kyocera KM-2550 | Basic Guide - Page 8
or Service Representative can provide information about recommended paper types. Safety Conventions Please read this Operation Guide before . The sections of this guide and parts of the machine marked with symbols are safety warnings meant to protect the user, other individuals and surrounding - Kyocera KM-2550 | Basic Guide - Page 9
action are indicated inside the symbol. .... [Alert of required action] .... [Remove the power plug from the outlet] .... [Always connect the machine to an outlet with a ground connection] Contact your Service Representative to order a replacement (fee required) if the safety warnings in this - Kyocera KM-2550 | Basic Guide - Page 10
for safety purposes. Take care to avoid fire or electric shock when removing a paper jam or when replacing toner. Label 2 High temperature inside. Do not touch parts in this area, because there is a danger of danger of getting burned. NOTE: Do not remove these labels. viii BASIC OPERATION GUIDE - Kyocera KM-2550 | Basic Guide - Page 11
and dirt. If dust or dirt become attached to the power plug, clean the plug to avoid the danger of fire cm Front: 39 3/8" 100 cm Rear: 3 15/16" 10 cm Right: 11 13/16" 30 cm Other Precautions Adverse the machine. • Avoid locations near a window or with exposure to direct sunlight. • Avoid GUIDE ix - Kyocera KM-2550 | Basic Guide - Page 12
short. If an earth connection is not possible, contact your Service Representative. Other Precautions Connect the power plug to the closest outlet possible to the machine. The power supply cord is used as the main may cling to their nose and mouth causing suffocation. x BASIC OPERATION GUIDE - Kyocera KM-2550 | Basic Guide - Page 13
: Do not remove or connect the power plug with wet hands, as there is a danger of electrical shock. WARNING: Always contact your Service Representative for maintenance or repair of internal parts. CAUTION: Do not pull the power cord when removing it from the outlet. If the power cord is pulled, the - Kyocera KM-2550 | Basic Guide - Page 14
power plug from the outlet when performing cleaning operations. If dust accumulates within the machine, there is a danger of fire or other trouble. It is therefore recommended that you consult with your Service light from the scanning lamp as it may cause your eyes to feel tired or painful. - Kyocera KM-2550 | Basic Guide - Page 15
gargle thoroughly with a large amount of water. If coughing develops, contact a physician. If you do happen to ingest toner, rinse your mouth out with water and drink 1 or 2 cups of water to dilute the contents of your return it to its original package and reseal it. BASIC OPERATION GUIDE xiii - Kyocera KM-2550 | Basic Guide - Page 16
and external cover. In the normal operation of the product by a user, no radiation can leak from the machine. This machine is classified as this manual may result in hazardous radiation exposure. These labels are attached to the laser scanner unit inside the machine and are not in a user access area - Kyocera KM-2550 | Basic Guide - Page 17
only functional switches and are not suitable for isolating the equipment from the power source. CAUTION: Der Netzstecker ist die Hauptisoliervorrichtung! Die anderen Schalter auf dem Safety of laser products, equipment classification, requirements and user's guide EN60825-1 BASIC OPERATION - Kyocera KM-2550 | Basic Guide - Page 18
Legal and Safety Information xvi BASIC OPERATION GUIDE - Kyocera KM-2550 | Basic Guide - Page 19
Guide has the following chapters: • 1 Machine Parts Identifies the names of the machine parts and main functions. • 2 Preparation Contains explanations on loading paper and machine connections and toner replenishment procedures. • 6 Troubleshooting Explains how to handle problems such as error - Kyocera KM-2550 | Basic Guide - Page 20
using the machine as a copier and printer and has a Troubleshooting section. Advanced Operation Guide The Advanced Operation Guide contains explanations on copier and printer functions as well as default settings adjusted on the machine. KX Printer Driver Operation Guide Describes how to install and - Kyocera KM-2550 | Basic Guide - Page 21
Conventions This manual uses the damage as a result of an action. Used to alert users to the possibility of personal injury. IMPORTANT: Never use water power plug from the outlet when cleaning the machine. WARNING: High voltage is present in the charger section. Measurements This guide - Kyocera KM-2550 | Basic Guide - Page 22
Introduction xx BASIC OPERATION GUIDE - Kyocera KM-2550 | Basic Guide - Page 23
-xv CE Declaration of Conformity Legal and Safety-xv Introduction Guides Included xviii Conventions xix 1 Machine Parts Main Body 1-2 Operation Panel 1-5 Message Display 1-7 2 Preparation Loading Paper 2-2 Connection 2-10 Switching Power On 2-12 Network Settings 2-13 Setting the Date and - Kyocera KM-2550 | Basic Guide - Page 24
13 Fax Kit 4-14 Network Scanner Kit 4-14 Memory Card (CompactFlash 4-14 Hard Disk 4-15 Expansion Memory 4-15 5 Maintenance Cleaning the Machine 5-2 Replacing the Toner Container and Waste Toner Box 5-5 6 Troubleshooting Problem Solving 6-2 Error Messages and Correction 6-5 Paper Jams 6-10 - Kyocera KM-2550 | Basic Guide - Page 25
1 Machine Parts This chapter explains the following topics: • Main Body 1-2 • Operation Panel 1-5 • Message Display 1-5 BASIC OPERATION GUIDE 1-1 - Kyocera KM-2550 | Basic Guide - Page 26
Main Body 9 10 11 1 2 3 7 8 5 6 4 1 Original Cover 2 Output Tray 3 Operation Panel 4 Cassette 1 5 Cassette 2 (20 and 25 ppm models only) 6 Paper Width Adjusting Tab 7 Paper Length Adjusting Tab 8 Left Cover Handle 9 Multi-Bypass Tray 10 Multi-Bypass Tray Extension 11 Insert Guides 1-2 BASIC - Kyocera KM-2550 | Basic Guide - Page 27
Machine Parts 13 14 12 16 17 15 18 19 12 Platen 13 Original Size Indicator Plates 14 Left Cover 15 Waste Toner Box 16 Toner Container Release Lever 17 Toner Container 18 Charger Cleaner Rod 19 Front Cover BASIC OPERATION GUIDE 1-3 - Kyocera KM-2550 | Basic Guide - Page 28
Machine Parts 23 24 25 26 22 20 21 22 20 Main Power Switch 21 Main Power Switch Cover 22 Handles for Transport 23 Network Interface Connector 24 USB Interface Connector 25 Parallel Interface Connector 26 Memory Card Slot 1-4 BASIC OPERATION GUIDE - Kyocera KM-2550 | Basic Guide - Page 29
Key and Indicator 2 Copier Key and Indicator 3 Printer Key and Indicator 4 Scanner Key and Indicator 5 Fax Key and Indicator 6 Combine Key and Indicator 7 Border Erase Key and Indicator 8 Duplex/Split Page Key and Indicator 9 Offset Key and Indicator 10 Function Key 11 Scanner Function Key 12 Auto - Kyocera KM-2550 | Basic Guide - Page 30
26 Ready Indicator (green light) 27 Data Indicator (green light) 28 Attention Indicator (red light) 29 Job Accounting Key 30 Interrupt Key and Indicator 31 Energy Saver Key and Indicator 32 Power Key and Indicator 33 Numeric Keys 34 Reset Key 35 Stop/clear Key 36 Start Key and Indicator 37 Main - Kyocera KM-2550 | Basic Guide - Page 31
Parts Message Display The message display indicates the operation status of the machine. Copier Basic Screen The following screen displays when the Copier key is pressed. 1 Ready to copy. Auto 3 100% Auto 4 , and the selected cassette. Number of copies selected. BASIC OPERATION GUIDE 1-7 - Kyocera KM-2550 | Basic Guide - Page 32
following screen displays when the Printer key is pressed: 1 Ready 2 GO 3 CANCEL 4 MENU Reference number 1 2 3 4 Meaning Indicates the current status of the machine. Select to switch between online and offline, to print/resume printing, to clear a specific error, and to cancel the currently - Kyocera KM-2550 | Basic Guide - Page 33
2 Preparation This chapter explains the following topics: • Loading Paper 2-2 • Connection 2-10 • Switching Power On 2-12 • Network Settings 2-13 • Setting the Date and Time 2-16 • Setting the Language 2-18 • Other Settings 2-18 BASIC OPERATION GUIDE 2-1 - Kyocera KM-2550 | Basic Guide - Page 34
of media that can be used, refer to Appendix, Advanced Operation Guide. Prepare the Paper After removing paper from the packaging, fan through the its package under high temperature and high humidity conditions may lead to problems caused by ambient moisture. After loading paper into a Cassette or - Kyocera KM-2550 | Basic Guide - Page 35
IMPORTANT: When pulling the cassette out of the machine, ensure it is supported and does not fall out. NOTE: Pull out one cassette at Base Plate. Preparation 3 Using the Paper Width Adjusting Tab, adjust the width guides to the paper size required. NOTE: The paper sizes are marked on the cassette - Kyocera KM-2550 | Basic Guide - Page 36
marked on the cassette. 5 Load the paper in the cassette, the leading edge must be aligned against the Paper Length Guide. IMPORTANT: Always adjust the paper length and width guides before loading paper to avoid skewed paper feed and/or a paper jam. Ensure the paper is placed securely against the - Kyocera KM-2550 | Basic Guide - Page 37
80 g/m²) Thin and Thick Paper 50 sheets to 5 sheets (45 to 160 g/m²) (depending on paper size and thickness) Postcard 10 sheets Transparencies 1 sheet A3, B4, Folio, 11 × 17" (Ledger), 8 1/ 25 sheets 2 × 14" (Legal), Type, on page 2-7. 1 Open the Multi-Bypass Tray. BASIC OPERATION GUIDE 2-5 - Kyocera KM-2550 | Basic Guide - Page 38
flip it open. 2 Adjust the Insert Guides to fit the width of the paper. 3 Slide the paper along the Insert Guides and into the tray as far as it will go. Ensure the Insert Guides are flush against the edge of the the side to be copied or printed onto is facing down. 2-6 BASIC OPERATION GUIDE - Kyocera KM-2550 | Basic Guide - Page 39
Preparation Multi-Bypass Tray Size and Type Use the following instructions to set the paper size and type prior to using the Multi-Bypass Tray. Paper Size: Input Size The Bypass Paper Type screen displays. Select the Paper Type required using the instructions on page 2-9. BASIC OPERATION GUIDE 2-7 - Kyocera KM-2550 | Basic Guide - Page 40
, B5R, B5, A5R, B6R, A6R, HAGAKI, Folio, Executive, ISO B5, Envelope DL, Envelope C5, Envelope C4, Comm. #10, Comm. #9, Comm. #6-3/4, Monarch • Metric Specification - 11 × 17" (Ledger), 8 1/2 × 14" (Legal), 8 1/2 the Paper Type required using the instructions on page 2-9. 2-8 BASIC OPERATION GUIDE - Kyocera KM-2550 | Basic Guide - Page 41
Bypass Paper Type screen displays. Select the Paper Type required using the instructions on page 2-9. Paper Type The following paper types are available: • . Bypass Paper type: * Plain Transparency Press [Enter]. The Copier Basic Preprinted screen returns. BASIC OPERATION GUIDE 2-9 - Kyocera KM-2550 | Basic Guide - Page 42
to a computer through a network, parallel or USB interface. Connecting to a Network To connect the machine to a network, use a network cable (10Base-T or 100Base-TX). 1 Open the main power switch cover on the right side of the machine and press the Power Switch to Off ({), then remove the power cord - Kyocera KM-2550 | Basic Guide - Page 43
and remove the power cord from the outlet before connecting the printer cable. Ensure your computer is also switched off. 1 Open the main power switch cover on the right side of the machine and press the Power Switch to Off ({), then remove the power cord from the outlet. 2 Connect the printer cable - Kyocera KM-2550 | Basic Guide - Page 44
Preparation Connecting to Power 1 Connect the power cord to the Power Cord Connector on the right side of the machine. 2 Connect the other end of the power cord to a power outlet. Switching Power On Open the main power switch cover on the right side of the machine and press the Power Switch to On ( - Kyocera KM-2550 | Basic Guide - Page 45
when DHCP is Off and TCP/IP is On. Refer to Chapter 2, Advanced Operation Guide for details. NOTE: Any changes made to network settings become valid after you power the machine off and on again. 1 Press [Printer]. 2 Press S or T to select MENU and press [Enter]. Ready GO CANCEL MENU 3 Press S or - Kyocera KM-2550 | Basic Guide - Page 46
in the highlighted area and press [#]. 0. 0. 0. 0 9 Enter the next segment and press [#]. IP Address Enter the remaining segments using the same procedure. 10 . 0 . 0 . 0 Press [Enter] when the entire address has been entered. Subnet Mask Setting Continue from the previous Step 9 to register - Kyocera KM-2550 | Basic Guide - Page 47
address using Gateway the same procedure used for the IP Address in steps 8 - 9 of IP Address Setting. 0. 0. 0. 0 Press [Enter] when the entire address has been entered. 4 When you have entered all the network settings, press [Reset]. The Printer Basic screen displays. BASIC OPERATION GUIDE - Kyocera KM-2550 | Basic Guide - Page 48
/ Counter]. 2 Press S or T to select Machine default and press [Enter]. System Menu / Counter: Job Accounting Copy Default Machine Default 3 Use the keypad to enter the 4 digit Enter Pin Code using # key. management code. NOTE: The factory default management code varies for each model: 16 ppm - Kyocera KM-2550 | Basic Guide - Page 49
Preparation 6 7 8 9 10 11 12 Press S or T to select Time. Press the < key or the > key to set the current time. Date/Time: entered, press S or T to select End and press [Enter]. Date/Time: End Time DST : 06:33 : Off Press [Reset]. The Copier Basic screen displays. BASIC OPERATION GUIDE 2-17 - Kyocera KM-2550 | Basic Guide - Page 50
and Japanese ( ) • Metric Specification - English, German (Deutsch), French (Français), Spanish (Español), and Italian (Italiano) For details refer to Chapter 3, Advanced Operation Guide. Various default settings on the machine can be adjusted to your preference. For information about adjustable - Kyocera KM-2550 | Basic Guide - Page 51
This chapter contains explanations on the following topics: • Basic Copying Procedure 3-2 • Making Zoom Copies 3-5 • Duplex Mode 3-9 • Split Mode 3-12 • Sort Mode 3-14 • Interrupt Mode 3-15 • Low Power Mode 3-18 • Auto Sleep Mode 3-19 • Basic Printing Procedure 3-20 Refer to the Advanced - Kyocera KM-2550 | Basic Guide - Page 52
cover on the right side of the machine and press the Power Switch to On ( | ). At the end of warm-up, the . NOTE: To disable the Auto Paper Selection function. Refer to Chapter 3, Advanced Operation Guide. You can specify which cassette will be automatically selected. For details, refer to Chapter - Kyocera KM-2550 | Basic Guide - Page 53
. You can also select which Image Quality mode will be the default setting in the initial mode, refer to Chapter 3, Advanced Operation Guide for details. 5 Copy Exposure can be adjusted automatically or manually. Press [Auto Exposure] to allow the machine to select the optimal exposure setting for - Kyocera KM-2550 | Basic Guide - Page 54
paper (80 g/m²). The capacity varies depending on the paper used. CAUTION: If the optional Fax kit is installed and the machine is not being used for a short period of time (overnight, etc.) switch off the main power ({). If it is not being used for an extended period of time (vacations, etc - Kyocera KM-2550 | Basic Guide - Page 55
% (8.5 × 14 Æ 11 × 17), 78 % (8.5 × 14 Æ 8.5 × 11), 77 % (11 × 17 Æ 8.5 × 14), 64 % (11 × 17 Æ 8.5 × 11), 50 % (11 × 17 Æ 5.5 × 8.5) • Metric Specification: 200 % (A5 Æ A3), 5 1/2 × 8 1/2": 64 % A5: 70 % NOTE: To set the Auto Zoom mode as the default mode when a cassette is selected, - Kyocera KM-2550 | Basic Guide - Page 56
required. The zoom ratio displays on the screen. 3 Press [Start]. The original is copied and automatically resized to fit on the selected paper. 3-6 BASIC OPERATION GUIDE - Kyocera KM-2550 | Basic Guide - Page 57
: The zoom ratio displays. Press [Enter]. 118% 3 Press [Start]. Copies are delivered to the Output Tray. 121%:8.5x14 11x17 100%: 78%:8.5x14 8.5x11 BASIC OPERATION GUIDE 3-7 - Kyocera KM-2550 | Basic Guide - Page 58
%: 100% 78%:8.5x14 8.5x11 The zoom ratio displays. Ready to copy. Auto 121% Auto 1 3 Press [Start]. Copies are delivered to the Output Tray. 3-8 BASIC OPERATION GUIDE - Kyocera KM-2550 | Basic Guide - Page 59
Mode If the optional Duplex Unit is installed, two-sided copies can be produced from one or two sided originals. Basic Operation Original The following Duplex Modes are available: Copy Mode 1 sided ¼ 2 sided def abc A ghi abc B ghi abc def def Originals Copy BASIC OPERATION GUIDE 3-9 - Kyocera KM-2550 | Basic Guide - Page 60
paper size can be changed and the zoom ratio adjusted to fit the size of the paper. 1 Position the original and press [Duplex/Split Page]. 2 Press S or T to select the Duplex Mode required and press [Enter]. Duplex/Split Page: 1 sided 2 sided 2 sided 2 sided Book 2-sided 3-10 BASIC OPERATION - Kyocera KM-2550 | Basic Guide - Page 61
automatically. If using the platen, a message displays when the next original is required. Position the next original and press [Start]. When all originals have been scanned, press [Enter]. BASIC OPERATION GUIDE 3-11 - Kyocera KM-2550 | Basic Guide - Page 62
180 degrees to ensure correct orientation on output copies. One-sided copies are produced from a double-page spread original, for example a magazine or book. 1 2 1 2 NOTE: The original sizes that can be used are A3, B4, A4R, B5R, A5R, 11 × 17" (Ledger) and 8 1/2 × 11" (Letter). The paper sizes - Kyocera KM-2550 | Basic Guide - Page 63
2 Press S or T to select the Split Mode required and press [Enter]. Duplex/Split Page: BooK 2-sided 2 sided 1 sided Book 1-sided If [2 sided ¼ 1 sided] is selected, press S or T to next original and press [Start]. When all originals have been scanned, press [Enter]. BASIC OPERATION GUIDE 3-13 - Kyocera KM-2550 | Basic Guide - Page 64
number of originals which can be scanned depends on the machine's available memory. ! Original ! ! ! Copy NOTE: If the optional Document Processor is installed, Sort mode can be set as default. For details refer to Chapter 3, Advanced Operation Guide. 1 Position the original and press - Kyocera KM-2550 | Basic Guide - Page 65
a copy job which is currently scanning to make copies of a different original fax functions, the optional Fax Kit must be installed. Interrupting Copying 1 Press [Interrupt]. An Interrupt mode OK message displays. 2 Remove and store the original for the current copying job. BASIC OPERATION GUIDE - Kyocera KM-2550 | Basic Guide - Page 66
the data received by the machine. If print data is received the Priority:Printer option displays. If fax data is received the Priority:Fax option displays. NOTE: If no data is received, there are no options available and the machine assumes you are performing a copying job. BASIC OPERATION GUIDE - Kyocera KM-2550 | Basic Guide - Page 67
3 If Priority:Printer or Priority:Fax is selected the output prints automatically. To perform a copying job, position the original, select the functions required and press [Start]. 4 When the interrupt job completes, press [Interrupt]. The interrupted job resumes. BASIC OPERATION GUIDE 3-17 - Kyocera KM-2550 | Basic Guide - Page 68
time before copies can be made is 10 seconds. NOTE: In Low Power mode, if the machine receives print or fax data it will automatically engage and output the data. Auto Low Power The Auto Low Power function automatically puts this machine into the lower power mode if no operation has been performed - Kyocera KM-2550 | Basic Guide - Page 69
been performed for a preset period of time. The factory default setting is 30 minutes (16 and 20 ppm Guide. It is possible to engage Auto Sleep mode manually: 1 Press [Power]. Auto Sleep mode engages immediately. Only the Main Power indicator is lit, all other indicators are off. Consumed power - Kyocera KM-2550 | Basic Guide - Page 70
the power cord are connected correctly. Installing the Printer Driver To use the printer function of your machine, the printer driver software must be installed in your computer. For information on how to install the printer driver software, refer to the KX Printer Drivers Operation Guide. Printing - Kyocera KM-2550 | Basic Guide - Page 71
Basic Operation 5 To start printing, click [OK]. NOTE: For information on how to use the printer driver software, refer to the KX Printer Driver Operation Guide. BASIC OPERATION GUIDE 3-21 - Kyocera KM-2550 | Basic Guide - Page 72
Basic Operation 3-22 BASIC OPERATION GUIDE - Kyocera KM-2550 | Basic Guide - Page 73
use with your machine • Optional Equipment Overview 4-2 • Document Processor 4-3 • Paper Feeder 4-7 • Duplex Unit 4-8 • Finisher 4-8 • Job Separator 4-12 • Key Counter 4-13 • Fax Kit 4-14 • Network Scanner Kit 4-14 • Memory Card (CompactFlash 4-14 • Hard Disk 4-15 • Expansion Memory 4-15 - Kyocera KM-2550 | Basic Guide - Page 74
your machine. Document Processor page 4-3 Expansion Memory page 4-15 Hard Disk page 4-15 Duplex Unit page 4-8 Finisher page 4-8 Job Separator page 4-12 4-2 Key Counter page 4-13 Fax Kit page 4-14 Network Scanner Kit page 4-14 Paper Feeder page 4-7 Memory Card (CompactFlash) page 4-14 BASIC - Kyocera KM-2550 | Basic Guide - Page 75
multiple originals one by one. Two-sided originals are automatically turned to enable both sides to be scanned. Optional Equipment Acceptable Originals • Use sheet originals only • Paper weight: - One-sided originals: before loading them in the Document Processor. BASIC OPERATION GUIDE 4-3 - Kyocera KM-2550 | Basic Guide - Page 76
. IMPORTANT: Ensure the Document Processor is closed whenever transporting the machine. Placing Originals in the Document Processor 1 Adjust the original insert guides to fit the width of the original(s). IMPORTANT: To prevent jams, remove any originals remaining on the Original Eject Table and - Kyocera KM-2550 | Basic Guide - Page 77
as far as they will go. IMPORTANT: To avoid jams, ensure originals do not exceed the level indicator on the inside of the rear insert guide. Optional Equipment 3 To ensure originals delivered to the Eject Table do not fall out, open the Ejection Extension when using larger sized originals such as - Kyocera KM-2550 | Basic Guide - Page 78
when the Document Processor is opened. Shadows may appear around the edges and up the middle of copies made from open-faced originals such as books. IMPORTANT: Do not put undue pressure on the platen when closing the Document Processor WARNING: Do not leave the Document Processor open as there is - Kyocera KM-2550 | Basic Guide - Page 79
Equipment A Paper Feeder with additional cassettes can be added below the standard cassette(s). • Cassette capacity: 300 sheets of standard paper (64 to 105 g/m²). • Paper sizes: A3, B4, A4, A4R, B5, B5R, A5R, Folio, 11 × 17" (Ledger to pick up or transport the machine. BASIC OPERATION GUIDE 4-7 - Kyocera KM-2550 | Basic Guide - Page 80
Two-sided copies can be made if the duplex unit is installed. Twosided copies of sizes from A3 to A5R, Folio, 11 × II)) Names of Parts 1 Finisher Tray 2 Process Tray 3 Process Tray Extension 4 Finisher Tray Extension 5 Paper Output Guide 1 6 Paper Output Guide 2 541 6 23 4-8 BASIC OPERATION - Kyocera KM-2550 | Basic Guide - Page 81
Equipment Adjust the Finisher Tray Extension to accommodate the size of paper. Paper sizes are marked on the Finisher Tray Extension. Open Paper Output Guide 1 or 2, depending on the paper size. When stapling large paper such as A3, B4, 11 × 17" (Ledger) and 8 1/2 × 14" (Legal), open the Process - Kyocera KM-2550 | Basic Guide - Page 82
from the staple holder. 4 Insert the new staple cartridge into the holder. The arrow on the staple cartridge indicates the correct insertion direction. Push the staple cartridge right into the holder and pull the paper tape from around the staple cartridge to remove it. 4-10 BASIC OPERATION GUIDE - Kyocera KM-2550 | Basic Guide - Page 83
5 Insert the Staple Holder back into the stapler unit. The holder should click into place when inserted correctly. 6 Close the Stapler Front Cover. Clearing a Staple Jam 1 Remove the Staple Holder, refer to Adding Staples, on page 4-10. Using Knob A on the Staple Holder face plate, raise the plate. - Kyocera KM-2550 | Basic Guide - Page 84
the Job Separator tray. To deliver output to the Job Separator tray, change the Machine Default settings for copies and the Paper Settings for prints. For details, refer to Chapters 2 and 3, Advanced Operation Guide, Remove paper from the Job Separator tray at an angle to avoid damaging the output - Kyocera KM-2550 | Basic Guide - Page 85
Key Counter The Key Counter option is used to monitor the amount of copier usage. It can track copier usage for each department, section and for the overall company. Optional Equipment Inserting the copies can only be made when the Key Counter is secured in the slot. BASIC OPERATION GUIDE 4-13 - Kyocera KM-2550 | Basic Guide - Page 86
and received via a computer. For details, refer to the Operation Guide for the Fax kit. Network Scanner Kit If the Network Scanner kit is installed the machine can be used for network scanning, For details, refer to the Operation Guide for the Network Scanner kit. Memory Card (CompactFlash - Kyocera KM-2550 | Basic Guide - Page 87
when copying from originals with photos, due to their normally low compression ratio. Memory Available: • For copier: 16 MB, 32 MB, 64 MB, 128 MB • For printer: 32 MB, 64 MB, 128 MB, 256 MB Number of originals that can be scanned (A4 originals of 6 % coverage, Text + Photo mode): 16 MB 32 MB - Kyocera KM-2550 | Basic Guide - Page 88
Optional Equipment 4-16 BASIC OPERATION GUIDE - Kyocera KM-2550 | Basic Guide - Page 89
5 Maintenance This chapter explains the following topics: • Cleaning the Machine 5-2 • Replacing the Toner Container and Waste Toner Box.. 5-5 BASIC OPERATION GUIDE 5-1 - Kyocera KM-2550 | Basic Guide - Page 90
Maintenance Cleaning the Machine CAUTION: For safety purposes, always remove the power plug from the outlet when cleaning the machine. Cleaning your machine regularly will ensure optimum : Never use water, A thinner or other organic solvents to clean the slit glass. 5-2 BASIC OPERATION GUIDE - Kyocera KM-2550 | Basic Guide - Page 91
separation needles by moving the brush from left to right along the needle, as shown in the illustration. 4 Close the Left Cover. Maintenance BASIC OPERATION GUIDE 5-3 - Kyocera KM-2550 | Basic Guide - Page 92
in the illustration, move the brush from left to right along the roller to remove any dirt or dust. 4 Close the Left Cover. 5-4 BASIC OPERATION GUIDE - Kyocera KM-2550 | Basic Guide - Page 93
Maintenance Replacing the Toner Container and Waste Toner Box If Unable to Copy. Please Add Toner displays, replace the Toner Container and Waste Toner Box. Set toner container. Please Add Toner Auto Only add toner when this 100% message displays. 10 Also, perform the appropriate cleaning - Kyocera KM-2550 | Basic Guide - Page 94
Release Lever (A) to the left and pull out A the Toner Container. 5 Place the used Toner Container and the used Waste Toner Box in the plastic bags provided for disposal. 6 Hold the charger cleaner rod . 7 Remove the Grid Cleaner from its packaging and remove the cap. 5-6 BASIC OPERATION GUIDE - Kyocera KM-2550 | Basic Guide - Page 95
in again after moving it back and forth several times. 10 Remove the Grid Cleaner and close the cap. IMPORTANT: After Toner Container several times and then shake the container horizontally approximately 10 times to distribute the toner evenly. 12 Install the new Toner Container and turn the Toner - Kyocera KM-2550 | Basic Guide - Page 96
Maintenance 13 Install the new Waste Toner Box. 14 Close the Front Cover. NOTE: After use, always dispose of the Toner Container and Waste Toner Box in accordance with local rules and regulations. 5-8 BASIC OPERATION GUIDE - Kyocera KM-2550 | Basic Guide - Page 97
6 Troubleshooting This chapter explains the following topics: • Problem Solving 6-2 • Error Messages and Correction 6-5 • Paper Jams 6-10 BASIC OPERATION GUIDE 6-1 - Kyocera KM-2550 | Basic Guide - Page 98
the following pages. If the problem persists, contact your Service Representative or Authorized Service Center. Problem Checkpoint Procedure Nothing lights on the operation panel when the power switch is turned on. Is the power plug connected to an AC outlet? Connect the plug to an AC outlet - Kyocera KM-2550 | Basic Guide - Page 99
Troubleshooting Problem Checkpoint The copies come out too Is the copier in Auto dark. Exposure Adjustment mode? Procedure In order to adjust the overall exposure level, perform the Auto Exposure Adjustment procedure. Is the manual exposure mode set? Use the Image Quality key to adjust the - Kyocera KM-2550 | Basic Guide - Page 100
proper printer cable Connect a shielded type printer cable. not printed. connected? Printing is not performed Is the setting on the properly. computer correct? Check the setting of the printer driver or the application software. Reference page page 5-2 Chapter 3, Advanced Operation Guide page - Kyocera KM-2550 | Basic Guide - Page 101
Troubleshooting Error Source required and press [Enter]. • If you press [Printer], the following messages display: - GO: Prints onto the code. Use the Department Management mode to reset the copy count. The Toner Container is not installed correctly. Install the Toner Container correctly. Toner - Kyocera KM-2550 | Basic Guide - Page 102
and then close it. If the message displays again, press [Stop/Clear] and check the number. Switch off the main power ({) and contact your Service Representative or Authorized Service Center. Time for maintenance Periodic maintenance is required to keep the machine in good condition. Contact your - Kyocera KM-2550 | Basic Guide - Page 103
used, reduce the RAM disk size. If this error occurs regularly, additional printer memory is recommended. To add printer memory, contact your Service Representative or Authorized Service Center. For details, refer to Chapter 2, Advanced Operation Guide. If the Auto Continue setting has been enabled - Kyocera KM-2550 | Basic Guide - Page 104
Troubleshooting Message Procedure Remove paper from computer. • Wait over five seconds and then switch on the main power ( | ). The error is cleared. If necessary, resubmit the print job. RAM disk error Press GO An error has occurred in writing to or reading from the RAM disk. • Press [Printer - Kyocera KM-2550 | Basic Guide - Page 105
is currently being used. Wait for a while - and retry. Checksum Error The machine has detected an error at startup. - Switch off the main power and then switch on again. If the same message appears, contact your Service Representative or Authorized Service Center. BASIC OPERATION GUIDE 6-9 - Kyocera KM-2550 | Basic Guide - Page 106
Troubleshooting Paper Jams If a paper jam occurs, a message displays and copying or printing Paper misfeed in cassette 1. stops. Remove paper. A message indicating the jammed JAM11 area and instructions for clearance displays. Jam location indicators also display. Leave the main power - Kyocera KM-2550 | Basic Guide - Page 107
Troubleshooting WARNING: High voltage is present in the charger section. Take sufficient care when working in this area, as there is a danger of electrical shock. CAUTION: The fixing unit is extremely hot. Take removal, remove any loose scraps from inside the machine. BASIC OPERATION GUIDE 6-11 - Kyocera KM-2550 | Basic Guide - Page 108
Troubleshooting 3 Push the cassette back in firmly. NOTE: If JAM21 displays, remove the jammed paper. For further information refer to Left Cover, on are included in the optional Paper Feeder. 1 Open the left cover for the cassette being used. 2 Remove jammed paper. 6-12 BASIC OPERATION GUIDE - Kyocera KM-2550 | Basic Guide - Page 109
Troubleshooting NOTE: If the paper tears during removal, remove any loose scraps from inside the machine. 3 Close the left cover of the cassette. 4 : If the paper tears during removal, remove any loose scraps from inside the machine. 6 Push the cassette back in firmly. BASIC OPERATION GUIDE 6-13 - Kyocera KM-2550 | Basic Guide - Page 110
Troubleshooting Reload the paper in the MultiBypass Tray. The error message clears. Left Cover If a jam occurs remove paper. JAM30 IMPORTANT: The drum section is sensitive to scratches and contaminants Cover. CAUTION: The fixing unit is extremely hot. Take sufficient care when working in - Kyocera KM-2550 | Basic Guide - Page 111
Troubleshooting NOTE: If the paper tears, remove any loose scraps from inside the machine. 3 If the optional Duplex Unit is installed, raise the Duplex Unit Paper misfeed in Eject Section Remove paper. JAM50 IMPORTANT: The drum section is sensitive to scratches and contaminants. When removing paper - Kyocera KM-2550 | Basic Guide - Page 112
Troubleshooting 1 If jammed paper shows through the Paper Output Slot, pull it out to remove it. NOTE: If the paper tears, remove any loose 3 Remove any jammed paper. NOTE: If the paper tears, remove any loose scraps from inside the machine. 4 Close the Left Cover. 6-16 BASIC OPERATION GUIDE - Kyocera KM-2550 | Basic Guide - Page 113
Troubleshooting Optional Document Processor If a paper jam occurs in the optional Document Processor, perform the following procedure Processor. Failure to do so may cause another paper jam later. 4 Raise the Paper Feed Unit (A) A and remove any jammed originals. BASIC OPERATION GUIDE 6-17 - Kyocera KM-2550 | Basic Guide - Page 114
Troubleshooting 5 Turn the dial as shown in the illustration to remove the jammed original. the jammed paper. Paper misfeed in Finisher,lower Process Tray and remove paper. JAM80 IMPORTANT: The drum section is sensitive to scratches and contaminants. When removing paper, be careful not to touch or - Kyocera KM-2550 | Basic Guide - Page 115
3 Raise the Process Tray. Troubleshooting 4 Remove the Finisher Tray. 5 Pull up the Left Cover handle and open the Left Cover. 6 Remove any jammed paper. NOTE: If the paper tears, remove any loose scraps from inside the machine. BASIC OPERATION GUIDE 6-19 - Kyocera KM-2550 | Basic Guide - Page 116
Troubleshooting 7 Close the Left Cover. 8 Reattach the Finisher Tray. 9 Lower the Process Tray. The error message clears. Optional Job Separator If a paper jam occurs in the optional Job Separator, perform the following procedure to remove the jammed paper. Paper misfeed - Kyocera KM-2550 | Basic Guide - Page 117
2 Pull up the Left Cover handle and open the Left Cover. Troubleshooting 3 Remove any jammed paper. NOTE: If the paper tears, remove any loose scraps from inside the machine. 4 Close the Left Cover. BASIC OPERATION GUIDE 6-21 - Kyocera KM-2550 | Basic Guide - Page 118
Troubleshooting 6-22 BASIC OPERATION GUIDE - Kyocera KM-2550 | Basic Guide - Page 119
Appendix The Appendix contains the following specifications: • Machine Appendix-2 • Copier Appendix-4 • Printer Appendix-5 • Document Processor (Option Appendix-5 • Paper Feeder (Option Appendix-5 • Duplex Unit (Option Appendix-6 • Finisher (Option Appendix-6 • Job Separator (Option Appendix - Kyocera KM-2550 | Basic Guide - Page 120
seconds Time for recovery from Low Power mode: 10 seconds Time for recovery from Sleep Mode: 20 seconds (At room temperature: around 73.4 °F (23 °C), humidity: around 50 %) 64 MB 64 MB For copier: 16 MB, 32 MB, 64 MB, and 128 MB For printer: 32 MB, 64 MB, 128 MB, and 256 MB 10 to 32.5 °C 15 to 80 - Kyocera KM-2550 | Basic Guide - Page 121
16 ppm model: Approx 92.4lbs/42kg 20/25 ppm model: Approx107.8lbs/49kg 70 dB(A) 32 9/16 × 23 3/8" 827 × 593 mm Appendix BASIC OPERATION GUIDE Appendix-3 - Kyocera KM-2550 | Basic Guide - Page 122
Copier minute A5R: 10 sheets/minute A6R: 10 sheets/minute 20 ppm model A3/11 × 17" (Ledger): 10 sheets/minute sheets/minute B5R: 13 sheets/minute A5R: 10 sheets/minute A6R: 10 sheets/minute 25 ppm model A3/11 × 17 seconds or less (1:1, A4/11 × 8 1/2") Scanning: 600 × 600 dpi Printing: 600 × 600 - Kyocera KM-2550 | Basic Guide - Page 123
1200 mode Microsoft Windows 95/98/Me Microsoft Windows NT4.x/2000/XP Apple Macintosh OS 9.x/OS X 10.x UNIX/Linux Parallel 1/2 × 11" (Letter), 5 1/2 × 8 1/2" (Statement), 8 1/2 × 13" (Oficio II) Weight: 64 to 105 g/m² Types: Standard paper, recycled paper, and color paper 22 7/16 × 21 3/16 × 5 5/16 - Kyocera KM-2550 | Basic Guide - Page 124
Duplex Unit (Option) System Paper Sizes Acceptable Paper Dimensions (W) × (D) × (H) Weight Internal type A3, B4, A4, A4R, B5, B5R, A5R, Folio, 11 × 17" (Ledger), 8 1/2 × 14" (Legal), 11 × 8 1/2", 8 1/2 × 11" (Letter), 5 1/2 × 8 1/2" (Statement), 8 1/2 × 13" (Oficio II) Weight: 64 OPERATION GUIDE - Kyocera KM-2550 | Basic Guide - Page 125
Appendix Environmental Specifications Recovery time from Low Power mode Transition time to Low Power mode (at time of purchase) Transition time to Auto Sleep mode (at time of purchase) Duplex (2-sided) Copying Paper Feed 10 seconds 15 minutes 30 minutes (16 and 20 ppm models) 45 minutes (25 ppm - Kyocera KM-2550 | Basic Guide - Page 126
Appendix Appendix-8 BASIC OPERATION GUIDE - Kyocera KM-2550 | Basic Guide - Page 127
Default gateway 2-15 Disconnecting power Legal and Safety-xv Document processor 4-3, 6-17, Appendix-5 Document processor parts 4-4 Document Processor Specifications Appendix-5 Duplex mode Legal and Safety-v, 3-9 Duplex unit 4-8, Appendix-6 Duplex unit specifications Appendix-6 BASIC OPERATION GUIDE - Kyocera KM-2550 | Basic Guide - Page 128
3-3 Text+Photo mode 3-3 Insert guides 1-2, 2-6 Installation precautions Legal and Safety-ix Installing the printer driver 3-20 Interrupt mode 3-15 IP address setting 2-13 Isolation device Legal and Safety-xv J Jam clearance 6-10 Jam location indicators 6-10 Job accounting mode Legal and Safety-ii - Kyocera KM-2550 | Basic Guide - Page 129
2-10 Network interface connector 1-4 Network scanner kit 4-14 Network Settings 2-13 Default gateway 2-15 IP address 2-13 Subnet mask 2-14 O Offset mode Legal and Safety-i On 2-12 Operation panel 1-2, 1-5 Optional equipment 4-1 Document processor 4-3 Duplex unit 4-8 Expansion memory 4-15 Fax kit - Kyocera KM-2550 | Basic Guide - Page 130
3-14 Specifications Appendix-2 Copier Appendix-4 Document processor Appendix-5 Duplex unit Appendix-6 Environmental Appendix-7 Finisher Appendix-6 Job separator Appendix-6 Machine Appendix-2 Paper feeder Appendix-5 Printer Appendix-5 Split mode 3-12 Staple jam 4-11 Stapling 4-10, 4-11 Subnet mask - Kyocera KM-2550 | Basic Guide - Page 131
MEMO - Kyocera KM-2550 | Basic Guide - Page 132
For best print results and machine performance, we recommend that you use only KYOCERA MITA original supplies for your KYOCERA MITA products. E1 - Kyocera KM-2550 | Basic Guide - Page 133
- Kyocera KM-2550 | Basic Guide - Page 134
2004.7
-
 1
1 -
 2
2 -
 3
3 -
 4
4 -
 5
5 -
 6
6 -
 7
7 -
8
-
9
-
10
-
11
-
12
-
13
-
14
-
15
-
16
-
17
-
18
-
19
-
20
-
21
-
22
-
23
-
24
-
25
-
26
-
27
-
28
-
29
-
30
-
31
-
32
-
33
-
34
-
35
-
36
-
37
-
38
-
39
-
40
-
41
-
42
-
43
-
44
-
45
-
46
-
47
-
48
-
49
-
50
-
51
-
52
-
53
-
54
-
55
-
56
-
57
-
58
-
59
-
60
-
61
-
62
-
63
-
64
-
65
-
66
-
67
-
68
-
69
-
70
-
71
-
72
-
73
-
74
-
75
-
76
-
77
-
78
-
79
-
80
-
81
-
82
-
83
-
84
-
85
-
86
-
87
-
88
-
89
-
90
-
91
-
92
-
93
-
94
-
95
-
96
-
97
-
98
-
99
-
100
-
101
-
102
-
103
-
104
-
105
-
106
-
107
-
108
-
109
-
110
-
111
-
112
-
113
-
114
-
115
-
116
-
117
-
118
-
119
-
120
-
121
-
122
-
123
-
124
-
125
-
126
-
127
-
128
-
129
-
130
-
131
-
132
-
133
-
134
 |
 |
KM-1650
KM-2050
KM-2550
Basic Operation Guide
Please read the Operation Guide before using this machine. Keep it close to the machine fore easy reference.