Kyocera KM-2550 Basic Guide - Page 45
Network Settings, IP Address Setting
 |
View all Kyocera KM-2550 manuals
Add to My Manuals
Save this manual to your list of manuals |
Page 45 highlights
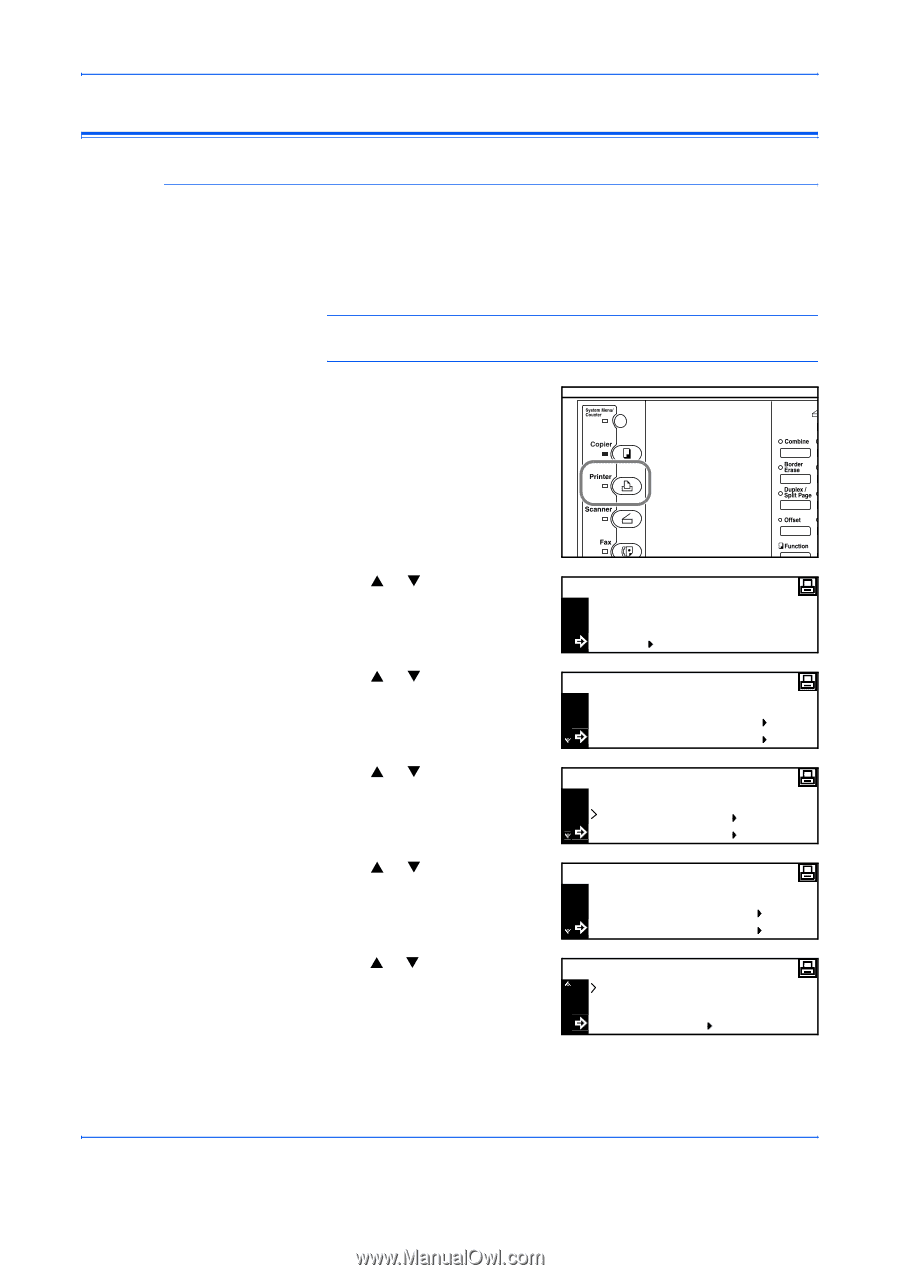
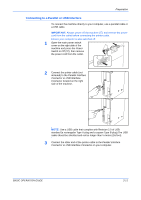
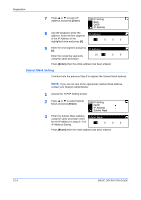
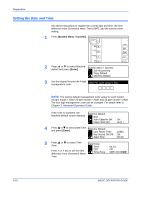
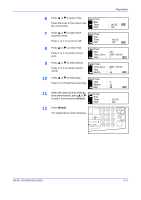
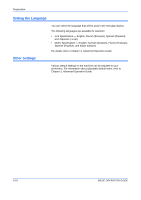
Preparation Network Settings IP Address Setting Use the following procedure to register an IP Address to the machine. Check with your network administrator before performing this procedure. The following procedure applies when DHCP is Off and TCP/IP is On. Refer to Chapter 2, Advanced Operation Guide for details. NOTE: Any changes made to network settings become valid after you power the machine off and on again. 1 Press [Printer]. 2 Press S or T to select MENU and press [Enter]. Ready GO CANCEL MENU 3 Press S or T to select Interface and press [Enter]. Menu Back Print Status Page Interface 4 Press S or T to select Network and press [Enter]. Interface Back Parallel Network 5 Press S or T to select TCP/IP and press [Enter]. Network Setting Back NetWare TCP/IP 6 Press S or T to select Change # and press [Enter]. TCP/IP On Off Change # BASIC OPERATION GUIDE 2-13
-
 1
1 -
2
-
3
-
4
-
5
-
6
-
7
-
8
-
9
-
10
-
11
-
12
-
13
-
14
-
15
-
16
-
17
-
18
-
19
-
20
-
21
-
22
-
23
-
24
-
25
-
26
-
27
-
28
-
29
-
30
-
31
-
32
-
33
-
34
-
35
-
36
-
37
-
38
-
39
-
 40
40 -
 41
41 -
 42
42 -
 43
43 -
 44
44 -
 45
45 -
 46
46 -
 47
47 -
 48
48 -
 49
49 -
 50
50 -
51
-
52
-
53
-
54
-
55
-
56
-
57
-
58
-
59
-
60
-
61
-
62
-
63
-
64
-
65
-
66
-
67
-
68
-
69
-
70
-
71
-
72
-
73
-
74
-
75
-
76
-
77
-
78
-
79
-
80
-
81
-
82
-
83
-
84
-
85
-
86
-
87
-
88
-
89
-
90
-
91
-
92
-
93
-
94
-
95
-
96
-
97
-
98
-
99
-
100
-
101
-
102
-
103
-
104
-
105
-
106
-
107
-
108
-
109
-
110
-
111
-
112
-
113
-
114
-
115
-
116
-
117
-
118
-
119
-
120
-
121
-
122
-
123
-
124
-
125
-
126
-
127
-
128
-
129
-
130
-
131
-
132
-
133
-
134
 |
 |