Lenovo NetVista A22 Hardware Maintenance Manual (HMM) for NetVista 2254, 2256, - Page 39
Installing a drive, Notes
 |
View all Lenovo NetVista A22 manuals
Add to My Manuals
Save this manual to your list of manuals |
Page 39 highlights
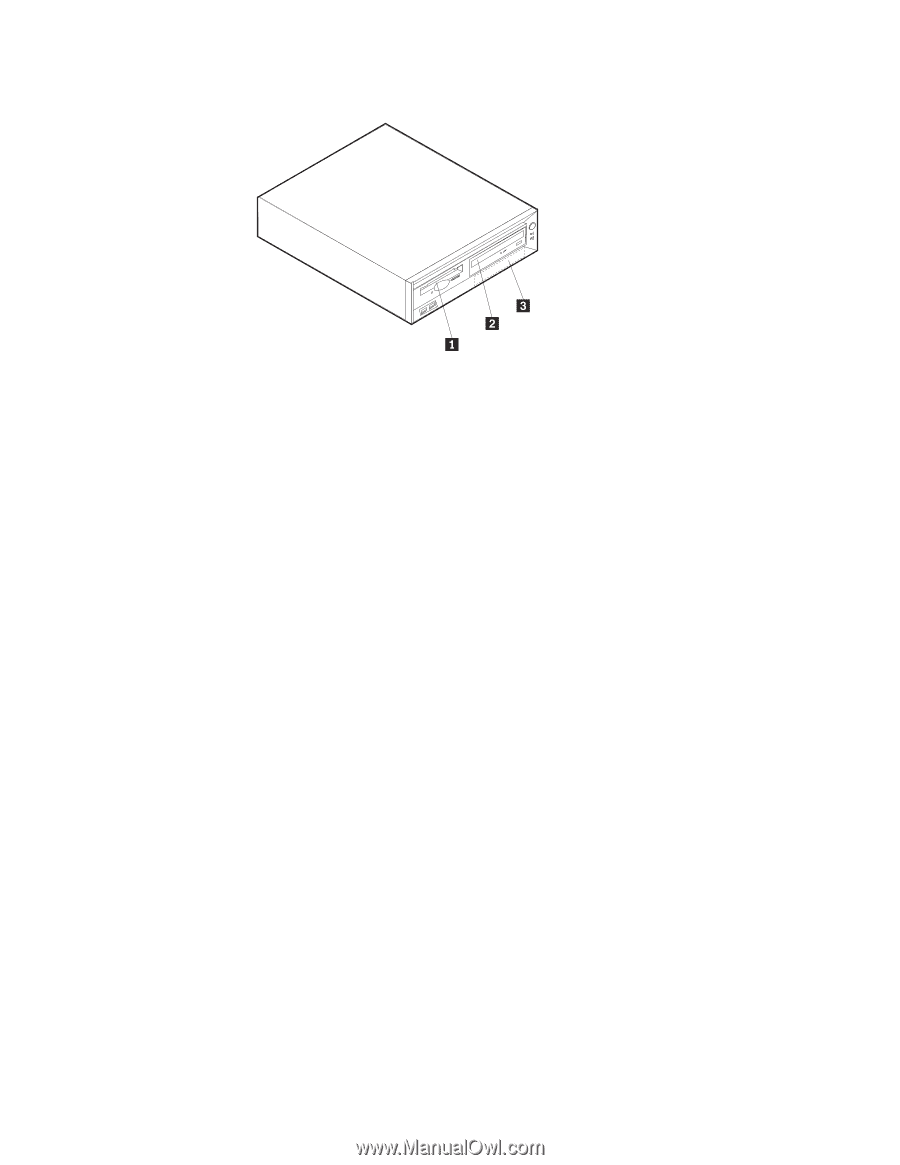
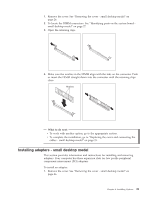
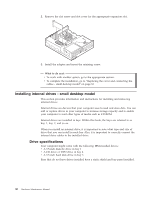
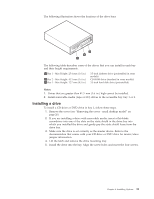
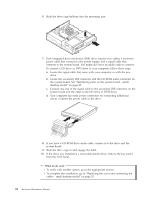
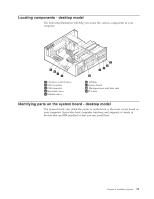
The following illustration shows the locations of the drive bays The following table describes some of the drives that you can install in each bay and their height requirements. 1 Bay 1 - Max Height: 25.4 mm (1.0 in.) 2 Bay 2 - Max Height: 41.3 mm (1.6 in.) 3 Bay 3 - Max Height: 12.7 mm (0.5 in.) 3.5-inch diskette drive (preinstalled in some models) CD-ROM drive (standard in some models) 3.5-inch hard disk drive (preinstalled) Notes: 1. Drives that are greater than 41.3 mm (1.6 in.) high cannot be installed. 2. Install removable media (tape or CD) drives in the accessible bay: bay 1 or 2. Installing a drive To install a CD drive or DVD drive in bay 2, follow these steps. 1. Remove the cover (see "Removing the cover - small desktop model" on page 26). 2. If you are installing a drive with removable media, insert a flat-blade screwdriver into one of the slots on the static shield in the drive bay into which you installed the drive and gently pry the static shield loose from the drive bay. 3. Make sure the drive is set correctly as the master device. Refer to the documentation that comes with your CD drive or DVD drive for master/slave jumper information. 4. Lift the latch and remove the drive mounting tray. 5. Install the drive into the bay. Align the screw holes and insert the four screws. Chapter 4. Installing Options 31
-
 1
1 -
2
-
3
-
4
-
5
-
6
-
7
-
8
-
9
-
10
-
11
-
12
-
13
-
14
-
15
-
16
-
17
-
18
-
19
-
20
-
21
-
22
-
23
-
24
-
25
-
26
-
27
-
28
-
29
-
30
-
31
-
32
-
33
-
 34
34 -
 35
35 -
 36
36 -
 37
37 -
 38
38 -
 39
39 -
 40
40 -
 41
41 -
 42
42 -
 43
43 -
 44
44 -
45
-
46
-
47
-
48
-
49
-
50
-
51
-
52
-
53
-
54
-
55
-
56
-
57
-
58
-
59
-
60
-
61
-
62
-
63
-
64
-
65
-
66
-
67
-
68
-
69
-
70
-
71
-
72
-
73
-
74
-
75
-
76
-
77
-
78
-
79
-
80
-
81
-
82
-
83
-
84
-
85
-
86
-
87
-
88
-
89
-
90
-
91
-
92
-
93
-
94
-
95
-
96
-
97
-
98
-
99
-
100
-
101
-
102
-
103
-
104
-
105
-
106
-
107
-
108
-
109
-
110
-
111
-
112
-
113
-
114
-
115
-
116
-
117
-
118
-
119
-
120
-
121
-
122
-
123
-
124
-
125
-
126
-
127
-
128
-
129
-
130
-
131
-
132
-
133
-
134
-
135
-
136
-
137
-
138
-
139
-
140
-
141
-
142
-
143
-
144
-
145
-
146
-
147
-
148
-
149
-
150
-
151
-
152
-
153
-
154
-
155
-
156
-
157
-
158
-
159
-
160
-
161
-
162
-
163
-
164
-
165
-
166
-
167
-
168
-
169
-
170
-
171
-
172
-
173
-
174
-
175
-
176
-
177
-
178
-
179
-
180
-
181
-
182
-
183
-
184
-
185
-
186
-
187
-
188
-
189
-
190
-
191
-
192
-
193
-
194
-
195
-
196
-
197
-
198
-
199
-
200
-
201
-
202
-
203
-
204
-
205
-
206
-
207
-
208
-
209
-
210
-
211
-
212
-
213
-
214
-
215
-
216
-
217
-
218
-
219
-
220
-
221
-
222
-
223
-
224
-
225
-
226
-
227
-
228
-
229
-
230
-
231
-
232
-
233
-
234
-
235
-
236
-
237
-
238
-
239
-
240
-
241
-
242
-
243
-
244
-
245
-
246
-
247
-
248
-
249
-
250
-
251
-
252
 |
 |