Lexmark 4076 Execjet II Service Manual - Page 55
Print Head Cable Removal, Push down the 2 latches that secure the cradle to the carrier
 |
View all Lexmark 4076 Execjet II manuals
Add to My Manuals
Save this manual to your list of manuals |
Page 55 highlights
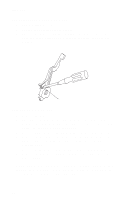
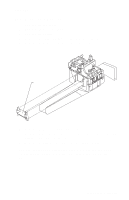
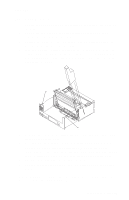
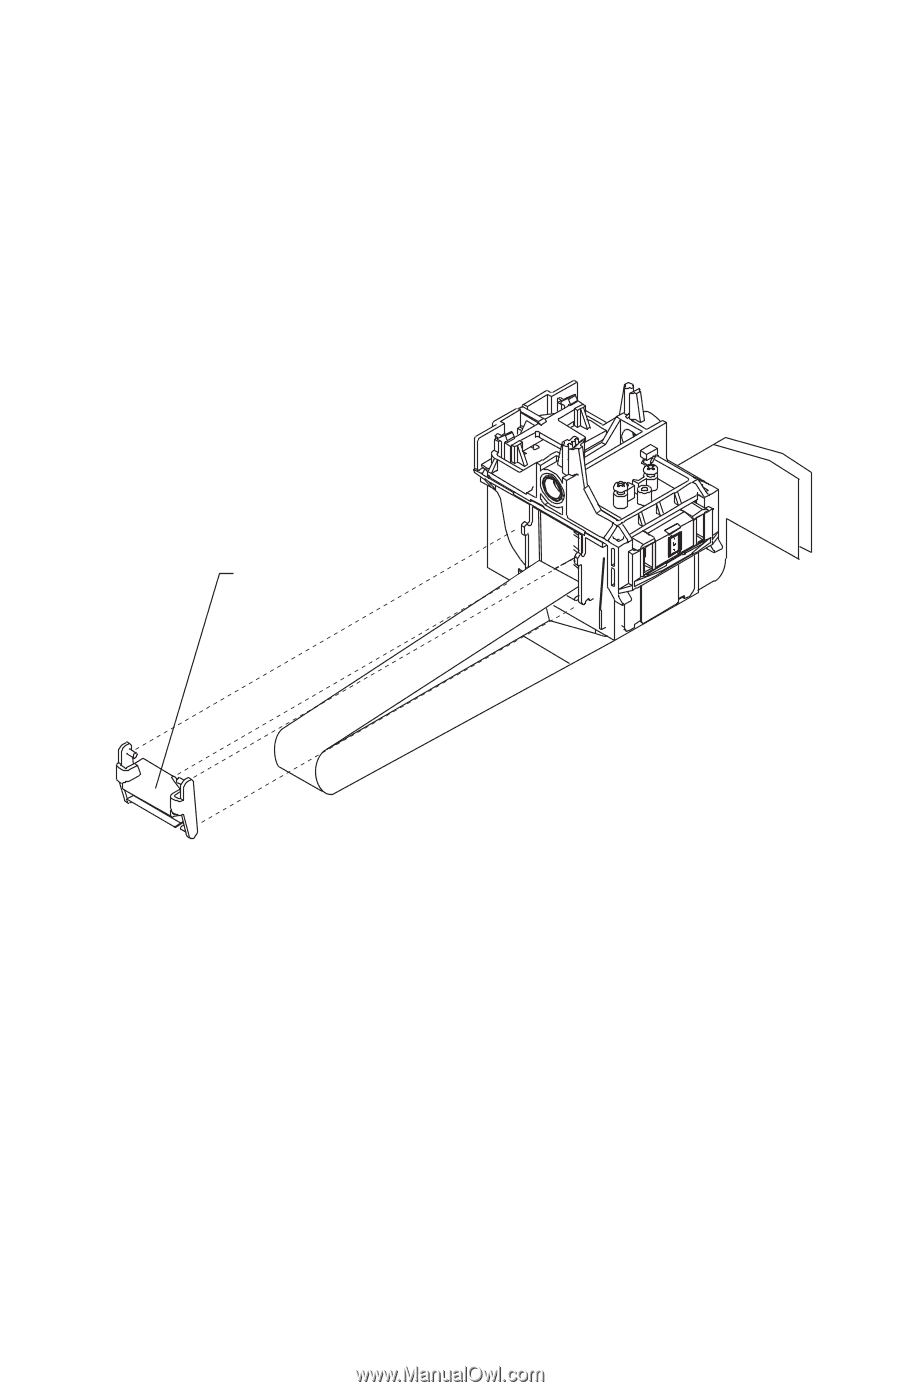
4076-0XX Print Head Cable Removal 1. Remove the top cover. 2. Remove the print cartridge. 3. Remove the carrier. 4. Remove the cable clip [A] from the left side of the carrier. 5. Remove the pointer from the front of the carrier. A 6. Remove the 2 sensor mounting screws. 7. Push down the 2 latches that secure the cradle to the carrier and pull the cradle up from the carrier. 8. Remove the print head cable from the alignment pins. The new cable comes without the folds in it. Place the new cable next to the old cable and fold the new cable in the appropriate places. Repair Information 43
-
 1
1 -
2
-
3
-
4
-
5
-
6
-
7
-
8
-
9
-
10
-
11
-
12
-
13
-
14
-
15
-
16
-
17
-
18
-
19
-
20
-
21
-
22
-
23
-
24
-
25
-
26
-
27
-
28
-
29
-
30
-
31
-
32
-
33
-
34
-
35
-
36
-
37
-
38
-
39
-
40
-
41
-
42
-
43
-
44
-
45
-
46
-
47
-
48
-
49
-
 50
50 -
 51
51 -
 52
52 -
 53
53 -
 54
54 -
 55
55 -
 56
56 -
 57
57 -
 58
58 -
 59
59 -
 60
60 -
61
-
62
-
63
-
64
-
65
-
66
-
67
-
68
-
69
-
70
-
71
-
72
-
73
-
74
-
75
-
76
-
77
-
78
-
79
-
80
-
81
-
82
-
83
-
84
-
85
-
86
-
87
-
88
-
89
 |
 |
4076-0XX
Repair Information
43
Print Head Cable Removal
1.
Remove the top cover.
2.
Remove the print cartridge.
3.
Remove the carrier.
4.
Remove the cable clip [
A
] from the left side of the carrier.
5.
Remove the pointer from the front of the carrier.
6.
Remove the 2 sensor mounting screws.
7.
Push down the 2 latches that secure the cradle to the carrier and
pull the cradle up from the carrier.
8.
Remove the print head cable from the alignment pins.
The new cable comes without the folds in it. Place the new cable
next to the old cable and fold the new cable in the appropriate
places.
A