Lexmark X7350 User's Guide - Page 85
Scan was not successful, Poor scanned image quality, See More Scan Settings - driver download
 |
View all Lexmark X7350 manuals
Add to My Manuals
Save this manual to your list of manuals |
Page 85 highlights
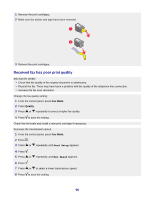
To change the scanning resolution to a lower value: 1 Click Start ΠPrograms or All Programs ΠLexmark 7300 Series. 2 Select All-In-One Center. 3 From the Scan area, click See More Scan Settings. 4 Click Display Advanced Scan Settings. 5 From the Scan Resolution menu, select a lower number. Scan was not successful 1 Check the USB cable for any obvious damage. 2 Firmly plug the rectangular end of the USB cable into the USB port of the computer. The USB port is marked with the USB symbol. 3 Firmly plug the square end of the USB cable into the back of the printer. Turn off and then restart your computer. If the printer is connected to the computer through another device: 1 Disconnect the USB cable from any other device, such as a USB hub or switch box. 2 Directly connect the cable to the printer and the computer. 1 Uninstall the printer software, and then reinstall it. For more information, see "Removing and reinstalling the software" on page 100. 2 If the software still does not install correctly, visit our Web site at www.lexmark.com to check for the latest software. a Click drivers & downloads. b Click Find Drivers and Downloads. c Select your printer family. d Select your printer model. e Select your operating system. f Select the file you want to download, and follow the directions on the computer screen. Poor scanned image quality If an error message is displayed, see "Error messages" on page 94. If the scanner glass is dirty, gently wipe it with a clean, lint-free cloth dampened with water. To adjust the quality of a scan: 1 Load the document facedown on the scanner glass. 2 From the control panel, press Scan Mode. 3 Press Quality. 85
-
 1
1 -
2
-
3
-
4
-
5
-
6
-
7
-
8
-
9
-
10
-
11
-
12
-
13
-
14
-
15
-
16
-
17
-
18
-
19
-
20
-
21
-
22
-
23
-
24
-
25
-
26
-
27
-
28
-
29
-
30
-
31
-
32
-
33
-
34
-
35
-
36
-
37
-
38
-
39
-
40
-
41
-
42
-
43
-
44
-
45
-
46
-
47
-
48
-
49
-
50
-
51
-
52
-
53
-
54
-
55
-
56
-
57
-
58
-
59
-
60
-
61
-
62
-
63
-
64
-
65
-
66
-
67
-
68
-
69
-
70
-
71
-
72
-
73
-
74
-
75
-
76
-
77
-
78
-
79
-
 80
80 -
 81
81 -
 82
82 -
 83
83 -
 84
84 -
 85
85 -
 86
86 -
 87
87 -
 88
88 -
 89
89 -
 90
90 -
91
-
92
-
93
-
94
-
95
-
96
-
97
-
98
-
99
-
100
-
101
-
102
-
103
-
104
-
105
-
106
-
107
-
108
-
109
-
110
-
111
-
112
 |
 |