Linksys SPA921 Cisco Small Business IP Telephony Devices Provisioning Guide - Page 75
Step 1, Step 2, Step 3, Step 4, Step 5, Step 6, Step 7, Step 8
 |
UPC - 745883570799
View all Linksys SPA921 manuals
Add to My Manuals
Save this manual to your list of manuals |
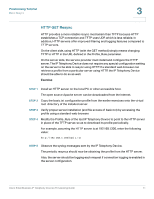
Page 75 highlights
Provisioning Tutorial Secure Resync 3 Exercise STEP 1 Install an HTTPS server on a host whose IP address is known to the network DNS server, through normal hostname translation. The open source Apache server can be configured to operate as an HTTPS server, when installed with the open source mod_ssl package. STEP 2 Generate a server Certificate Signing Request for the server. STEP 3 For this step, you may need to install the open source OpenSSL package or equivalent software. If using OpenSSL, the command to generate the basic CSR file is as follows: openssl req -new -out provserver.csr This command generates a public/private key pair, which is saved in the privkey.pem file. STEP 4 Submit the CSR file (provserver.csr) to Cisco for signing. A signed server certificate is returned (provserver.cert) along with a Sipura CA Client Root Certificate, spacroot.cert. STEP 5 Store the signed server certificate, the private key pair file, and the client root certificate in the appropriate locations on the server. In the case of an Apache installation on Linux, these locations are typically as follows: # Server Certificate: SSLCertificateFile /etc/httpd/conf/provserver.cert # Server Private Key: SSLCertificateKeyFile /etc/httpd/conf/pivkey.pem # Certificate Authority: SSLCACertificateFile /etc/httpd/conf/spacroot.cert STEP 6 Restart the server. STEP 7 Copy the basic.txt configuration profile from the earlier exercises onto the virtual root directory of the HTTPS server. STEP 8 Verify proper server operation by downloading basic.txt from the HTTPS server, using a standard browser from the local PC. Cisco Small Business IP Telephony Devices Provisioning Guide 73
-
 1
1 -
2
-
3
-
4
-
5
-
6
-
7
-
8
-
9
-
10
-
11
-
12
-
13
-
14
-
15
-
16
-
17
-
18
-
19
-
20
-
21
-
22
-
23
-
24
-
25
-
26
-
27
-
28
-
29
-
30
-
31
-
32
-
33
-
34
-
35
-
36
-
37
-
38
-
39
-
40
-
41
-
42
-
43
-
44
-
45
-
46
-
47
-
48
-
49
-
50
-
51
-
52
-
53
-
54
-
55
-
56
-
57
-
58
-
59
-
60
-
61
-
62
-
63
-
64
-
65
-
66
-
67
-
68
-
69
-
 70
70 -
 71
71 -
 72
72 -
 73
73 -
 74
74 -
 75
75 -
 76
76 -
 77
77 -
 78
78 -
 79
79 -
 80
80 -
81
-
82
-
83
-
84
-
85
-
86
-
87
-
88
-
89
-
90
-
91
-
92
-
93
-
94
-
95
-
96
-
97
-
98
-
99
-
100
-
101
-
102
-
103
-
104
-
105
-
106
-
107
-
108
-
109
-
110
-
111
-
112
-
113
-
114
-
115
-
116
 |
 |