Netgear WN604 User Manual - Page 12
Log In to the Access Point, admin, password, Login - dhcp
 |
UPC - 606449070712
View all Netgear WN604 manuals
Add to My Manuals
Save this manual to your list of manuals |
Page 12 highlights
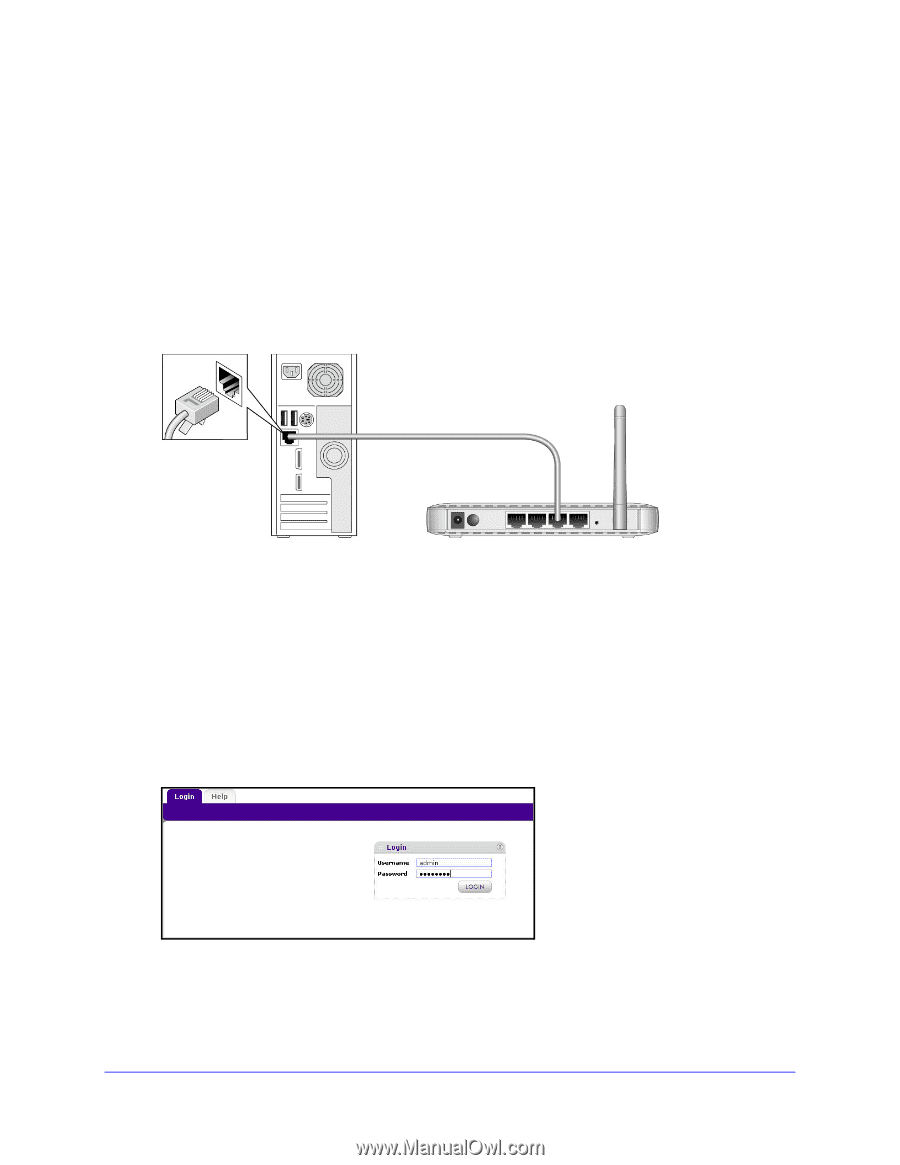
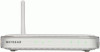
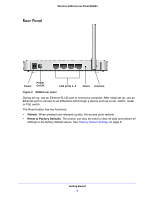
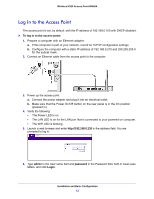
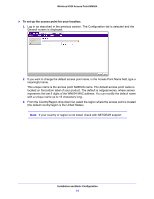
Wireless N150 Access Point WN604 Log In to the Access Point The access point is set, by default, with the IP address of 192.168.0.100 with DHCP disabled. To log in to the access point: 1. Prepare a computer with an Ethernet adapter. a. If this computer is part of your network, record its TCP/IP configuration settings. b. Configure the computer with a static IP address of 192.168.0.210 and 255.255.255.0 for the subnet mask. 2. Connect an Ethernet cable from the access point to the computer. 3. Power up the access point. a. Connect the power adapter and plug it into an electrical outlet. b. Make sure that the Power On/Off button on the rear panel is in the On position (pressed in). 4. Verify the following: • The Power LED is on. • The LAN LED is on for the LAN port that is connected to your powered-on computer. • The WiFi LED is blinking. 5. Launch a web browser and enter http://192.168.0.230 in the address field. You are prompted to log in: 6. Type admin in the User name field and password in the Password field, both in lower-case letters, and click Login. Installation and Basic Configuration 12
-
 1
1 -
2
-
3
-
4
-
5
-
6
-
 7
7 -
 8
8 -
 9
9 -
 10
10 -
 11
11 -
 12
12 -
 13
13 -
 14
14 -
 15
15 -
 16
16 -
 17
17 -
18
-
19
-
20
-
21
-
22
-
23
-
24
-
25
-
26
-
27
-
28
-
29
-
30
-
31
-
32
-
33
-
34
-
35
-
36
-
37
-
38
-
39
-
40
-
41
-
42
-
43
-
44
-
45
-
46
-
47
-
48
-
49
-
50
-
51
-
52
-
53
-
54
-
55
-
56
-
57
-
58
-
59
-
60
-
61
-
62
-
63
-
64
-
65
-
66
-
67
-
68
-
69
-
70
 |
 |