Nokia 6185i Nokia 6185i User Guide in English - Page 66
Adding an entry to the phone book, Associating an email address with an entry, Names, Add new, Select
 |
View all Nokia 6185i manuals
Add to My Manuals
Save this manual to your list of manuals |
Page 66 highlights
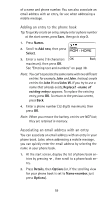
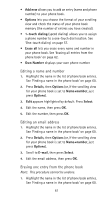
of a name and phone number. You can also associate an email address with an entry, for use when addressing a mobile message. Adding an entry to the phone book Tip: To quickly create an entry, simply enter a phone number at the start screen, press Save, then go to step 3. 1. Press Names. 2. Scroll to Add new, then press Select. 3. Enter a name (16 characters maximum), then press OK. See "Entering text and numbers" on page 38. Note: You can't associate the same name with two different entries: for example, John and John. Instead, create entries for John H and John W. If you try to use a name that already exists, Replace? appears. To replace the existing entry, press OK. To return to the previous screen, press Back. 4. Enter a phone number (32 digits maximum), then press OK. Note: When you remove the battery, entries are NOT lost; they are retained in memory. Associating an email address with an entry You can associate an email address with an entry in your phone book. Later, when addressing a mobile message, you can quickly enter the email address by selecting the name in your phone book. 1. At the start screen, display the list of phone book entries by pressing , then scroll to a phone book entry. 2. Press Details, then Options (or, if the scrolling view for your phone book is set to Name+number, just press Options). 59
-
 1
1 -
2
-
3
-
4
-
5
-
6
-
7
-
8
-
9
-
10
-
11
-
12
-
13
-
14
-
15
-
16
-
17
-
18
-
19
-
20
-
21
-
22
-
23
-
24
-
25
-
26
-
27
-
28
-
29
-
30
-
31
-
32
-
33
-
34
-
35
-
36
-
37
-
38
-
39
-
40
-
41
-
42
-
43
-
44
-
45
-
46
-
47
-
48
-
49
-
50
-
51
-
52
-
53
-
54
-
55
-
56
-
57
-
58
-
59
-
60
-
 61
61 -
 62
62 -
 63
63 -
 64
64 -
 65
65 -
 66
66 -
 67
67 -
 68
68 -
 69
69 -
 70
70 -
 71
71 -
72
-
73
-
74
-
75
-
76
-
77
-
78
-
79
-
80
-
81
-
82
-
83
-
84
-
85
-
86
-
87
-
88
-
89
-
90
-
91
-
92
-
93
-
94
-
95
-
96
-
97
-
98
-
99
-
100
-
101
-
102
-
103
-
104
-
105
-
106
-
107
-
108
-
109
-
110
-
111
-
112
-
113
-
114
-
115
-
116
-
117
-
118
-
119
-
120
-
121
-
122
-
123
-
124
-
125
-
126
-
127
-
128
-
129
 |
 |