Nokia 6651 Nokia 6651 User Guide in English - Page 43
Options, folder that you have created inside
 |
UPC - 844602105455
View all Nokia 6651 manuals
Add to My Manuals
Save this manual to your list of manuals |
Page 43 highlights
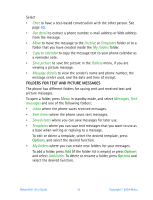
• To insert a picture into the message, press Options and select Insert picture. The list of folders in the Gallery is shown. Scroll to the desired picture, press Options and select Insert. The picture is indicated by the indicator on the top of the message. To view the text and picture together, press Options and select Preview. To change the picture or delete it from the message, press Options and select the desired function. • To use a text template as a base for the new message, press Options and select Use template. The list of templates in the Templates folder is shown. Scroll to the desired template, press Options and select Insert. See also Templates in Folders for text and picture messages. • To insert a phone number from contacts, press Options and select Insert number. Press Find or and search for the number in contacts. • To insert a name from contacts, press Options and select Insert contact and the desired name. To insert a number or text item saved with the name, press Options and select View details and the desired number or text item. • To save the message in the Archive or Templates folder or in a folder that you have created inside the My folders folder, press Options and select Save message. 3 To send the message, press Send or , key in the recipient's phone number or search for it in contacts, and press OK. Alternatively, press Options and select Sending options. Select • Send to many to send the message to several recipients. Scroll to the first recipient and press Send. Repeat this for each recipient. When you have sent the message to everyone you want, press Done. • Send to list to send the message using a distribution list. See Distribution lists. • Sending profile to send the message using the settings that you have defined earlier. For more information, see Message settings. The sent message is saved in the Sent items folder. For information about different folders for text and picture messages, see page 35. Nokia 6651 User Guide 33 Copyright © 2004 Nokia
-
 1
1 -
2
-
3
-
4
-
5
-
6
-
7
-
8
-
9
-
10
-
11
-
12
-
13
-
14
-
15
-
16
-
17
-
18
-
19
-
20
-
21
-
22
-
23
-
24
-
25
-
26
-
27
-
28
-
29
-
30
-
31
-
32
-
33
-
34
-
35
-
36
-
37
-
 38
38 -
 39
39 -
 40
40 -
 41
41 -
 42
42 -
 43
43 -
 44
44 -
 45
45 -
 46
46 -
 47
47 -
 48
48 -
49
-
50
-
51
-
52
-
53
-
54
-
55
-
56
-
57
-
58
-
59
-
60
-
61
-
62
-
63
-
64
-
65
-
66
-
67
-
68
-
69
-
70
-
71
-
72
-
73
-
74
-
75
-
76
-
77
-
78
-
79
-
80
-
81
-
82
-
83
-
84
-
85
-
86
-
87
-
88
-
89
-
90
-
91
-
92
-
93
-
94
-
95
-
96
-
97
-
98
-
99
-
100
-
101
-
102
-
103
-
104
-
105
-
106
-
107
-
108
-
109
-
110
-
111
-
112
-
113
-
114
-
115
-
116
-
117
-
118
-
119
-
120
-
121
-
122
-
123
-
124
-
125
-
126
-
127
-
128
-
129
-
130
 |
 |
