Panasonic AG-HMR10 Operating Instructions - Page 49
PRE REC, Optical Image Stabilizer, FREE RUN] in the [TC/UB
 |
View all Panasonic AG-HMR10 manuals
Add to My Manuals
Save this manual to your list of manuals |
Page 49 highlights
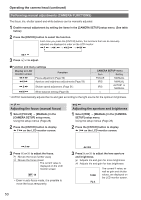
Recording PRE REC Record video and audio from three seconds before the time of the operation to start recording. Operation to start recording Operation to stop recording (Time) Actual recording time PRE REC time 1 Select [TCG] → [FREE RUN] in the [TC/UB SETUP] setup menu. Using the setup menus (Page 29) 2 Select [PREREC MODE] → [ON] in the [RECORDING SETUP] setup menu. "P-PAUSE" will be displayed on the screen. • When recording is started while "P-PAUSE" is not displayed on the screen, normal recording is performed. • When [REC RUN] is set in [TCG] in the [TC/ UB SETUP] setup menu, the setting will be automatically changed to [FREE RUN]. 3 Press the [REC/PAUSE] button. Video and audio from approximately 3 seconds previously will be recorded. • Recording of the previous 3 seconds of video and audio may not be possible if recording is started in the following cases. · Immediately after switching from PB mode to CAM mode · Immediately after turning the power on · Immediately after setting [PREREC MODE] to [ON] · Immediately after setting TC or UB • The thumbnail for clips recorded using the PREREC function will display the image from when the [REC/PAUSE] button was pressed. • When clips that were recorded using the PREREC function are played back, the images pause momentarily during clip changeovers. (Page 97) • An index is not added to the head of the clips which were recorded using the PREREC function. Optical Image Stabilizer Use the Optical Image Stabilizer (OIS) to reduce the effects of camera head shake when shooting by hand. 1 Select [O.I.S.] → [ON] in the [CAMERA SETUP] setup menu. Using the setup menus (Page 29) When the [O.I.S.] is [ON], is displayed on the LCD monitor screen. When the camera head is fixed, such as when using a tripod, set the [O.I.S.] to [OFF] for more natural images. • This function will not be as effective when the vibration is severe or when tracking a moving subject. 49
-
 1
1 -
2
-
3
-
4
-
5
-
6
-
7
-
8
-
9
-
10
-
11
-
12
-
13
-
14
-
15
-
16
-
17
-
18
-
19
-
20
-
21
-
22
-
23
-
24
-
25
-
26
-
27
-
28
-
29
-
30
-
31
-
32
-
33
-
34
-
35
-
36
-
37
-
38
-
39
-
40
-
41
-
42
-
43
-
 44
44 -
 45
45 -
 46
46 -
 47
47 -
 48
48 -
 49
49 -
 50
50 -
 51
51 -
 52
52 -
 53
53 -
 54
54 -
55
-
56
-
57
-
58
-
59
-
60
-
61
-
62
-
63
-
64
-
65
-
66
-
67
-
68
-
69
-
70
-
71
-
72
-
73
-
74
-
75
-
76
-
77
-
78
-
79
-
80
-
81
-
82
-
83
-
84
-
85
-
86
-
87
-
88
-
89
-
90
-
91
-
92
-
93
-
94
-
95
-
96
-
97
-
98
-
99
-
100
-
101
-
102
-
103
-
104
-
105
-
106
 |
 |
