Panasonic KX-HN1003 HomeHawk App Users Guide - Page 191
Initial setup by Bluetooth, Front door camera and outdoor camera features
 |
View all Panasonic KX-HN1003 manuals
Add to My Manuals
Save this manual to your list of manuals |
Page 191 highlights
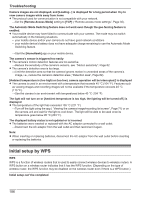
Troubleshooting The camera's LED indicator is lit in yellow. R The camera is not in WPS mode because the SETUP button was not pressed for long enough. →Follow the on-screen instructions, and press and hold the SETUP button on the camera until the LED indicator starts blinking (about 5 seconds). Initial setup by Bluetooth Initial setup can't be completed The camera's LED indicator is blinking in red. If you have trouble during the initial setup check the following causes/solutions first and then turn off the camera and restart it. R The wireless network password may be incorrect. →Enter the correct password for the wireless network. R The DHCP function of your wireless router may be disabled. →Enable the wireless router's DHCP settings. For details, refer to your wireless router's manual. R The address filter function of your wireless router may be enabled. →Register the MAC address of the camera to the address filter setting of the wireless router. Refer to your wireless router's manual. The camera's LED indicator is lit in blue. R A network clash has occurred because you have 2 wireless routers at home that are using the same channel or channels of a close frequency. →Unplug all the wireless routers and plug them in again. If the situation still does not improve, refer to your wireless router's manual for information on how to change the router channel of your wireless network. R The "Isolation" function on the wireless router is enabled. Sometimes when the "Isolation" function is enabled, the camera will not be able to communicate with your mobile device via your wireless router. →Disable the "Isolation" function on your wireless router. For details, refer to your wireless router's manual. Front door camera and outdoor camera features Refer to the following after checking the general troubleshooting information described in "General information", Page 176. [Camera update failed] is displayed R An error occurred while updating the camera. →Fully charge the camera and try again. I fully charged the camera (the charging LED indicator is lit in red), but its operation time seems to be shorter than usual R The temperature of the location where the camera is being used is too low. →Use the camera in a location with a higher temperature. The camera will not charge (the charging LED indicator blinks quickly in red) R You are charging the camera in a location outside of the camera's specified charging temperatures. →Charge the camera in a location with a temperature between 5 °C and 40 °C (41 °F and 104 °F). 191
-
 1
1 -
2
-
3
-
4
-
5
-
6
-
7
-
8
-
9
-
10
-
11
-
12
-
13
-
14
-
15
-
16
-
17
-
18
-
19
-
20
-
21
-
22
-
23
-
24
-
25
-
26
-
27
-
28
-
29
-
30
-
31
-
32
-
33
-
34
-
35
-
36
-
37
-
38
-
39
-
40
-
41
-
42
-
43
-
44
-
45
-
46
-
47
-
48
-
49
-
50
-
51
-
52
-
53
-
54
-
55
-
56
-
57
-
58
-
59
-
60
-
61
-
62
-
63
-
64
-
65
-
66
-
67
-
68
-
69
-
70
-
71
-
72
-
73
-
74
-
75
-
76
-
77
-
78
-
79
-
80
-
81
-
82
-
83
-
84
-
85
-
86
-
87
-
88
-
89
-
90
-
91
-
92
-
93
-
94
-
95
-
96
-
97
-
98
-
99
-
100
-
101
-
102
-
103
-
104
-
105
-
106
-
107
-
108
-
109
-
110
-
111
-
112
-
113
-
114
-
115
-
116
-
117
-
118
-
119
-
120
-
121
-
122
-
123
-
124
-
125
-
126
-
127
-
128
-
129
-
130
-
131
-
132
-
133
-
134
-
135
-
136
-
137
-
138
-
139
-
140
-
141
-
142
-
143
-
144
-
145
-
146
-
147
-
148
-
149
-
150
-
151
-
152
-
153
-
154
-
155
-
156
-
157
-
158
-
159
-
160
-
161
-
162
-
163
-
164
-
165
-
166
-
167
-
168
-
169
-
170
-
171
-
172
-
173
-
174
-
175
-
176
-
177
-
178
-
179
-
180
-
181
-
182
-
183
-
184
-
185
-
 186
186 -
 187
187 -
 188
188 -
 189
189 -
 190
190 -
 191
191 -
 192
192 -
 193
193 -
 194
194 -
 195
195 -
 196
196 -
197
-
198
-
199
-
200
 |
 |