Panasonic PTAE4000 Operating Instructions - Page 30
Memory Save
 |
View all Panasonic PTAE4000 manuals
Add to My Manuals
Save this manual to your list of manuals |
Page 30 highlights
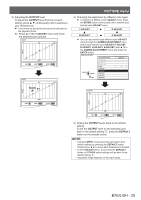
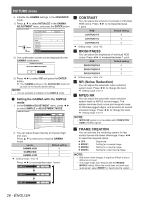
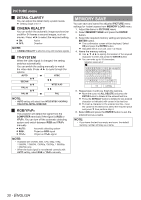
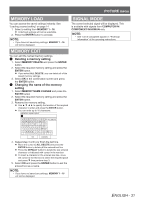
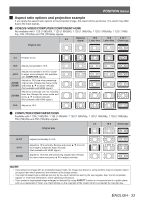
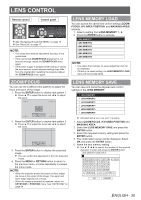
PICTURE menu JJ DETAIL CLARITY You can adjust the detail clarity system levels. Setting range: 0 to +7 JJ CINEMA REALITY You can switch the automatic image synchronizer on/off for 24 frames a second images, such as movies. Press ◄ ► to select the required setting. ON: Active OFF: Deactive NOTE: •• CINEMA REALITY is effective only with interlace signals. JJ TV-SYSTEM When the video signal is changed, the setting switches automatically. You can switch the setting manually to match the video data. Press ◄ ► to cycle through the options. AUTO NTSC MEMORY SAVE You can save and name the adjusted PICTURE menu settings for instant access from MEMORY LOAD menu. 111 Adjust the items in PICTURE menu. 222 Select MEMORY SAVE and press the ENTER button. 333 Select the required memory setting and press the ENTER button. The confirmation screen will be displayed. Select OK and press the ENTER button. Indicated with is in use, and is empty. 444 Name the memory setting. Use to specify the location of the required character to enter and press the ENTER button. You can enter up to 16 characters. MEMORY NAME INPUT ALL DELETE SECAM PAL-N NTSC 4.43 PAL-M PAL NOTE: •• AUTO setting will select from NTSC/NTSC 4.43/PAL/ PAL60/PAL-M/PAL-N/SECAM. JJ RGB/YPBPR The projector will detect the signal from the COMPUTER terminals if the signal is RGB or YPBPR. You can turn off the automatic detecting system and switch between RGB and YPBPR manually. AUTO: Automatic detecting system RGB: Project as RGB signal YP BPR: Project as YPBPR signal NOTE: •• Available with VGA60, 480i, 576i, 480p, 576p, 1 080/60i, 1 080/50i, 720/60p, 720/50p, 1 080/60p, 1 080/50p only. •• When the input signal is not selected correctly with AUTO setting, select RGB or YPBPR manually. OK CANCEL 555 Repeat step 4 until you finish the text line. Move the cursor to ALL DELETE and press the ENTER button to delete all the entered text line. Press the DEFAULT button to delete the last entered character or indicated with cursor in the text box. To insert a character in the entered text line, move the cursor to the text box to select the required place and press ▼ then perform step 4. 666 Select OK and press the ENTER button to set the entered text as a name. NOTE: •• If you leave the text box empty and save, the default memory number will stay as a name. 30 - ENGLISH
-
 1
1 -
2
-
3
-
4
-
5
-
6
-
7
-
8
-
9
-
10
-
11
-
12
-
13
-
14
-
15
-
16
-
17
-
18
-
19
-
20
-
21
-
22
-
23
-
24
-
 25
25 -
 26
26 -
 27
27 -
 28
28 -
 29
29 -
 30
30 -
 31
31 -
 32
32 -
 33
33 -
 34
34 -
 35
35 -
36
-
37
-
38
-
39
-
40
-
41
-
42
-
43
-
44
-
45
-
46
-
47
-
48
-
49
-
50
 |
 |
