Panasonic VDRM55PP Dvd Video Camera-oem - Page 59
Playing Back
 |
View all Panasonic VDRM55PP manuals
Add to My Manuals
Save this manual to your list of manuals |
Page 59 highlights
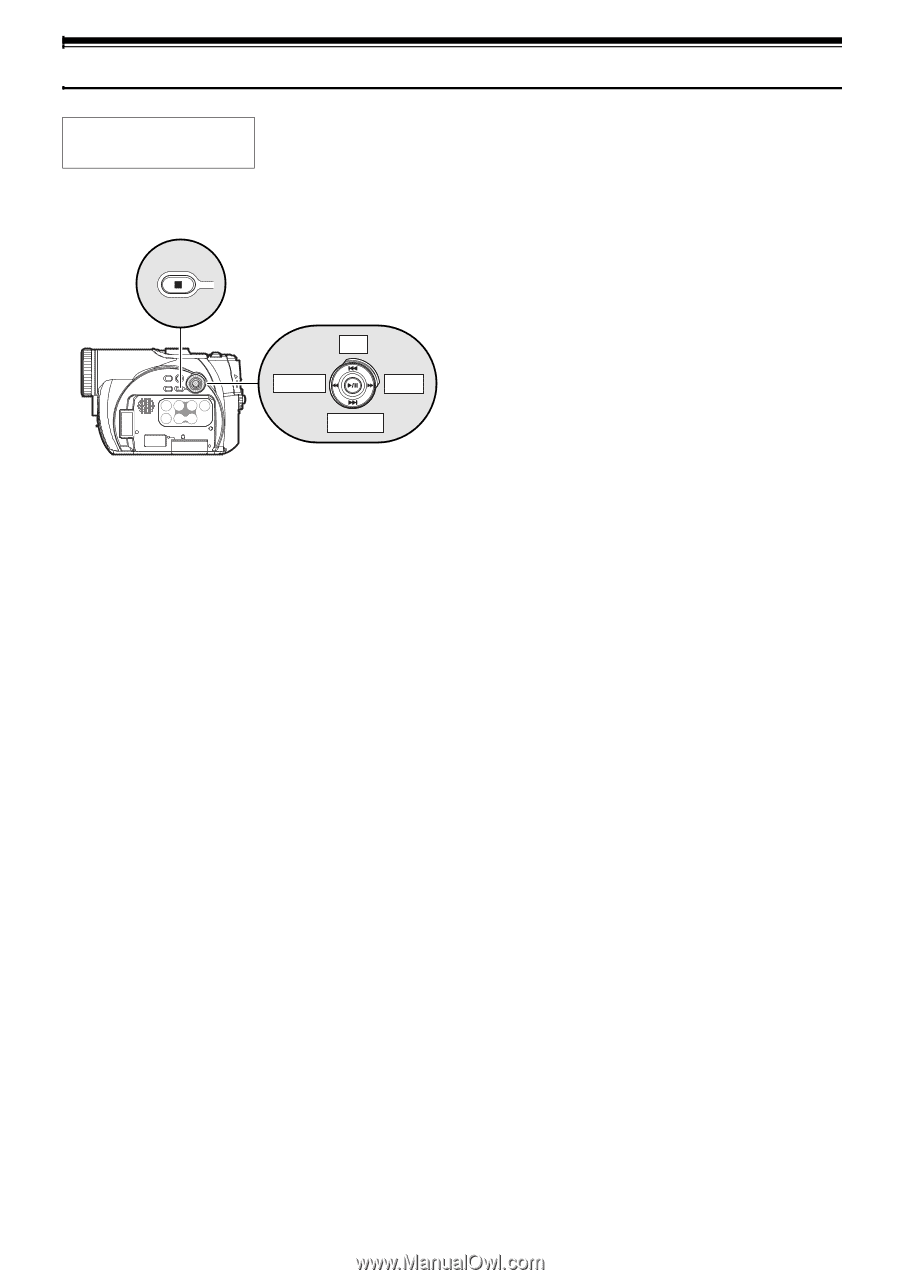
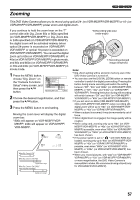
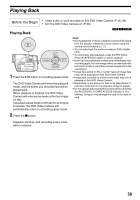
Playing Back Before You Begin • Insert a disc or card recorded on this DVD Video Camera (P. 46, 49). • Turn the DVD Video Camera on (P. 50). Playing Back 123 UP RIGHT LEFT DOWN 1 Press the A button in recording pause mode. The DVD Video Camera will enter the playback mode, and the scene you recorded last will be played back. When playback is finished, the DVD Video Camera will enter pause mode at the last image on disc. If playback pause mode continues for as long as 5 minutes, the DVD Video Camera will automatically return to recording pause mode. Note: • During playback of movie, playback sound will be heard from the speaker. Adjust the sound volume using the volume control buttons ((, )). • You can play back the audio recorded in Dolby Digital (2ch). • To temporarily stop playback, press the A button. Press the A button again to restart playback. • Even if you stop playback midway and immediately start recording again, the new image will be recorded after the last scene on disc or card (the previous images will not be overwritten). • Image data edited on PC or certain types of image data may not be displayed on this DVD Video Camera. • Image data recorded on another camcorder may not be playable on this DVD Video Camera. • Depending on the amount of data to be played back, it may take some time for the playback image to appear. • Do not operate the power switch or remove the card while the ACCESS/PC or CARD ACCESS indicator is lit or blinking: Doing so may damage the card or the data on card. 2 Press the g button. Playback will stop, and recording pause mode will be restored. 59
-
 1
1 -
2
-
3
-
4
-
5
-
6
-
7
-
8
-
9
-
10
-
11
-
12
-
13
-
14
-
15
-
16
-
17
-
18
-
19
-
20
-
21
-
22
-
23
-
24
-
25
-
26
-
27
-
28
-
29
-
30
-
31
-
32
-
33
-
34
-
35
-
36
-
37
-
38
-
39
-
40
-
41
-
42
-
43
-
44
-
45
-
46
-
47
-
48
-
49
-
50
-
51
-
52
-
53
-
 54
54 -
 55
55 -
 56
56 -
 57
57 -
 58
58 -
 59
59 -
 60
60 -
 61
61 -
 62
62 -
 63
63 -
 64
64 -
65
-
66
-
67
-
68
-
69
-
70
-
71
-
72
-
73
-
74
-
75
-
76
-
77
-
78
-
79
-
80
-
81
-
82
-
83
-
84
-
85
-
86
-
87
-
88
-
89
-
90
-
91
-
92
-
93
-
94
-
95
-
96
-
97
-
98
-
99
-
100
-
101
-
102
-
103
-
104
-
105
-
106
-
107
-
108
-
109
-
110
-
111
-
112
-
113
-
114
-
115
-
116
-
117
-
118
-
119
-
120
-
121
-
122
-
123
-
124
-
125
-
126
-
127
-
128
-
129
-
130
-
131
-
132
-
133
-
134
-
135
-
136
-
137
-
138
-
139
-
140
-
141
-
142
-
143
-
144
-
145
-
146
-
147
-
148
-
149
-
150
-
151
-
152
-
153
-
154
-
155
-
156
-
157
-
158
-
159
-
160
-
161
-
162
-
163
-
164
-
165
-
166
-
167
-
168
-
169
-
170
 |
 |