Pfaff creative 4874 Owner's Manual - Page 16
Machine cover, Electrical connection, Connect the foot control, Power switch
 |
View all Pfaff creative 4874 manuals
Add to My Manuals
Save this manual to your list of manuals |
Page 16 highlights
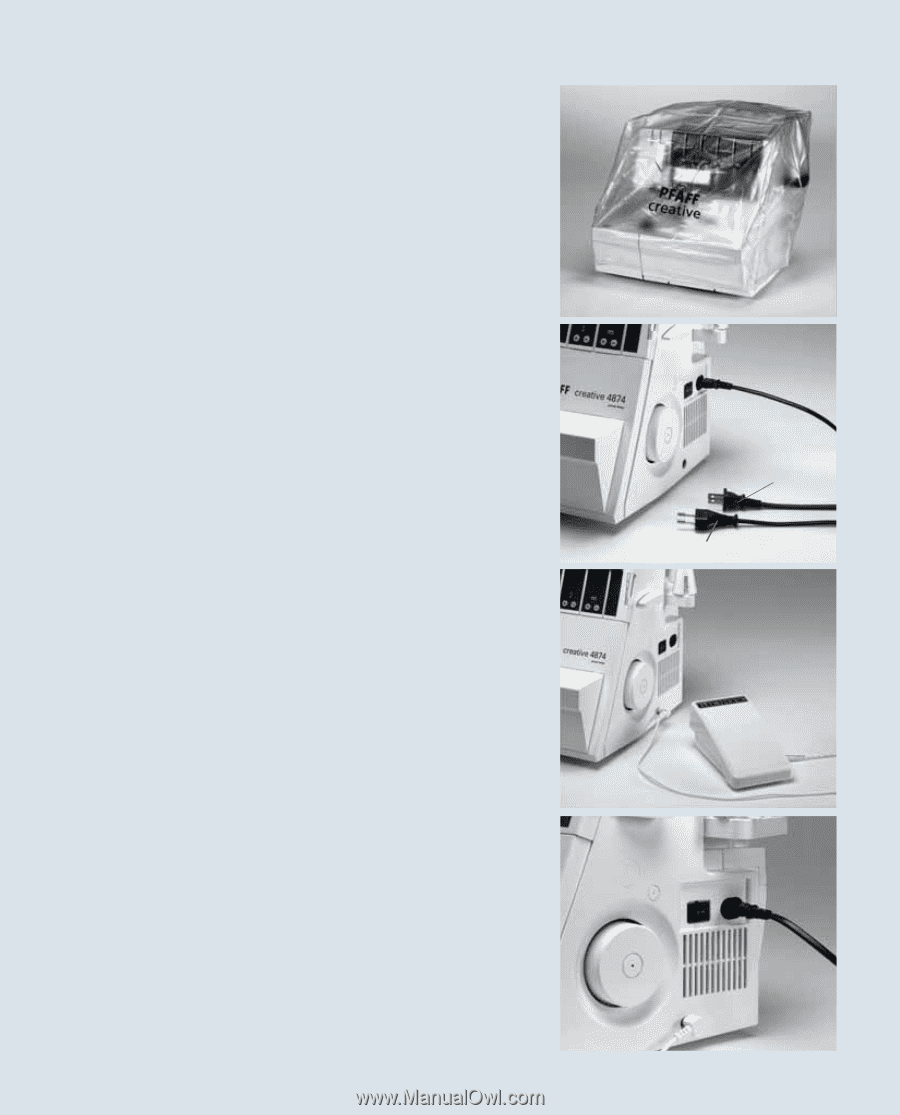
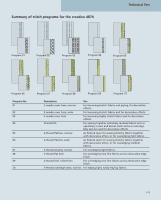
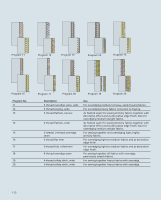
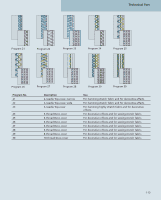
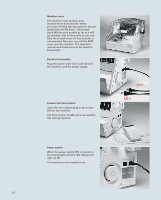
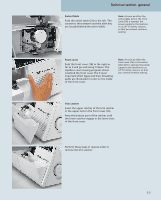
Machine cover The machine cover protects your machine from dust and dirt. When you have finished sewing, push the thread guides (28 and 44) down. The thread stand (49) must be pushed as far as it will go towards close to the machine; you can take the thread cones off first, but this is not essential. Now you can pull the 4874 cover over the machine. The operator's manual and accessories can be placed in the pockets. Electrical connection Plug the power cable into socket (53) on the machine, and the power supply. Connect the foot control Insert the foot control plug in the socket (54) on the machine. The foot control YC-485 has to be used for this sewing machine. 120 V 220 V Power switch When the power switch (55) is turned on, the sewing light and the LCD display will light up (9). The machine is now ready for use. 2-2
-
 1
1 -
2
-
3
-
4
-
5
-
6
-
7
-
8
-
9
-
10
-
 11
11 -
 12
12 -
 13
13 -
 14
14 -
 15
15 -
 16
16 -
 17
17 -
 18
18 -
 19
19 -
 20
20 -
 21
21 -
22
-
23
-
24
-
25
-
26
-
27
-
28
-
29
-
30
-
31
-
32
-
33
-
34
-
35
-
36
-
37
-
38
-
39
-
40
-
41
-
42
-
43
-
44
-
45
-
46
-
47
-
48
-
49
-
50
-
51
-
52
-
53
-
54
-
55
-
56
-
57
-
58
-
59
-
60
-
61
-
62
-
63
-
64
-
65
-
66
-
67
-
68
-
69
-
70
-
71
-
72
-
73
-
74
-
75
-
76
-
77
-
78
-
79
-
80
-
81
-
82
-
83
-
84
-
85
-
86
-
87
-
88
-
89
-
90
-
91
-
92
-
93
-
94
-
95
-
96
-
97
-
98
-
99
-
100
-
101
-
102
-
103
-
104
-
105
-
106
-
107
-
108
-
109
-
110
-
111
-
112
-
113
-
114
-
115
-
116
-
117
-
118
-
119
-
120
-
121
-
122
-
123
-
124
-
125
-
126
-
127
-
128
-
129
-
130
-
131
-
132
-
133
-
134
-
135
-
136
-
137
-
138
-
139
-
140
-
141
-
142
-
143
-
144
 |
 |