Pfaff creative 4874 Owner's Manual - Page 77
You can also refer to the threading
 |
View all Pfaff creative 4874 manuals
Add to My Manuals
Save this manual to your list of manuals |
Page 77 highlights
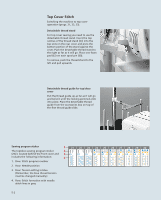
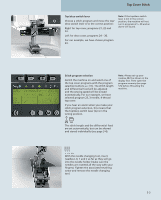
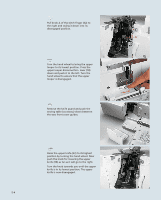
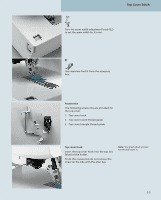
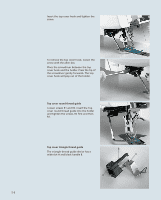
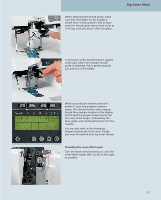
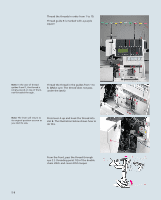
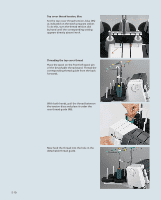
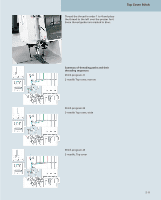
When attaching the thread guide, make sure that the holder for the top/deco switch lever is fully seated in slot A. Now push the thread guide device back as far as it will go until you hear it click into place. Top Cover Stitch To remove it, press handle B down against C (the part where the triangle thread guide is attached). Pull it gently towards you and out of the holder. B C When you press the memory selection button P once, the program memory opens. The thread tension values appear beside the program number in the display. First thread the purple thread tension for the cover-stitch looper, followed by the blue, green and red thread tensions for the needles. You can also refer to the threading diagram behind the front cover. Finally, you must thread the blue top cover thread. Threading the cover-stitch looper Turn the hand wheel towards you until the cover-stitch looper (33) is as far to the right 33 as possible. 5-7
-
 1
1 -
2
-
3
-
4
-
5
-
6
-
7
-
8
-
9
-
10
-
11
-
12
-
13
-
14
-
15
-
16
-
17
-
18
-
19
-
20
-
21
-
22
-
23
-
24
-
25
-
26
-
27
-
28
-
29
-
30
-
31
-
32
-
33
-
34
-
35
-
36
-
37
-
38
-
39
-
40
-
41
-
42
-
43
-
44
-
45
-
46
-
47
-
48
-
49
-
50
-
51
-
52
-
53
-
54
-
55
-
56
-
57
-
58
-
59
-
60
-
61
-
62
-
63
-
64
-
65
-
66
-
67
-
68
-
69
-
70
-
71
-
 72
72 -
 73
73 -
 74
74 -
 75
75 -
 76
76 -
 77
77 -
 78
78 -
 79
79 -
 80
80 -
 81
81 -
 82
82 -
83
-
84
-
85
-
86
-
87
-
88
-
89
-
90
-
91
-
92
-
93
-
94
-
95
-
96
-
97
-
98
-
99
-
100
-
101
-
102
-
103
-
104
-
105
-
106
-
107
-
108
-
109
-
110
-
111
-
112
-
113
-
114
-
115
-
116
-
117
-
118
-
119
-
120
-
121
-
122
-
123
-
124
-
125
-
126
-
127
-
128
-
129
-
130
-
131
-
132
-
133
-
134
-
135
-
136
-
137
-
138
-
139
-
140
-
141
-
142
-
143
-
144
 |
 |
