Pfaff creative 4874 Owner's Manual - Page 79
Pull the thread about 10 cm 5 through
 |
View all Pfaff creative 4874 manuals
Add to My Manuals
Save this manual to your list of manuals |
Page 79 highlights
Pull about 10 cm (5") of thread through the looper and place it to the left under the presser foot. Top Cover Stitch 1 2 5 3 4 6 7 8 9 5 4 Threading the needle(s) Thread the thread in order from 1 to 9. The thread must pass through the lower slot in thread guide 5. To thread needles more easily, use the needle threader in the accessory box. 7 8 Pull the thread about 10 cm (5") through the eye of the needle and place it to the left under the presser foot (if necessary, press the tension release button (10), see page 3-4). 9 5-9
-
 1
1 -
2
-
3
-
4
-
5
-
6
-
7
-
8
-
9
-
10
-
11
-
12
-
13
-
14
-
15
-
16
-
17
-
18
-
19
-
20
-
21
-
22
-
23
-
24
-
25
-
26
-
27
-
28
-
29
-
30
-
31
-
32
-
33
-
34
-
35
-
36
-
37
-
38
-
39
-
40
-
41
-
42
-
43
-
44
-
45
-
46
-
47
-
48
-
49
-
50
-
51
-
52
-
53
-
54
-
55
-
56
-
57
-
58
-
59
-
60
-
61
-
62
-
63
-
64
-
65
-
66
-
67
-
68
-
69
-
70
-
71
-
72
-
73
-
 74
74 -
 75
75 -
 76
76 -
 77
77 -
 78
78 -
 79
79 -
 80
80 -
 81
81 -
 82
82 -
 83
83 -
 84
84 -
85
-
86
-
87
-
88
-
89
-
90
-
91
-
92
-
93
-
94
-
95
-
96
-
97
-
98
-
99
-
100
-
101
-
102
-
103
-
104
-
105
-
106
-
107
-
108
-
109
-
110
-
111
-
112
-
113
-
114
-
115
-
116
-
117
-
118
-
119
-
120
-
121
-
122
-
123
-
124
-
125
-
126
-
127
-
128
-
129
-
130
-
131
-
132
-
133
-
134
-
135
-
136
-
137
-
138
-
139
-
140
-
141
-
142
-
143
-
144
 |
 |
5-9
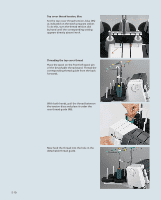
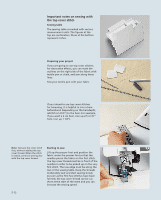
Top Cover Stitch
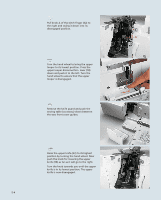
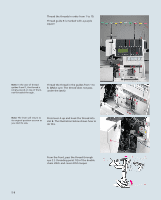
Pull about 10 cm (5”) of thread through
the looper and place it to the left under
the presser foot.
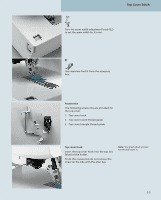
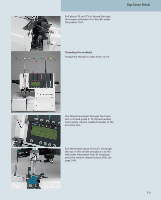
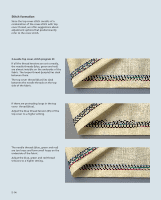
Threading the needle(s)
Thread the thread in order from 1 to 9.
The thread must pass through the lower
slot in thread guide 5. To thread needles
more easily, use the needle threader in the
accessory box.
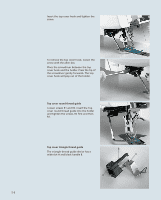
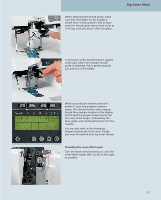
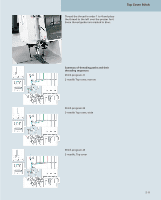
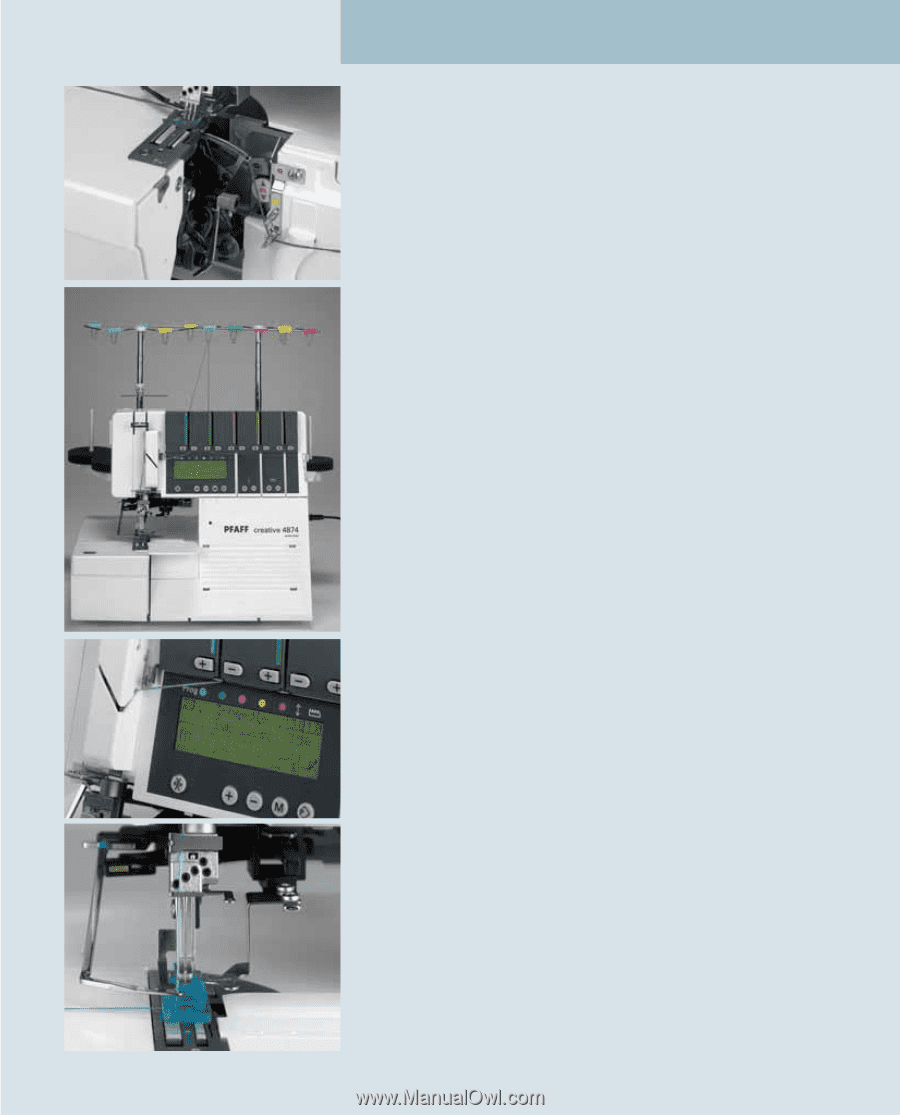
Pull the thread about 10 cm (5”) through
the eye of the needle and place it to the
left under the presser foot (if necessary,
press the tension release button (10), see
page 3-4).
1
2
4
5
6
7
9
8
3
5
4
7
9
8