Pfaff creative 4874 Owner's Manual - Page 93
the screwdriver between the decorative
 |
View all Pfaff creative 4874 manuals
Add to My Manuals
Save this manual to your list of manuals |
Page 93 highlights
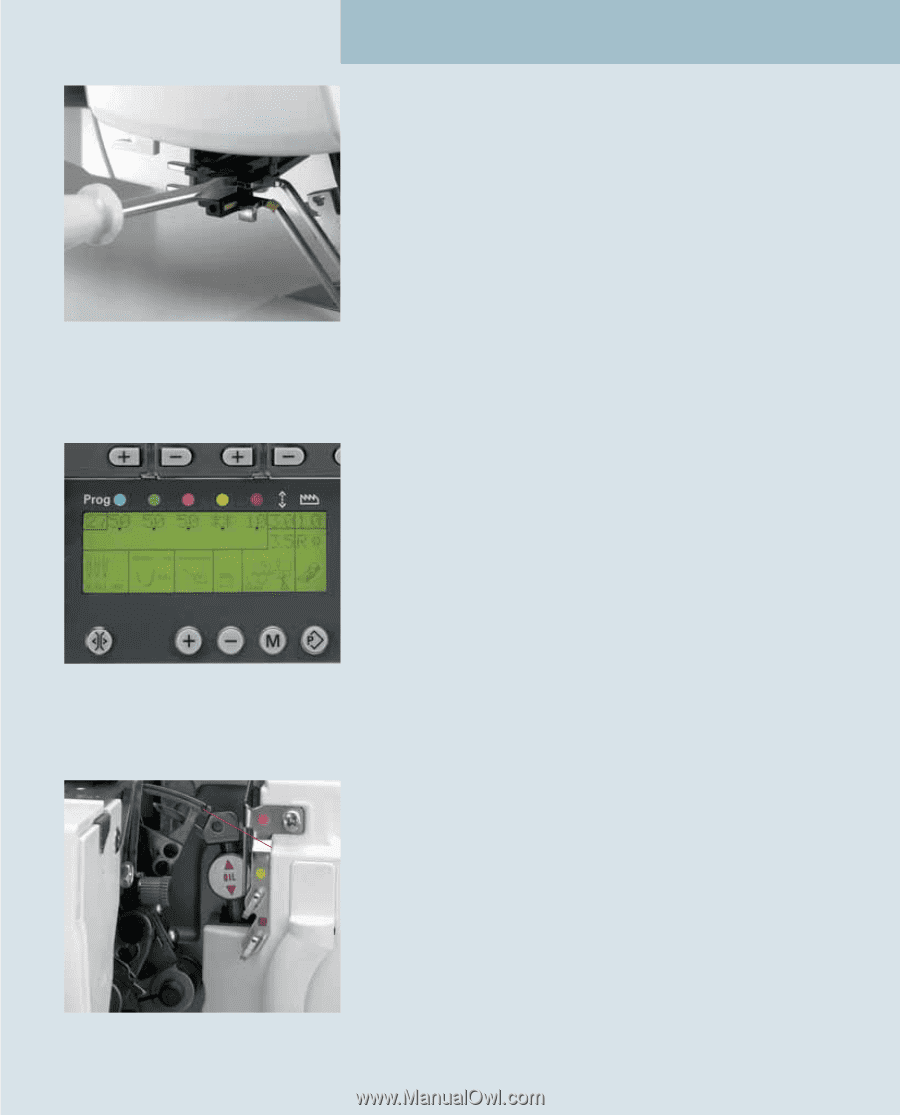
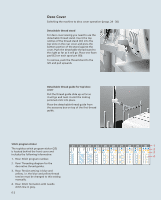
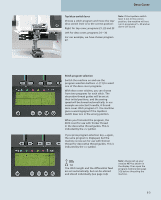
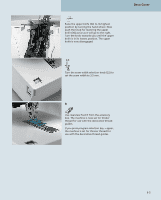
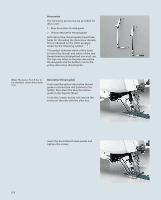
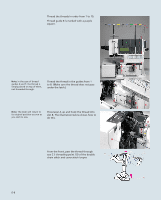
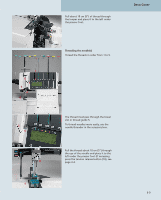
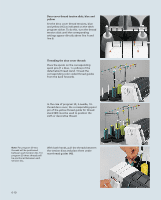
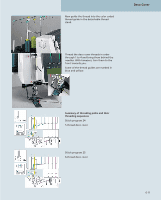
To remove the decorative thread guides, loosen the screws with the allen key. Place the screwdriver between the decorative thread guide and the holder and press the tip of the screwdriver gently forwards. The thread guide will pop out of the holder. Remove the blue one first, and then the yellow one. Deco Cover When you press the memory selection button P once, the program memory opens. The thread tension values appear beside the program number in the display. First thread the purple thread tension for the cover-stitch looper, followed by the blue, green and red thread tensions for the needles. You can also refer to the threading diagram behind the front cover. Finally the blue and yellow deco cover threads are threaded. Threading the cover-stitch looper Turn the hand wheel towards you until the cover-stitch looper (33) is as far to the right 33 as possible. 6-7
-
 1
1 -
2
-
3
-
4
-
5
-
6
-
7
-
8
-
9
-
10
-
11
-
12
-
13
-
14
-
15
-
16
-
17
-
18
-
19
-
20
-
21
-
22
-
23
-
24
-
25
-
26
-
27
-
28
-
29
-
30
-
31
-
32
-
33
-
34
-
35
-
36
-
37
-
38
-
39
-
40
-
41
-
42
-
43
-
44
-
45
-
46
-
47
-
48
-
49
-
50
-
51
-
52
-
53
-
54
-
55
-
56
-
57
-
58
-
59
-
60
-
61
-
62
-
63
-
64
-
65
-
66
-
67
-
68
-
69
-
70
-
71
-
72
-
73
-
74
-
75
-
76
-
77
-
78
-
79
-
80
-
81
-
82
-
83
-
84
-
85
-
86
-
87
-
 88
88 -
 89
89 -
 90
90 -
 91
91 -
 92
92 -
 93
93 -
 94
94 -
 95
95 -
 96
96 -
 97
97 -
 98
98 -
99
-
100
-
101
-
102
-
103
-
104
-
105
-
106
-
107
-
108
-
109
-
110
-
111
-
112
-
113
-
114
-
115
-
116
-
117
-
118
-
119
-
120
-
121
-
122
-
123
-
124
-
125
-
126
-
127
-
128
-
129
-
130
-
131
-
132
-
133
-
134
-
135
-
136
-
137
-
138
-
139
-
140
-
141
-
142
-
143
-
144
 |
 |