Pfaff creative 4874 Owner's Manual - Page 21
Changing the presser foot
 |
View all Pfaff creative 4874 manuals
Add to My Manuals
Save this manual to your list of manuals |
Page 21 highlights
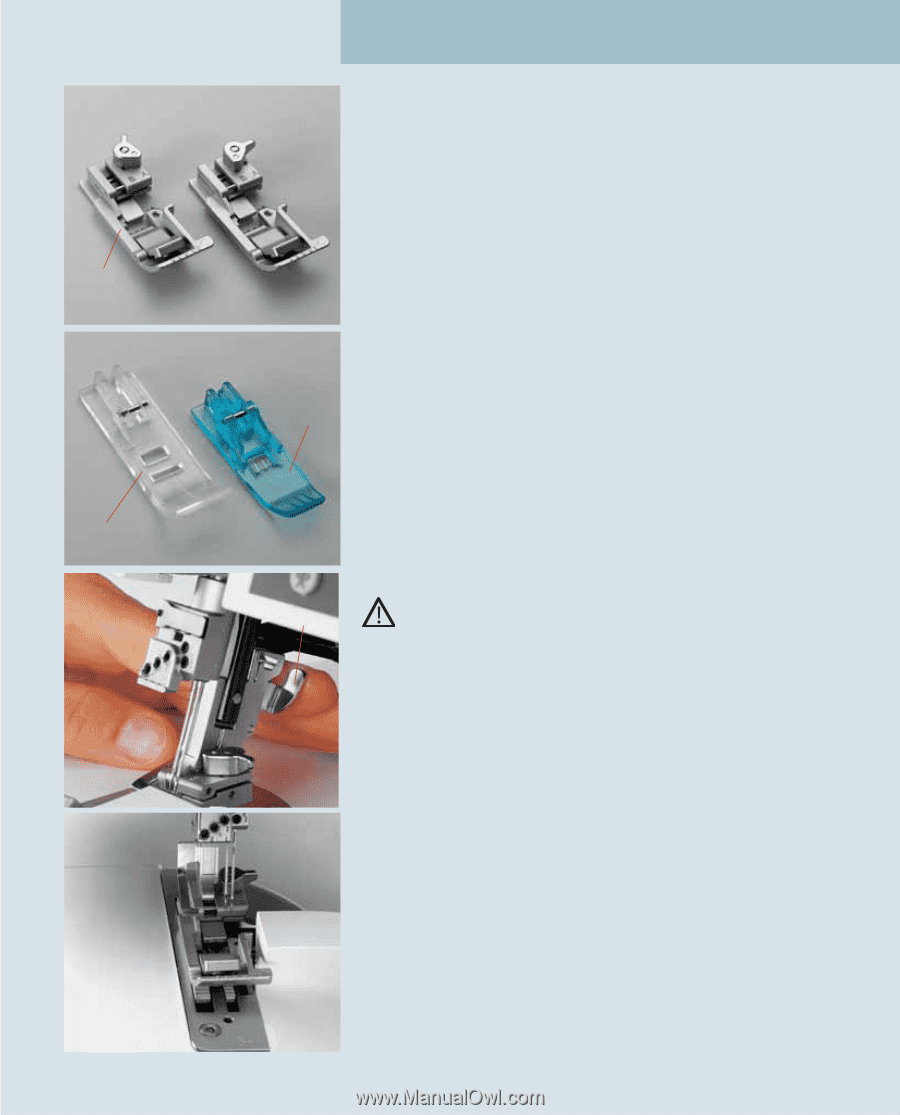
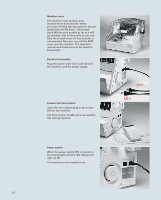
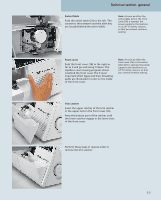
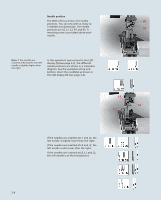
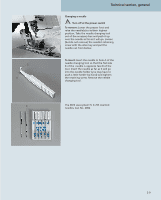
Technical section, general Presser foot The standard presser foot has two different positions: Note: The position of the presser foot, "A" or "B", appears in the LCD display (9) (see page 3-2). Position "A" - for sewing cover stitch (progs. 1, 2, 3), double chainstitch (prog. 4), the 4-thread safety seam (prog. 19) and the 5-thread safety seam (prog. 20). Position "B" - for sewing programs 05 - 18. To choose these positions, simply move the 20 selection lever. For cover stitch (progs. 1, 2, 3) and double chainstitch (prog. 4), clearview foot F from the accessory box can also be used. Note: The foot you need to use will be shown in the LCD display (9) (see page 3-2). For top cover (progs. 21, 22, 23) and deco R cover (progs. 24 - 30), use clearview foot R from the accessories box. F Changing the presser foot A Turn off the power switch To remove: Raise the needle(s) to its/their highest position. Lift up the presser foot and press lever A on the back of the presser foot holder. The presser foot is released automatically and you can pull it out to the left. To insert: Place the presser foot below the presser foot holder so that when the presser foot lifter is lowered, the pin on the foot is directly beneath the presser foot holder. Lower the presser foot and if necessary press lever A, the presser foot will now click back into place. Check: Lift the presser foot to confirm that it is correctly attached. 2-7
-
 1
1 -
2
-
3
-
4
-
5
-
6
-
7
-
8
-
9
-
10
-
11
-
12
-
13
-
14
-
15
-
 16
16 -
 17
17 -
 18
18 -
 19
19 -
 20
20 -
 21
21 -
 22
22 -
 23
23 -
 24
24 -
 25
25 -
 26
26 -
27
-
28
-
29
-
30
-
31
-
32
-
33
-
34
-
35
-
36
-
37
-
38
-
39
-
40
-
41
-
42
-
43
-
44
-
45
-
46
-
47
-
48
-
49
-
50
-
51
-
52
-
53
-
54
-
55
-
56
-
57
-
58
-
59
-
60
-
61
-
62
-
63
-
64
-
65
-
66
-
67
-
68
-
69
-
70
-
71
-
72
-
73
-
74
-
75
-
76
-
77
-
78
-
79
-
80
-
81
-
82
-
83
-
84
-
85
-
86
-
87
-
88
-
89
-
90
-
91
-
92
-
93
-
94
-
95
-
96
-
97
-
98
-
99
-
100
-
101
-
102
-
103
-
104
-
105
-
106
-
107
-
108
-
109
-
110
-
111
-
112
-
113
-
114
-
115
-
116
-
117
-
118
-
119
-
120
-
121
-
122
-
123
-
124
-
125
-
126
-
127
-
128
-
129
-
130
-
131
-
132
-
133
-
134
-
135
-
136
-
137
-
138
-
139
-
140
-
141
-
142
-
143
-
144
 |
 |