Pfaff creative 4874 Owner's Manual - Page 66
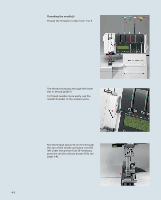
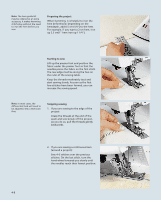
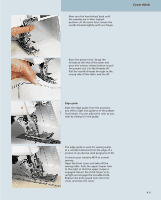
Preparing the project, Stopping sewing, Starting to sew
 |
View all Pfaff creative 4874 manuals
Add to My Manuals
Save this manual to your list of manuals |
Page 66 highlights
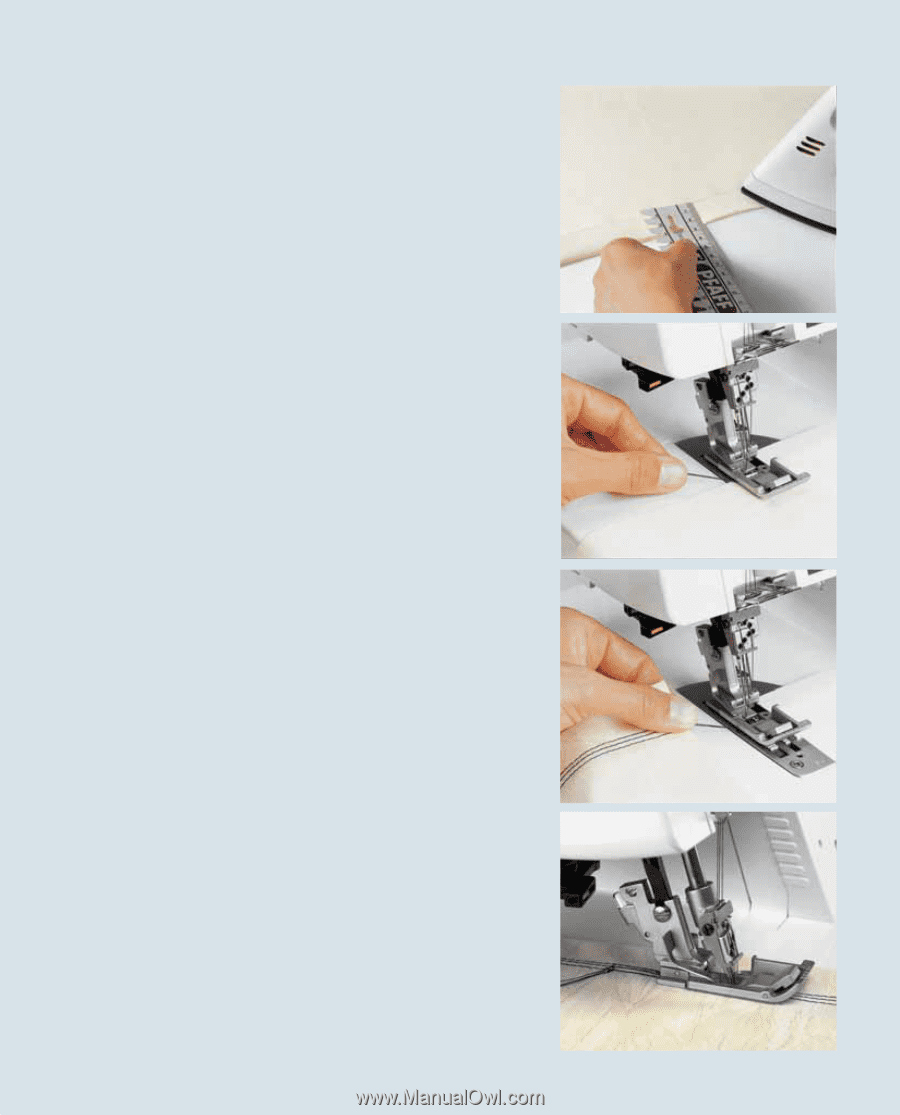
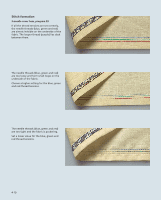
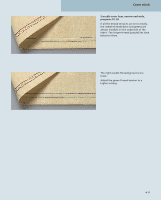
Note: The hem guide H2 may be ordered as an extra accessory. It makes hemming child's play without the need to iron the hem before you sew. Preparing the project When hemming, it is helpful to iron the hem beforehand. Depending on the hemdepth, add 0.5 cm (1/4") to the hem. For example, if you want a 2 cm hem, iron up 2.5 cm(1" hem iron up 1 1/4"). Starting to sew Lift up the presser foot and position the fabric under the presser foot so that the needles pierce the fabric on the first stitch. The raw edge must be along the two on the ruler of the sewing table. Keep the threads moderately taut and start sewing slowly. As soon as the first few stitches have been formed, you can increase the sewing speed. Note: In most cases, the differential feed will need to be adjusted. Sew a test seam first. Stopping sewing 1. If you are sewing to the edge of the project: Grasp the threads at the end of the seam and sew slowly off the project. As you do so, pull the threads gently backwards. 2. If you are sewing a continuous hem (around a project): Sew 4-5 stitches over the previous stitches. On the last stitch, turn the hand wheel towards you slowly until the needles reach their lowest position. 4-8
-
 1
1 -
2
-
3
-
4
-
5
-
6
-
7
-
8
-
9
-
10
-
11
-
12
-
13
-
14
-
15
-
16
-
17
-
18
-
19
-
20
-
21
-
22
-
23
-
24
-
25
-
26
-
27
-
28
-
29
-
30
-
31
-
32
-
33
-
34
-
35
-
36
-
37
-
38
-
39
-
40
-
41
-
42
-
43
-
44
-
45
-
46
-
47
-
48
-
49
-
50
-
51
-
52
-
53
-
54
-
55
-
56
-
57
-
58
-
59
-
60
-
 61
61 -
 62
62 -
 63
63 -
 64
64 -
 65
65 -
 66
66 -
 67
67 -
 68
68 -
 69
69 -
 70
70 -
 71
71 -
72
-
73
-
74
-
75
-
76
-
77
-
78
-
79
-
80
-
81
-
82
-
83
-
84
-
85
-
86
-
87
-
88
-
89
-
90
-
91
-
92
-
93
-
94
-
95
-
96
-
97
-
98
-
99
-
100
-
101
-
102
-
103
-
104
-
105
-
106
-
107
-
108
-
109
-
110
-
111
-
112
-
113
-
114
-
115
-
116
-
117
-
118
-
119
-
120
-
121
-
122
-
123
-
124
-
125
-
126
-
127
-
128
-
129
-
130
-
131
-
132
-
133
-
134
-
135
-
136
-
137
-
138
-
139
-
140
-
141
-
142
-
143
-
144
 |
 |