Pfaff creative icon User Guide - Page 140
Hoop Position, Current Stitch Position, Park Position, Trim Position, Center Position
|
View all Pfaff creative icon manuals
Add to My Manuals
Save this manual to your list of manuals |
Page 140 highlights
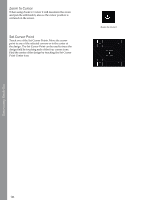
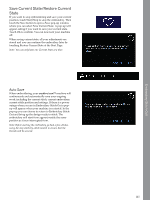
Hoop Position Use the Hoop Position options to move the embroidery hoop to different positions. Current Stitch Position When you want to return to the current stitch position and continue embroidering after you have changed the hoop position, touch the current stitch position. You can also press at the Start/Stop button, on the front of the machine, once to return to the current stitch position and start the embroidery. Park Position When you have finished your embroidery, remove the hoop and select park position. The embroidery arm will be placed in a position that will allow easy storage. Use the park position when you need to have a free sewing space with the embroidery arm out of the way. Note: Normally the embroidery unit is in park position when in Embroidery Edit or Sewing Mode. Trim Position Trim position will move the hoop towards you, making it easier to trim threads and fabric for specialty techniques. Center Position When you need to remove the hoop, e.g. when changing a bobbin, touch the Center Position. This will also show the Center Position of the hoop. Current Stitch Position Park Position Trim Position Center Position Embroidery Stitch-Out 140
-
 1
1 -
2
-
3
-
4
-
5
-
6
-
7
-
8
-
9
-
10
-
11
-
12
-
13
-
14
-
15
-
16
-
17
-
18
-
19
-
20
-
21
-
22
-
23
-
24
-
25
-
26
-
27
-
28
-
29
-
30
-
31
-
32
-
33
-
34
-
35
-
36
-
37
-
38
-
39
-
40
-
41
-
42
-
43
-
44
-
45
-
46
-
47
-
48
-
49
-
50
-
51
-
52
-
53
-
54
-
55
-
56
-
57
-
58
-
59
-
60
-
61
-
62
-
63
-
64
-
65
-
66
-
67
-
68
-
69
-
70
-
71
-
72
-
73
-
74
-
75
-
76
-
77
-
78
-
79
-
80
-
81
-
82
-
83
-
84
-
85
-
86
-
87
-
88
-
89
-
90
-
91
-
92
-
93
-
94
-
95
-
96
-
97
-
98
-
99
-
100
-
101
-
102
-
103
-
104
-
105
-
106
-
107
-
108
-
109
-
110
-
111
-
112
-
113
-
114
-
115
-
116
-
117
-
118
-
119
-
120
-
121
-
122
-
123
-
124
-
125
-
126
-
127
-
128
-
129
-
130
-
131
-
132
-
133
-
134
-
 135
135 -
 136
136 -
 137
137 -
 138
138 -
 139
139 -
 140
140 -
 141
141 -
 142
142 -
 143
143 -
 144
144 -
 145
145 -
146
-
147
-
148
-
149
-
150
-
151
-
152
-
153
-
154
-
155
-
156
-
157
-
158
-
159
-
160
-
161
-
162
-
163
-
164
-
165
-
166
-
167
-
168
-
169
-
170
-
171
-
172
-
173
-
174
-
175
-
176
-
177
-
178
-
179
-
180
-
181
-
182
-
183
-
184
-
185
-
186
-
187
-
188
-
189
-
190
-
191
-
192
-
193
-
194
-
195
-
196
-
197
-
198
-
199
-
200
-
201
-
202
-
203
-
204
-
205
-
206
-
207
-
208
-
209
-
210
-
211
 |
 |