Pfaff creative icon User Guide - Page 145
Save Current State/Restore Current State, Auto Save, touching Restore Current State at the Start
|
View all Pfaff creative icon manuals
Add to My Manuals
Save this manual to your list of manuals |
Page 145 highlights
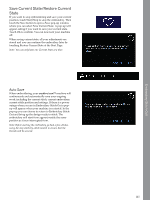
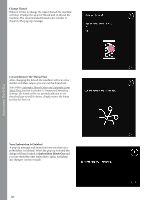
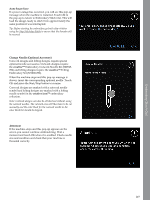
Embroidery Stitch-Out Save Current State/Restore Current State If you want to stop embroidering and save your current position, touch Start/Stop to stop the embroidery. Then touch the Save button to open a Save pop-up window where you can select Save Current State. A pop-up will appear asking if you want to save your current state. Touch OK to confirm. You can now turn your machine off. When saving current state, all your adjustments are stored and you can continue the embroidery later by touching Restore Current State at the Start Page. Note: You can only have one Current State at a time. Auto Save When embroidering, your creative icon™ machine will continuously and automatically save your ongoing work, including the current stitch, current embroidery, current stitch position and settings. If there is a power outage when you are in Embroidery Stitch-Out a popup will appear when your machine is restarted. In the pop-up you can choose to return to Embroidery StitchOut and bring up the design ready to stitch. The embroidery will start from approximately the same position as it was interrupted from. Note: Before starting the embroidery go back a few stitches using the step stitch-by-stitch control to ensure that the threads will be secured. 145
-
 1
1 -
2
-
3
-
4
-
5
-
6
-
7
-
8
-
9
-
10
-
11
-
12
-
13
-
14
-
15
-
16
-
17
-
18
-
19
-
20
-
21
-
22
-
23
-
24
-
25
-
26
-
27
-
28
-
29
-
30
-
31
-
32
-
33
-
34
-
35
-
36
-
37
-
38
-
39
-
40
-
41
-
42
-
43
-
44
-
45
-
46
-
47
-
48
-
49
-
50
-
51
-
52
-
53
-
54
-
55
-
56
-
57
-
58
-
59
-
60
-
61
-
62
-
63
-
64
-
65
-
66
-
67
-
68
-
69
-
70
-
71
-
72
-
73
-
74
-
75
-
76
-
77
-
78
-
79
-
80
-
81
-
82
-
83
-
84
-
85
-
86
-
87
-
88
-
89
-
90
-
91
-
92
-
93
-
94
-
95
-
96
-
97
-
98
-
99
-
100
-
101
-
102
-
103
-
104
-
105
-
106
-
107
-
108
-
109
-
110
-
111
-
112
-
113
-
114
-
115
-
116
-
117
-
118
-
119
-
120
-
121
-
122
-
123
-
124
-
125
-
126
-
127
-
128
-
129
-
130
-
131
-
132
-
133
-
134
-
135
-
136
-
137
-
138
-
139
-
 140
140 -
 141
141 -
 142
142 -
 143
143 -
 144
144 -
 145
145 -
 146
146 -
 147
147 -
 148
148 -
 149
149 -
 150
150 -
151
-
152
-
153
-
154
-
155
-
156
-
157
-
158
-
159
-
160
-
161
-
162
-
163
-
164
-
165
-
166
-
167
-
168
-
169
-
170
-
171
-
172
-
173
-
174
-
175
-
176
-
177
-
178
-
179
-
180
-
181
-
182
-
183
-
184
-
185
-
186
-
187
-
188
-
189
-
190
-
191
-
192
-
193
-
194
-
195
-
196
-
197
-
198
-
199
-
200
-
201
-
202
-
203
-
204
-
205
-
206
-
207
-
208
-
209
-
210
-
211
 |
 |