Pfaff creative icon User Guide - Page 206
The Automatic Needle Threader Does Not Work Properly, The Machine Skips Stitches
|
View all Pfaff creative icon manuals
Add to My Manuals
Save this manual to your list of manuals |
Page 206 highlights
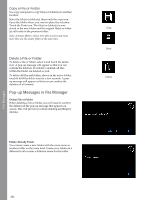
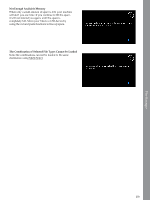
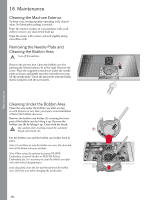
Maintenance The Automatic Needle Threader Does Not Work Properly The needle eye is too small for the thread Use a larger needle size or lighter weight thread. See Selecting Correct Thread/Needle Combination, page 37 Are you using a specialty thread such as an "invisible" or other stretchy thread, metallic or flat metallic thread or heavy weight thread? Specialty threads may not be caught correctly by the hook on the automatic needle threader. If this happens, the needle will not be threaded. Try using the automatic needle threader again or thread the needle manually. Pop-up message: The automatic needle threader is not in its home position. Touch OK to calibrate. The needle threader has shifted from its home position, possibly due to something snagging on it during sewing or embroidery. Touch OK to calibrate the needle threader and continue sewing or embroidering. Pop-up message: The calibration of the automatic needle threader has failed. Touch OK to calibrate again. If the automatic needle threader still does not calibrate correctly, please contact your local authorized service center. Shown if the machine fails to calibrate the needle threader when turning on the machine. Remove anything that may be blocking the needle threader and touch OK. Pop-up message: The automatic needle threader seems to be blocked and cannot return to its home position. Touch OK to move the automatic needle threader to position for manual cleaning. If using thread that is too thick for the needle, the automatic needle threader may not be able to pull the thread through the needle eye. Touch OK to go to manual cleaning. A new pop-up message with further instructions will appear. If you cannot identify the problem or are unable to remove the thread, touch cancel. Pop-up message: Gently remove any thread that is stuck in the automatic needle threader or needle eye. Touch OK to return the automatic needle threader to its home position. If using thread that is too thick for the needle, the automatic needle threader may not be able to pull the thread through the needle eye. Remove the thread carefully so as not to damage the small hook that runs through the needle eye. Once the thread is removed, touch OK. Pop-up message: The automatic needle threader is not in its home position. Further sewing is disabled to prevent damage to the machine. After closing this pop-up, touch the automatic needle threader button on your machine to try threading again or contact your local authorized service center. Contact your authorized PFAFF® retailer for service. Pop-up message: The automatic needle threader cannot return to its home position. Further sewing is disabled to prevent damage to the machine. Please contact your local authorized service center. Contact your authorized PFAFF® retailer for service. The Machine Skips Stitches Did you insert the needle properly? Did you insert a wrong needle? Is the needle bent or blunt? Did you thread the machine properly? Is the correct presser foot used? Insert needle correctly as described, see Changing the Needle, page 34. Use needle system 130/705 H. Use a needle suitable for selected fabric and thread. See Selecting Correct Thread/Needle Combination, page 37. Insert a new needle. Remove the thread completely and rethread the machine, see Threading the Upper Thread, page 35. Attach correct presser foot. 206
-
 1
1 -
2
-
3
-
4
-
5
-
6
-
7
-
8
-
9
-
10
-
11
-
12
-
13
-
14
-
15
-
16
-
17
-
18
-
19
-
20
-
21
-
22
-
23
-
24
-
25
-
26
-
27
-
28
-
29
-
30
-
31
-
32
-
33
-
34
-
35
-
36
-
37
-
38
-
39
-
40
-
41
-
42
-
43
-
44
-
45
-
46
-
47
-
48
-
49
-
50
-
51
-
52
-
53
-
54
-
55
-
56
-
57
-
58
-
59
-
60
-
61
-
62
-
63
-
64
-
65
-
66
-
67
-
68
-
69
-
70
-
71
-
72
-
73
-
74
-
75
-
76
-
77
-
78
-
79
-
80
-
81
-
82
-
83
-
84
-
85
-
86
-
87
-
88
-
89
-
90
-
91
-
92
-
93
-
94
-
95
-
96
-
97
-
98
-
99
-
100
-
101
-
102
-
103
-
104
-
105
-
106
-
107
-
108
-
109
-
110
-
111
-
112
-
113
-
114
-
115
-
116
-
117
-
118
-
119
-
120
-
121
-
122
-
123
-
124
-
125
-
126
-
127
-
128
-
129
-
130
-
131
-
132
-
133
-
134
-
135
-
136
-
137
-
138
-
139
-
140
-
141
-
142
-
143
-
144
-
145
-
146
-
147
-
148
-
149
-
150
-
151
-
152
-
153
-
154
-
155
-
156
-
157
-
158
-
159
-
160
-
161
-
162
-
163
-
164
-
165
-
166
-
167
-
168
-
169
-
170
-
171
-
172
-
173
-
174
-
175
-
176
-
177
-
178
-
179
-
180
-
181
-
182
-
183
-
184
-
185
-
186
-
187
-
188
-
189
-
190
-
191
-
192
-
193
-
194
-
195
-
196
-
197
-
198
-
199
-
200
-
 201
201 -
 202
202 -
 203
203 -
 204
204 -
 205
205 -
 206
206 -
 207
207 -
 208
208 -
 209
209 -
 210
210 -
 211
211
 |
 |