Philips DVDR3355 User manual - Page 23
Getting Started - manuals
 |
View all Philips DVDR3355 manuals
Add to My Manuals
Save this manual to your list of manuals |
Page 23 highlights
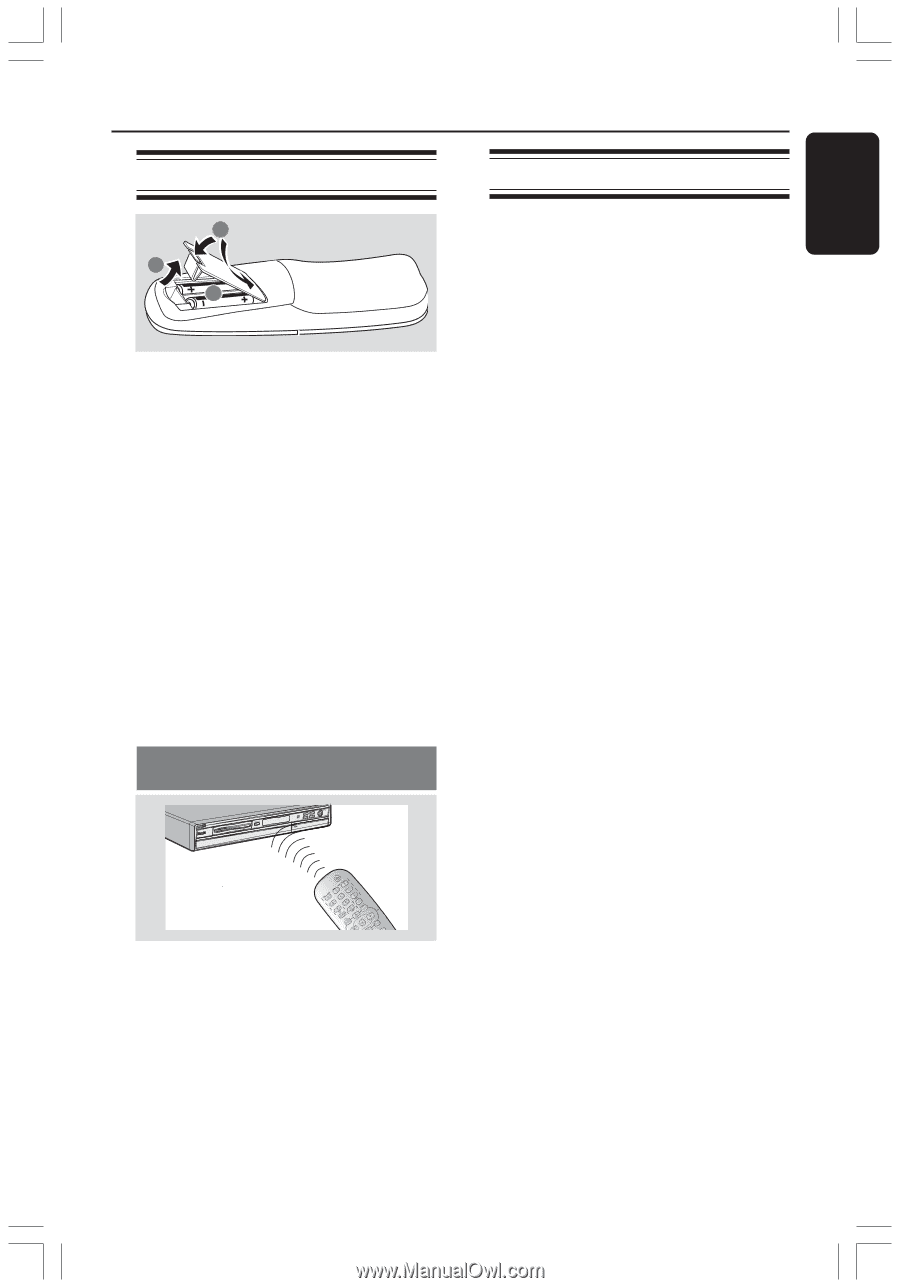
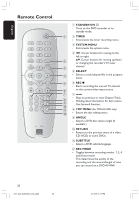
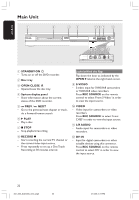
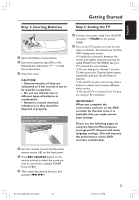
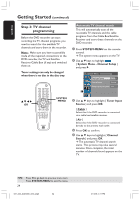
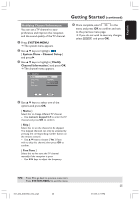
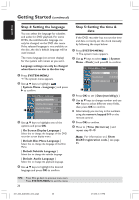
English Getting Started Step 1: Inserting Batteries Step 2: Setting the TV 3 1 2 1 Open the battery compartment. 2 Insert two batteries type R06 or AA, following the indications (+-) inside the compartment. 3 Close the cover. CAUTION! - Remove batteries if they are exhausted or if the remote is not to be used for a long time. - Do not use old and new or different types of batteries in combination. - Batteries contain chemical substances, so they should be disposed of properly. Using the remote control to operate the system 1 Connect the power cable from the DVD recorder's ~ MAINS to the power supply. 2 Turn on the TV and set it to the correct video-in channel. You should see the blue DVD background screen. ➜ Usually this channel is between the lowest and highest channels and may be called FRONT,A/V IN,VIDEO. See your TV's manual for more details. ➜ Or, you may go to channel 1 on your TV, then press the Channel down button repeatedly until you see the Video In channel. ➜ Or, the TV remote control may have a button or switch that chooses different video modes. ➜ Or, set the TV to channel 3 or 4 if you are using an RF modulator. IMPORTANT! When you complete the connections and turn on the DVD recorder for the first time, it is advisable that you make several basic settings. Please see the following pages on using the System Menu features to program TV channels and menu language settings. This will improve the performance of this DVD recorder considerably. 1 Aim the remote control directly at the remote sensor (iR) on the front panel. 2 Press REC SOURCE button on the remote control to select the mode you wish to control (for example TUNER, Front-CVBS.) 3 Then select the desired function (for example S, T.) 001_033_dvdr3355_37A_eng5 23 23 21/3/05, 3:17 PM
-
 1
1 -
2
-
3
-
4
-
5
-
6
-
7
-
8
-
9
-
10
-
11
-
12
-
13
-
14
-
15
-
16
-
17
-
 18
18 -
 19
19 -
 20
20 -
 21
21 -
 22
22 -
 23
23 -
 24
24 -
 25
25 -
 26
26 -
 27
27 -
 28
28 -
29
-
30
-
31
-
32
-
33
-
34
-
35
-
36
-
37
-
38
-
39
-
40
-
41
-
42
-
43
-
44
-
45
-
46
-
47
-
48
-
49
-
50
-
51
-
52
-
53
-
54
-
55
-
56
-
57
-
58
-
59
-
60
 |
 |