Philips DVDR3355 User manual - Page 26
Step 4: Setting the language, Step 5: Setting the time & - dvd recorder manual
 |
View all Philips DVDR3355 manuals
Add to My Manuals
Save this manual to your list of manuals |
Page 26 highlights
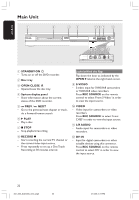
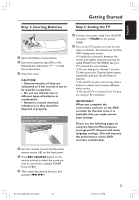
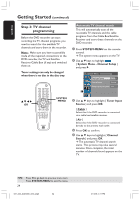
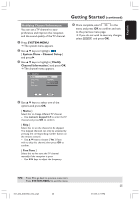
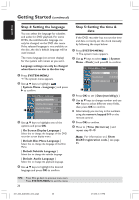
Getting Started (continued) English Step 4: Setting the language You can select the language for subtitles and audio for DVD playback. For some DVDs, the subtitle/audio language can only be changed via the DVD disc menu. If the selected language is not available on the disc, the disc's default language will be used instead. The menu language (on-screen display) for the system will remain as you set it. Language settings can only be changed when there is no disc in the disc tray. 1 Press SYSTEM-MENU. ➜ The system menu appears. 2 Use 3 4 keys to highlight { System Menu - Language } and press 2 to confirm. System Menu - Language On Screen Display Language English Default Disc Menu Language English Default Subtitle Language Default Audio Language Off English 3 Use 3 4 keys to highlight one of the options and press OK. { On Screen Display Language } Select this to change the language of this DVD recorder screen display menu. { Default Disc Menu Language } Select this to change the language of the Disc Menu. { Default Subtitle Language } Select this to change the subtitle language. { Default Audio Language } Select this to change the playback language. 4 Use 3 4 keys to highlight the desired language and press OK to confirm. Step 5: Setting the time & date If the DVD recorder has not set the time and date correctly, set the clock manually by following the steps below. 1 Press SYSTEM-MENU. ➜ The system menu appears. 2 Use 3 4 keys to select { System Menu - Clock } and press 2 to confirm. System Menu - Clock Date(mm/dd/yy) 01 / 31 / 05 Time(hh:mm:ss) 10 : 33 : 57 AM Show DivX registration code: OK 3 Press OK to set { Date(mm/dd/yy). } 4 Use 3 4 keys to change number and use 1 2 keys to select different entry fields, then press OK to confirm. G Alternatively, you can key in the numbers using the numeric keypad 0-9 on the remote control. 5 Press OK to confirm. 6 Move to { Time (hh:mm:ss) } and repeat step 4~5. Note: For information on { Show DivX® registration code, } see page 55. TIPS: Press 1 to go back to previous menu item. Press SYSTEM-MENU to exit the menu. 26 001_033_dvdr3355_37A_eng5 26 21/3/05, 3:17 PM
-
 1
1 -
2
-
3
-
4
-
5
-
6
-
7
-
8
-
9
-
10
-
11
-
12
-
13
-
14
-
15
-
16
-
17
-
18
-
19
-
20
-
 21
21 -
 22
22 -
 23
23 -
 24
24 -
 25
25 -
 26
26 -
 27
27 -
 28
28 -
 29
29 -
 30
30 -
 31
31 -
32
-
33
-
34
-
35
-
36
-
37
-
38
-
39
-
40
-
41
-
42
-
43
-
44
-
45
-
46
-
47
-
48
-
49
-
50
-
51
-
52
-
53
-
54
-
55
-
56
-
57
-
58
-
59
-
60
 |
 |