Pioneer DEH-80PRS Owner's Manual - Page 20
Standard mode, Extra functions, Introduction of audio adjustments - asl
 |
View all Pioneer DEH-80PRS manuals
Add to My Manuals
Save this manual to your list of manuals |
Page 20 highlights
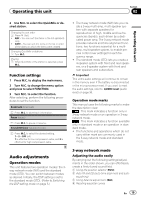
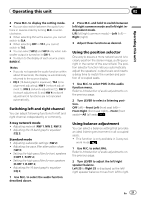
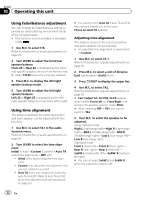
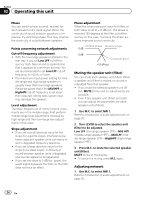
Section 02 Operating this unit Adjusting the audio finely By carrying out the following settings/adjustments in the order shown, you can effortlessly create a finely-tuned sound field. 1 Adjusting time alignment (TA1, TA2) 2 Adjusting network (NW 1, NW 2, NW 3, NW 4) 3 Adjusting equalizer curves (EQ 1) 4 Adjusting the 16-band graphic equalizer (EQ 2) Standard mode Adjusting the audio easily The following functions let you easily adjust your audio system to match the car interior acoustic characteristics, which vary depending on the type of car. 1 Using the position selector (POSI) 2 Auto TA and EQ (auto-time alignment and auto- equalizing) 3 Using fader/balance adjustment (F/B) 4 Recalling equalizer curves Adjusting the audio finely By carrying out the following settings/adjustments in the order shown, you can effortlessly create a finely-tuned sound field. 1 Using time alignment (TA1, TA2) 2 Using subwoofer output (SW 1) 3 Adjusting subwoofer settings (SW 2) 4 Adjusting low pass filter attenuation slope (SW 3) 5 Setting the high pass filter for front speakers (F.HPF 1, F.HPF 2) 6 Setting the high pass filter for rear speakers (R.HPF 1, R.HPF 2) 7 Adjusting equalizer curves (EQ 1) 8 Adjusting the 16-band graphic equalizer (EQ 2) Extra functions These functions are helpful in adjusting the sound to suit your system or your personal preferences. ! Adjusting loudness (LOUD) ! Adjusting source levels (SLA) ! Using automatic sound levelizer (ASL) Introduction of audio adjustments 1 1 Audio display 1 Press M.C. to display the main menu. 2 Turn M.C. to change the menu option and press to select AUDIO. 3 Turn M.C. to select the audio function. After selecting, perform the following procedures to set the audio function. 3-way network mode BAL (balance adjustment)-NW 1 (network adjustment 1)-NW 2 (network adjustment 2) -NW 3 (network adjustment 3)-NW 4 (network adjustment 4)-POSI (position selector) -TA1 (time alignment setting)-TA2 (time alignment adjusting)-LOUD (loudness)- EQ 1 (graphic equalizer)-EQ 2 (16-band graphic equalizer)-A.EQ (auto-equalizer on/off) -ASL (automatic sound levelizer)-SLA (source level adjustment) Standard mode F/B (balance adjustment)-POSI (position selector)-TA1 (time alignment setting)-TA2 (time alignment adjusting)-LOUD (loudness) -EQ 1 (graphic equalizer)-EQ 2 (16-band graphic equalizer)-SW 1 (subwoofer on/off) -SW 2 (subwoofer cut-off frequency)-SW 3 (subwoofer slope)-F.HPF 1 (front high pass filter slope)-F.HPF 2 (front high pass filter cut-off frequency)-R.HPF 1 (rear high pass filter slope)-R.HPF 2 (rear high pass filter cutoff frequency)-A.EQ (auto-equalizer on/off)- ASL (automatic sound levelizer)-SLA (source level adjustment) 20 En
-
 1
1 -
2
-
3
-
4
-
5
-
6
-
7
-
8
-
9
-
10
-
11
-
12
-
13
-
14
-
 15
15 -
 16
16 -
 17
17 -
 18
18 -
 19
19 -
 20
20 -
 21
21 -
 22
22 -
 23
23 -
 24
24 -
 25
25 -
26
-
27
-
28
-
29
-
30
-
31
-
32
-
33
-
34
-
35
-
36
-
37
-
38
-
39
-
40
-
41
-
42
-
43
-
44
-
45
-
46
-
47
-
48
-
49
-
50
-
51
-
52
 |
 |
