Pioneer DEH-80PRS Owner's Manual - Page 37
Other functions, Operating this unit - installation manual
 |
View all Pioneer DEH-80PRS manuals
Add to My Manuals
Save this manual to your list of manuals |
Page 37 highlights
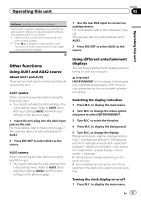
Operating this unit Section 02 Operating this unit Software (updating the bluetooth software) This function is used to update this unit with the latest bluetooth software. For about bluetooth software and updating, refer to our website. ! Never turn the unit off while the bluetooth soft- ware is being updated. 1 Press M.C. to display the data transfer mode. Follow the on-screen instructions to finish updating the bluetooth software. 1 Use the rear RCA input to connect an auxiliary device. For more details, refer to the installation manual. This auxiliary device is automatically set to AUX2. 2 Press SRC/OFF to select AUX2 as the source. Other functions Using AUX1 and AUX2 source About AUX1 and AUX2 There are two methods to connect auxiliary devices to this unit. AUX1 source When connecting auxiliary device using the front AUX input. ! You need to activate the AUX setting in the initial setting menu. Refer to AUX1 (front AUX input setting)/AUX2 (rear RCA input setting) on the previous page. 1 Insert the mini plug into the AUX input jack on this unit. For more details, refer to Head unit on page 7. This auxiliary device is automatically set to AUX1. 2 Press SRC/OFF to select AUX1 as the source. AUX2 source When connecting auxiliary device using the rear RCA input. ! You need to activate the AUX setting in the initial setting menu. Refer to AUX1 (front AUX input setting)/AUX2 (rear RCA input setting) on the previous page. Using different entertainment displays You can enjoy entertainment displays while listening to each sound source. Important ENTERTAINMENT will not display if the temperature is detected as being below 10°C. If this occurs, please wait for the unit to warm up before proceeding. Switching the display indication 1 Press M.C. to display the main menu. 2 Turn M.C. to change the menu option and press to select ENTERTAINMENT. 3 Turn M.C. to select the function. 4 Press M.C. to display the Background. 5 Turn M.C. to change the display. Background visual-genre-background picture 1-background picture 2-background picture 3-background picture 4-spectrum analyzer1-spectrum analyzer2-level indicator-level meter-simple display-movie screen -calendar # Genre display changes depending on the genre of music. # Genre display may not operate correctly depending on the application used to encode audio files. Turning the clock display on or off 1 Press M.C. to display the main menu. En 37
-
 1
1 -
2
-
3
-
4
-
5
-
6
-
7
-
8
-
9
-
10
-
11
-
12
-
13
-
14
-
15
-
16
-
17
-
18
-
19
-
20
-
21
-
22
-
23
-
24
-
25
-
26
-
27
-
28
-
29
-
30
-
31
-
 32
32 -
 33
33 -
 34
34 -
 35
35 -
 36
36 -
 37
37 -
 38
38 -
 39
39 -
 40
40 -
 41
41 -
 42
42 -
43
-
44
-
45
-
46
-
47
-
48
-
49
-
50
-
51
-
52
 |
 |
