Pioneer DEH-80PRS Owner's Manual - Page 21
Switching left and right channel, Using the position selector, Using balance adjustment - network mode
 |
View all Pioneer DEH-80PRS manuals
Add to My Manuals
Save this manual to your list of manuals |
Page 21 highlights
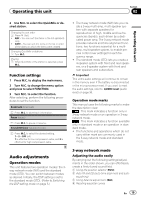
Operating this unit Section 02 Operating this unit 4 Press M.C. to display the setting mode. # You can also switch between the audio functions in reverse order by turning M.C. counterclockwise. # When selecting FM as the source, you cannot switch to SLA. # When selecting OFF in TA1, you cannot switch to TA2. # You can select SW 2 and SW 3 only when subwoofer output is turned on in SW 1. # To return to the display of each source, press BAND/ . Notes ! If you do not operate the audio function within about 30 seconds, the display is automatically returned to the source display. ! EQ 2 (16-band graphic equalizer), TA2 (time alignment adjusting), NW 1 (network adjustment 1), NW 2 (network adjustment 2), NW 3 (network adjustment 3) and NW 4 (network adjustment 4) functions are not canceled automatically. Switching left and right channel You can adjust following functions for left and right channel independently or commonly. 3-way network mode ! Adjusting network (NW 1, NW 2, NW 3) ! Adjusting the 16-band graphic equalizer (EQ 2) Standard mode ! Adjusting subwoofer settings (SW 2) ! Adjusting low pass filter attenuation slope (SW 3) ! Setting the high pass filter for front speakers (F.HPF 1, F.HPF 2) ! Setting the high pass filter for rear speakers (R.HPF 1, R.HPF 2) ! Adjusting the 16-band graphic equalizer (EQ 2) 1 Use M.C. to select the audio function described above. 2 Press M.C. and hold to switch between left/right common mode and left/right independent mode. L/R (left/right common mode)-Left (left)- Right (right) 3 Adjust these functions as desired. Using the position selector One way to assure a more natural sound is to clearly position the stereo image, putting you right in the center of the sound field. The position selector function lets you automatically adjust the speakers' output levels and inserts a delay time to match the number and position of occupied seats. 1 Use M.C. to select POSI in the audio function menu. Refer to Introduction of audio adjustments on the previous page. 2 Turn LEVER to select a listening posi- tion. OFF (off)-Front Left (front seat left)- Front Right (front seat right)-Front (front seats)-All (all seats ) Using balance adjustment You can select a balance setting that provides an ideal listening environment in all occupied seats. ! This function is only available in 3-way net- work mode . 1 Use M.C. to select BAL. Refer to Introduction of audio adjustments on the previous page. 2 Turn LEVER to adjust the left/right speaker balance. Left 25 to Right 25 is displayed as the left/ right speaker balance moves from left to right. En 21
-
 1
1 -
2
-
3
-
4
-
5
-
6
-
7
-
8
-
9
-
10
-
11
-
12
-
13
-
14
-
15
-
 16
16 -
 17
17 -
 18
18 -
 19
19 -
 20
20 -
 21
21 -
 22
22 -
 23
23 -
 24
24 -
 25
25 -
 26
26 -
27
-
28
-
29
-
30
-
31
-
32
-
33
-
34
-
35
-
36
-
37
-
38
-
39
-
40
-
41
-
42
-
43
-
44
-
45
-
46
-
47
-
48
-
49
-
50
-
51
-
52
 |
 |
