Pioneer DEH-80PRS Owner's Manual - Page 22
Using fader/balance adjustment, Using time alignment - auto eq
 |
View all Pioneer DEH-80PRS manuals
Add to My Manuals
Save this manual to your list of manuals |
Page 22 highlights
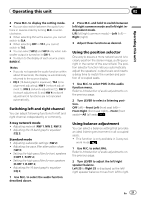
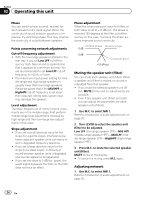
Section 02 Operating this unit Using fader/balance adjustment You can change the fader/balance setting to provide an ideal listening environment for all of the occupied seats. ! This function is only available in standard mode . 1 Use M.C. to select F/B. Refer to Introduction of audio adjustments on page 20. 2 Turn LEVER to adjust the front/rear speaker balance. Front 25 to Rear 25 is displayed as the front/ rear speaker balance moves from front to rear. # Select F/R 00 when only using two speakers. 3 Press M.C. to display the left/right speaker balance mode. 4 Turn LEVER to adjust the left/right speaker balance. Left 25 to Right 25 is displayed as the left/ right speaker balance moves from left to right. Using time alignment The distance between the listening position and each speaker can be adjusted with this function. 1 Use M.C. to select TA1 in the audio function menu. Refer to Introduction of audio adjustments on page 20. 2 Turn LEVER to select the time alignment. Initial (initial)-Custom (custom)-Auto TA (auto-time alignment)-OFF (off) ! Initial is the factory supplied time alignment. ! Custom is an adjusted time alignment that you can create for yourself. ! Auto TA is the time alignment created by auto TA and EQ. (Refer to Auto TA and EQ (auto-time alignment and auto-equalizing) on page 29.) # You cannot select Auto TA if auto TA and EQ has not been carried out. In this case, Please set Auto TA appears. Adjusting time alignment The distance between the selected position and each speaker can be adjusted. ! An adjusted time alignment is memorized in Custom. 1 Use M.C. to select TA 1. Refer to Introduction of audio adjustments on page 20. 2 Press M.C. to select a unit of distance. (cm) (centimeter)-(inch) (inch) 3 Press /DISP to display the upper tier. 4 Use M.C. to select TA2. Refer to Introduction of audio adjustments on page 20. # Can't Adjust TA. Set POS. FL/FR appears when neither Front Left nor Front Right is selected in the position selector mode (POSI). # When selecting OFF in TA1, you cannot switch to TA2. 5 Turn M.C. to select the speaker to be adjusted. 3-way network mode High L (high-range left)-High R (high-range right)-Mid L (middle-range left)-Mid R (middle-range right)-Low L (low-range left)- Low R (low-range right) Standard mode Front L (front left)-Front R (front right)- Rear R (rear right)-Rear L (rear left)- SubW. L (subwoofer left)-SubW. R (subwoofer right) # You cannot select SubW. L and SubW. R when the subwoofer output is off. 22 En
-
 1
1 -
2
-
3
-
4
-
5
-
6
-
7
-
8
-
9
-
10
-
11
-
12
-
13
-
14
-
15
-
16
-
 17
17 -
 18
18 -
 19
19 -
 20
20 -
 21
21 -
 22
22 -
 23
23 -
 24
24 -
 25
25 -
 26
26 -
 27
27 -
28
-
29
-
30
-
31
-
32
-
33
-
34
-
35
-
36
-
37
-
38
-
39
-
40
-
41
-
42
-
43
-
44
-
45
-
46
-
47
-
48
-
49
-
50
-
51
-
52
 |
 |
