Pioneer DEH-80PRS Owner's Manual - Page 5
In case of trouble, Visit our website, Resetting the microprocessor, Switching the DSP setting, - firmware
 |
View all Pioneer DEH-80PRS manuals
Add to My Manuals
Save this manual to your list of manuals |
Page 5 highlights
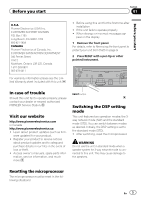
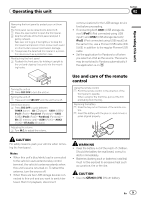
Before you start Section 01 Before you start U.S.A. Pioneer Electronics (USA) Inc. CUSTOMER SUPPORT DIVISION P.O. Box 1760 Long Beach, CA 90801-1760 800-421-1404 CANADA Pioneer Electronics of Canada, Inc. CUSTOMER SATISFACTION DEPARTMENT 340 Ferrier Street Unit 2 Markham, Ontario L3R 2Z5, Canada 1-877-283-5901 905-479-4411 For warranty information please see the Limited Warranty sheet included with this unit. ! Before using this unit for the first time after installation ! If the unit fails to operate properly ! When strange or incorrect messages ap- pear on the display 1 Remove the front panel. For details, refer to Removing the front panel to protect your unit from theft on page 9. 2 Press RESET with a pen tip or other pointed instrument. In case of trouble Should this unit fail to operate properly, please contact your dealer or nearest authorized PIONEER Service Station. Visit our website http://www.pioneerelectronics.com in Canada http://www.pioneerelectronics.ca ! Learn about product updates (such as firm- ware updates) for your product. ! Register your product to receive notices about product updates and to safeguard purchase details in our files in the event of loss or theft. ! Access owner's manuals, spare parts information, service information, and much more. RESET button Switching the DSP setting mode This unit features two operation modes: the 3way network mode (NW) and the standard mode (STD). You can switch between modes as desired. Initially, the DSP setting is set to the standard mode (STD). ! After switching, reset the microprocessor. WARNING Do not use the unit in standard mode when a speaker system for 3-way network mode is connected to this unit. This may cause damage to the speakers. Resetting the microprocessor The microprocessor must be reset in the following situations: En 5
-
 1
1 -
 2
2 -
 3
3 -
 4
4 -
 5
5 -
 6
6 -
 7
7 -
 8
8 -
 9
9 -
 10
10 -
 11
11 -
12
-
13
-
14
-
15
-
16
-
17
-
18
-
19
-
20
-
21
-
22
-
23
-
24
-
25
-
26
-
27
-
28
-
29
-
30
-
31
-
32
-
33
-
34
-
35
-
36
-
37
-
38
-
39
-
40
-
41
-
42
-
43
-
44
-
45
-
46
-
47
-
48
-
49
-
50
-
51
-
52
 |
 |
