Pioneer MEP-7000 Owner's Manual - Page 52
<For Windows XP>, <For Windows 2000>
 |
UPC - 012562879185
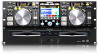
View all Pioneer MEP-7000 manuals
Add to My Manuals
Save this manual to your list of manuals |
Page 52 highlights
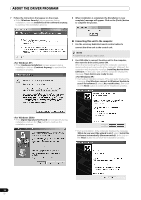
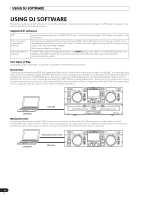
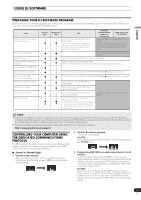
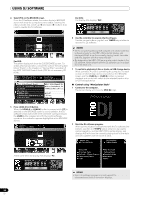
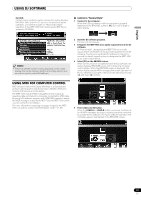
ABOUT THE DRIVER PROGRAM 7 Follow the instructions that appear on the screen. • If the [Windows Security] screen appears during installation, click on [Install this driver software anyway] to continue the installation process. 8 When installation is completed, the [Installation is now complete.] message will appear. Click on the [Finish] button to complete the process. • If the [Hardware Installation] screen appears during installation, click on [Continue Anyway] to continue the installation process. Connecting this unit to the computer 1 Use the accessory dedicated remote control cables to connect the drive unit to the control unit. NOTE • Insert firmly until you hear a click. 2 Use USB cable to connect the drive unit to the computer, then turn the drive unit's power ON. When first connecting this unit to the computer, and when disconnecting and reconnecting the computer USB port, the computer may display the message [Installing device driver software]. In this case, wait until the computer displays the message [Your devices are ready to use]. • During the installation process, if the computer displays the message [Can Windows connect to Windows Update to search for software?] select [No, not this time], then click on the [Next] button to continue the installation process. • If the [Digital Signature Not Found] screen appears during installation, click on the [Yes] button to continue the installation process. • During installation, if the computer displays the message [What do you want the wizard to do?] select [Install the software automatically (Recommended)], then click on the [Next] button to continue the installation process. 52 En
-
 1
1 -
2
-
3
-
4
-
5
-
6
-
7
-
8
-
9
-
10
-
11
-
12
-
13
-
14
-
15
-
16
-
17
-
18
-
19
-
20
-
21
-
22
-
23
-
24
-
25
-
26
-
27
-
28
-
29
-
30
-
31
-
32
-
33
-
34
-
35
-
36
-
37
-
38
-
39
-
40
-
41
-
42
-
43
-
44
-
45
-
46
-
 47
47 -
 48
48 -
 49
49 -
 50
50 -
 51
51 -
 52
52 -
 53
53 -
 54
54 -
 55
55 -
 56
56 -
 57
57 -
58
-
59
-
60
-
61
-
62
-
63
-
64
-
65
-
66
-
67
-
68
-
69
-
70
-
71
-
72
 |
 |
