Pioneer VSX 818V Owner's Manual - Page 38
Fine Channel Level - subwoofer problem
 |
UPC - 012562884769
View all Pioneer VSX 818V manuals
Add to My Manuals
Save this manual to your list of manuals |
Page 38 highlights
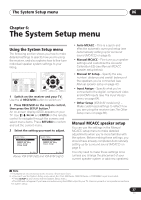
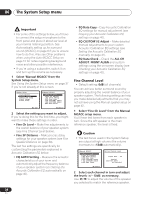
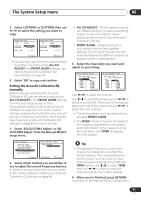
06 The System Setup menu Important • For some of the settings below, you'll have to connect the setup microphone to the front panel and place it about ear level at your normal listening position. See Automatically setting up for surround sound (MCACC) on page 8 if you're unsure how to do this. Also see Other problems when using the Auto MCACC Setup on page 10 for notes regarding background noise and other possible interference. • If you're using a subwoofer, switch it on and turn up the volume as necessary. 1 Select 'Manual MCACC' from the System Setup menu. See Using the System Setup menu on page 37 if you're not already at this screen. System Setup 1.Auto MCACC 2.Manual MCACC 3.Manual SP Setup 4.Input Assign 5.Other Setup : Exit 2.Manual MCACC a.Fine Ch Level b.Fine SP Distance c.EQ AUTO Setting d.EQ Data Copy e.EQ CUSTOM1 Adjust f .EQ CUSTOM2 Adjust g.EQ Data Check :Return 2 Select the setting you want to adjust. If you're doing this for the first time, you might want to make these settings in order. • Fine Ch Level - Make fine adjustments to the overall balance of your speaker system (see Fine Channel Level below). • Fine SP Distance - Make precise delay settings for your speaker system (see Fine Speaker Distance on page 39). The last five settings are specifically for customizing the parameters explained in Acoustic Calibration EQ below: • EQ AUTO Setting - Measure the acoustic characteristics of your room and automatically adjust the frequency balance of your speaker system (see Setting the Acoustic Calibration EQ automatically on page 40). • EQ Data Copy - Copy Acoustic Calibration EQ settings for manual adjustment (see Copying your Acoustic Calibration EQ settings on page 40). • EQ CUSTOM1/2 Adjust - Make detailed manual adjustments to your custom Acoustic Calibration EQ settings (see Setting the Acoustic Calibration EQ manually on page 41). • EQ Data Check - Check the ALL CH ADJUST, FRONT ALIGN and custom settings using the on-screen display (see Checking your Acoustic Calibration EQ settings on page 42). Fine Channel Level • Default setting: 0dB (all channels) You can achieve better surround sound by properly adjusting the overall balance of your speaker system. The following setting can help you make detailed adjustments that you may not achieve using the Manual speaker setup on page 42. 1 Select 'Fine Ch Level' from the Manual MCACC setup menu. You'll hear test tones from each speaker in turn. Since the left speaker is the main reference speaker, the level is fixed. Caution • The test tones used in the System Setup are output at high volume (the volume increases to -13dB automatically). 2.Manual MCACC a.Fine Ch Level b.Fine SP Distance c.EQ AUTO Setting d.EQ Data Copy e.EQ CUSTOM1 Adjust f .EQ CUSTOM2 Adjust g.EQ Data Check :Return 2a.Fine Channel Level Please Wait . . . 20 Caution! Loud test tones will be output. :Cancel 2 Select each channel in turn and adjust the levels (+/- 10dB) as necessary. Use / to adjust the volume of the speaker you selected to match the reference speaker. 38 En
-
 1
1 -
2
-
3
-
4
-
5
-
6
-
7
-
8
-
9
-
10
-
11
-
12
-
13
-
14
-
15
-
16
-
17
-
18
-
19
-
20
-
21
-
22
-
23
-
24
-
25
-
26
-
27
-
28
-
29
-
30
-
31
-
32
-
 33
33 -
 34
34 -
 35
35 -
 36
36 -
 37
37 -
 38
38 -
 39
39 -
 40
40 -
 41
41 -
 42
42 -
 43
43 -
44
-
45
-
46
-
47
-
48
-
49
-
50
-
51
-
52
-
53
-
54
-
55
-
56
-
57
-
58
-
59
-
60
-
61
-
62
-
63
-
64
-
65
-
66
-
67
-
68
-
69
-
70
-
71
-
72
-
73
-
74
-
75
-
76
 |
 |
