Pioneer VSX 818V Owner's Manual - Page 67
Additional information - troubleshooting
 |
UPC - 012562884769
View all Pioneer VSX 818V manuals
Add to My Manuals
Save this manual to your list of manuals |
Page 67 highlights
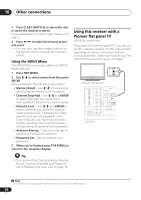
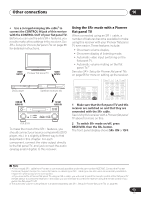
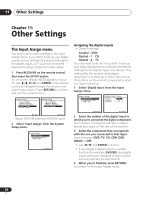
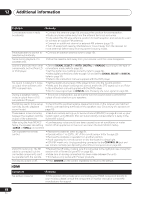
Additional information 12 English Deutsch Français Italiano Nederlands Español Chapter 12: Additional information Troubleshooting Incorrect operations are often mistaken for trouble and malfunctions. If you think that there is something wrong with this component, check the points below. Take a look at the other components and electrical appliances being used, because sometimes the problem may lie there. If the trouble isn't sorted out even after going through the checks below, ask your nearest Pioneer authorized independent service company to carry out repair work. • If the unit does not operate normally due to external effects such as static electricity disconnect the power plug from the outlet and insert again to return to normal operating conditions. Problem Remedy The power does not turn on. • Disconnect the power plug from the outlet, and insert again. • Make sure there are no loose strands of speaker wire touching the rear panel. This could cause the receiver to shut off automatically. The receiver suddenly switches • After about a minute (you won't be able to switch the unit on during this time), off and the power indicator switch the receiver back on. If the message persists, call a Pioneer authorized blinks. independent service company. No sound is output when a function is selected. • Make sure the component is connected correctly (refer to Connecting up on page 11). • Press MUTE on the remote control to turn muting off. • Press SPEAKERS to select the proper speaker set (see Switching the speaker system on page 22). • Press SIGNAL SELECT to select the proper input signal (see Choosing the input signal on page 36). No image is output when a function is selected. • Make sure the component is connected correctly (refer to Connecting up on page 11). • Select the correct component (use the input select buttons). • Check Assigning the component video inputs on page 65 to make sure you're assigned the correct input. • The video input selected on the TV monitor is incorrect. Refer to the instruction manual supplied with the TV. No sound from subwoofer. • Make sure the subwoofer is switched on. • If the subwoofer has a volume knob, make sure it's turned up. • The Dolby Digital or DTS source you are listening to may not have an LFE channel. • Switch the subwoofer setting in Speaker Setting on page 42 to YES or PLUS. • Switch the LFE ATT (LFE Attenuate) on page 35 to LFEATT 0 or LFEATT 10. No sound from surround or center speakers. • Connect the speakers properly (refer to page 20). • Refer to Speaker Setting on page 42 to check the speaker settings. • Refer to Channel Level on page 44 to check the speaker levels. The PHASE CONTROL feature doesn't seem to have an audible effect. • If applicable, check that the lowpass filter switch on your subwoofer is off, or the lowpass cutoff is set to the highest frequency setting. If there is a PHASE setting on your subwoofer, set it to 0º (or depending on the subwoofer, the setting where you think it has the best overall effect on the sound). • Make sure the speaker distance setting is correct for all speakers (see Speaker Distance on page 45). 67 En
-
 1
1 -
2
-
3
-
4
-
5
-
6
-
7
-
8
-
9
-
10
-
11
-
12
-
13
-
14
-
15
-
16
-
17
-
18
-
19
-
20
-
21
-
22
-
23
-
24
-
25
-
26
-
27
-
28
-
29
-
30
-
31
-
32
-
33
-
34
-
35
-
36
-
37
-
38
-
39
-
40
-
41
-
42
-
43
-
44
-
45
-
46
-
47
-
48
-
49
-
50
-
51
-
52
-
53
-
54
-
55
-
56
-
57
-
58
-
59
-
60
-
61
-
 62
62 -
 63
63 -
 64
64 -
 65
65 -
 66
66 -
 67
67 -
 68
68 -
 69
69 -
 70
70 -
 71
71 -
 72
72 -
73
-
74
-
75
-
76
 |
 |