Pioneer VSX 818V Owner's Manual - Page 42
The System Setup menu, Manual speaker setup
 |
UPC - 012562884769
View all Pioneer VSX 818V manuals
Add to My Manuals
Save this manual to your list of manuals |
Page 42 highlights
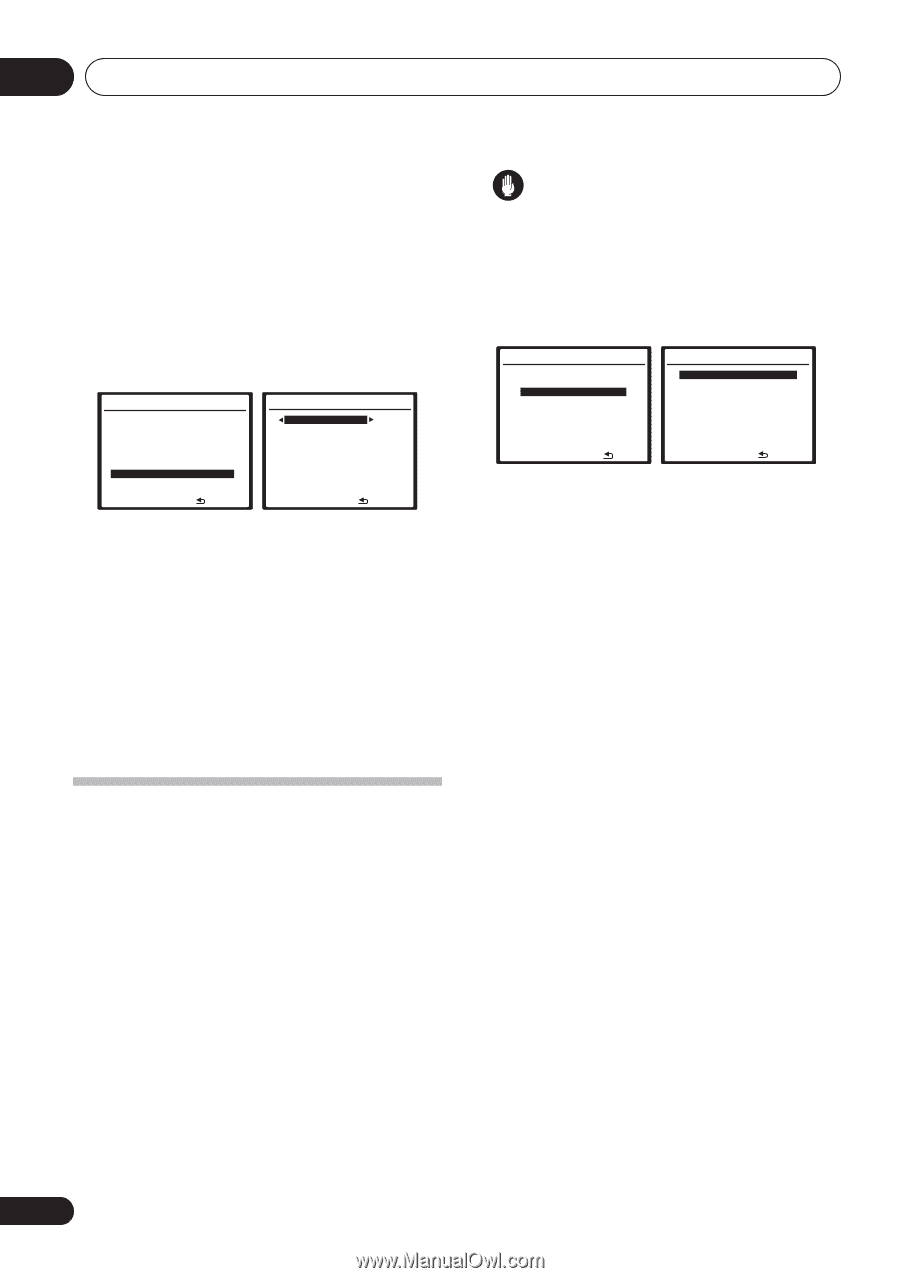
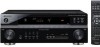
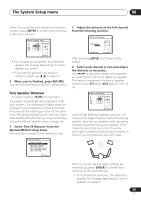
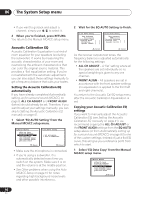
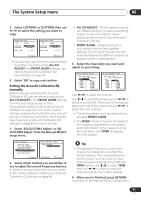
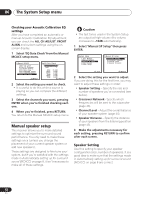
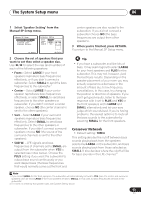
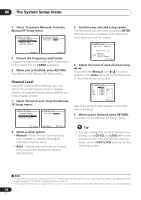
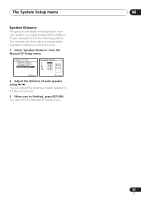
06 The System Setup menu Checking your Acoustic Calibration EQ settings After you have completed an automatic or manual Acoustic Calibration EQ adjustment, you can check the ALL CH ADJUST, FRONT ALIGN and custom settings using the onscreen display. 1 Select 'EQ Data Check' from the Manual MCACC setup menu. 2.Manual MCACC a.Fine Ch Level b.Fine SP Distance c.EQ AUTO Setting d.EQ Data Copy e.EQ CUSTOM1 Adjust f .EQ CUSTOM2 Adjust g.EQ Data Check :Return 2g.EQ Data Check ALL CH ADJUST [ Left ] 40Hz : 125Hz : 250Hz : 4kHz : 13kHz : TRIM : +1.0dB 0.0dB 0.0dB 0.0dB 0.0dB 0.0dB :Return 2 Select the setting you want to check. • It is useful to do this while a source is playing so you can compare the different settings. 3 Select the channels you want, pressing ENTER when you're finished checking each one. 4 When you're finished, press RETURN. You return to the Manual MCACC setup menu. Manual speaker setup This receiver allows you to make detailed settings to optimize the surround sound performance. You only need to make these settings once (unless you change the placement of your current speaker system or add new speakers). These settings are designed to fine-tune your system, but if you're satisfied with the settings made in Automatically setting up for surround sound (MCACC) on page 8, it isn't necessary to make all of these settings. Caution • The test tones used in the System Setup are output at high volume (the volume increases to -13dB automatically). 1 Select 'Manual SP Setup' then press ENTER. System Setup 1.Auto MCACC 2.Manual MCACC 3.Manual SP Setup 4.Input Assign 5.Other Setup 3.Manual SP Setup a.Speaker Setting b.Crossover Network c.Channel Level d.Speaker Distance : Exit :Return 2 Select the setting you want to adjust. If you are doing this for the first time, you may want to adjust these settings in order: • Speaker Setting - Specify the size and number of speakers you've connected (see below). • Crossover Network- Specify which frequencies will be sent to the subwoofer (page 43). • Channel Level - Adjust the overall balance of your speaker system (page 44). • Speaker Distance - Specify the distance of your speakers from the listening position (page 45). 3 Make the adjustments necessary for each setting, pressing RETURN to confirm after each screen. Speaker Setting Use this setting to specify your speaker configuration (size, number of speakers). It is a good idea to make sure that the settings made in Automatically setting up for surround sound (MCACC) on page 8 are correct. 42 En
-
 1
1 -
2
-
3
-
4
-
5
-
6
-
7
-
8
-
9
-
10
-
11
-
12
-
13
-
14
-
15
-
16
-
17
-
18
-
19
-
20
-
21
-
22
-
23
-
24
-
25
-
26
-
27
-
28
-
29
-
30
-
31
-
32
-
33
-
34
-
35
-
36
-
 37
37 -
 38
38 -
 39
39 -
 40
40 -
 41
41 -
 42
42 -
 43
43 -
 44
44 -
 45
45 -
 46
46 -
 47
47 -
48
-
49
-
50
-
51
-
52
-
53
-
54
-
55
-
56
-
57
-
58
-
59
-
60
-
61
-
62
-
63
-
64
-
65
-
66
-
67
-
68
-
69
-
70
-
71
-
72
-
73
-
74
-
75
-
76
 |
 |