Pioneer VSX 818V Owner's Manual - Page 69
Important information regarding, the HDMI connection - amp err
 |
UPC - 012562884769
View all Pioneer VSX 818V manuals
Add to My Manuals
Save this manual to your list of manuals |
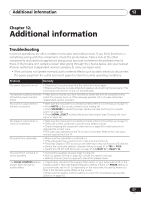
Page 69 highlights
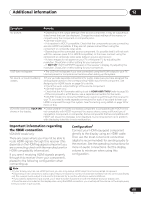
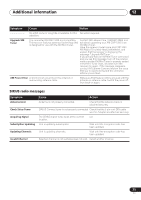
Additional information 12 English Deutsch Français Italiano Nederlands Español Symptom Remedy No picture. • Depending in the output settings of the source component, it may be outputting a video format that can't be displayed. Change the output settings of the source, or connect using the component or composite jacks. • VSX-918V model only: - This receiver is HDCP-compatible. Check that the components you are connecting are also HDCP-compatible. If they are not, please connect them using the component or composite video jacks. - Depending on the connected source component, it's possible that it will not work with this receiver (even if it is HDCP-compatible). In this case, connect using the component or composite video jacks between source and receiver. - If video images do not appear on your TV or flat panel TV, try adjusting the resolution, DeepColor or other setting for your component. - If 'NOT SPT' (NOT SUPPORT) appears in the receiver's display, try adjusting the resolution, DeepColor or other setting for your component. OSD does not appear. • The OSD will not appear if you have connected using the HDMI output to your TV. Use component or composite connections when setting up the system. No sound, or sound suddenly ceases. • If you've made separate connections for audio, make sure you have assigned the analog/digital jack(s) to the corresponding HDMI input for the component. See Assigning the HDMI inputs on page 65 to do this. • Check the audio output settings of the source component. • VSX-918V model only: - Check that the AV Parameter setting is set to HDMI AMP/THRU (refer to page 35). - If the component is a DVI device, use a separate connection for the audio. • VSX-818V model only: Since the HDMI audio signal is sent through this receiver to your TV, you need to make separate connections for audio if you want to hear your HDMI component through this system. See Connecting using HDMI on page 16 for more on this. VSX-918V model only: HDCP ERR • Check whether or not the connected component is compatible with HDCP. If it is shows in the display. not compatible with HDCP, reconnect the source device using a different type of connection (component or composite). Some components that are compatible with HDCP still cause this message to be displayed, but so long as there is no problem with displaying video this is not a malfunction. Important information regarding the HDMI connection VSX-918V model only There are cases where you may not be able to route HDMI signals through this receiver (this depends on the HDMI equipped component you are connecting-check with the manufacturer for HDMI compatibility information). If you aren't receiving HDMI signals properly through this receiver (from your component), please try the following configuration when connecting up. Configuration1 Connect your HDMI-equipped component directly to the display using an HDMI cable. Then use the most convenient connection (digital is recommended) for sending audio to the receiver. See the operating instructions for more on audio connections. Set the display volume to minimum when using this configuration. Note 1 • If your display only has one HDMI terminal, you can only receive HDMI video from the connected component. • Depending on the component, audio output may be limited to the number of channels available from the connected display unit (for example audio output is reduced to 2 channels for a monitor with stereo audio limitations). • If you want to switch the input source, you'll have to switch functions on both the receiver and your display unit. • Since the sound is muted on the display when using the HDMI connection, you must adjust the volume on the display every time you switch input sources. 69 En
-
 1
1 -
2
-
3
-
4
-
5
-
6
-
7
-
8
-
9
-
10
-
11
-
12
-
13
-
14
-
15
-
16
-
17
-
18
-
19
-
20
-
21
-
22
-
23
-
24
-
25
-
26
-
27
-
28
-
29
-
30
-
31
-
32
-
33
-
34
-
35
-
36
-
37
-
38
-
39
-
40
-
41
-
42
-
43
-
44
-
45
-
46
-
47
-
48
-
49
-
50
-
51
-
52
-
53
-
54
-
55
-
56
-
57
-
58
-
59
-
60
-
61
-
62
-
63
-
 64
64 -
 65
65 -
 66
66 -
 67
67 -
 68
68 -
 69
69 -
 70
70 -
 71
71 -
 72
72 -
 73
73 -
 74
74 -
75
-
76
 |
 |